RSS Feed

Posts Tagged ‘chocolate’

  1. Chocolate immersion weekend!

    December 23, 2015 by sarah

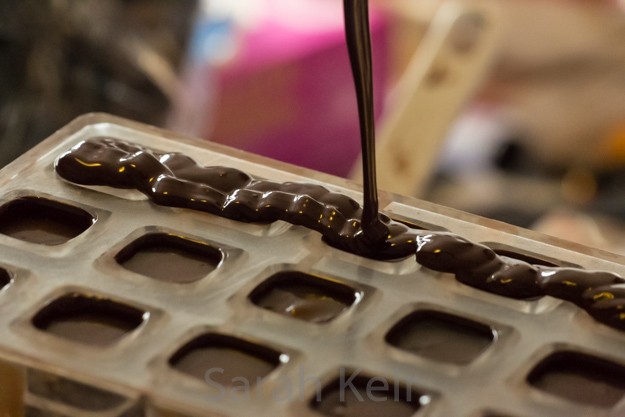
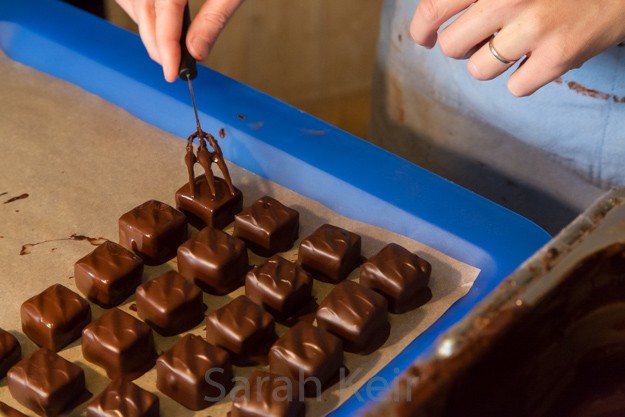
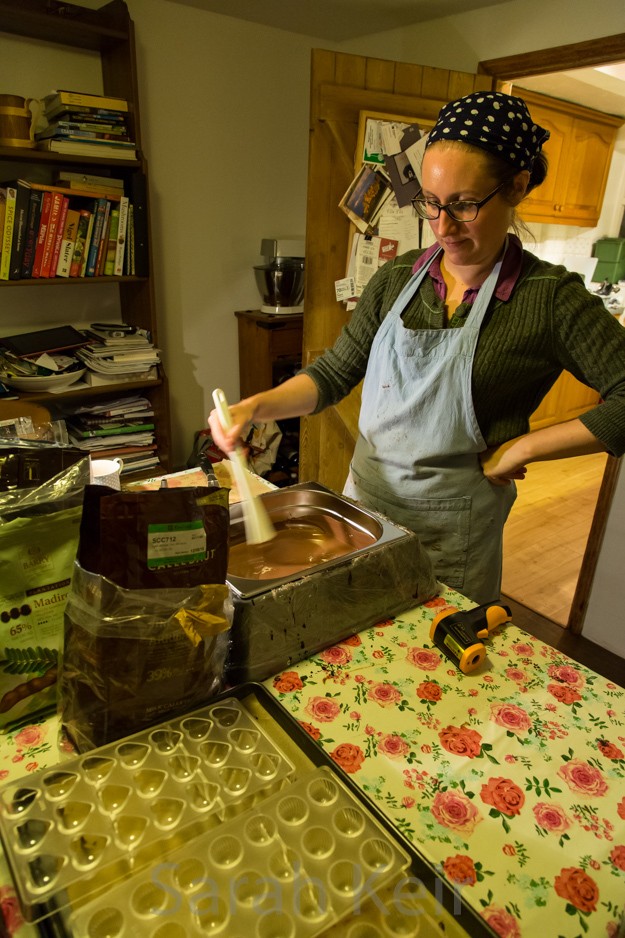
    I was really busy at the weekend. And I mean seriously busy. It was my chocolate immersion weekend! I decided that as part of my teaching myself the art of chocolatier, immersing myself in the chocolate making process from start to end would be a great way to learn. Eight kilograms of chocolate and 25 hours later, I feel I am happy to temper dark, milk and white chocolate, make molded chocolates, hand dipped and rolled truffles and improvise chocolate recipes to get my flavours nailed. And I definitely learned too; I need to charge more, I need to estimate weights for boxes of chocolates better and I need to reduce wastage especially on molded chocolates. But the seconds are not going to waste – I am sick of eating them over the past few days so I am going to take the remainder to work tomorrow for our Christmas Eve lunch party. And for all those who didn’t get any this year – get your orders in early next time!

    Happy Christmas one and all, and may it be a chocolately one!

    chocs-002

    Capping molded chocolates

    chocs-003

    Hand dipped pate de fruit with hand decorated tops.

    chocs-004

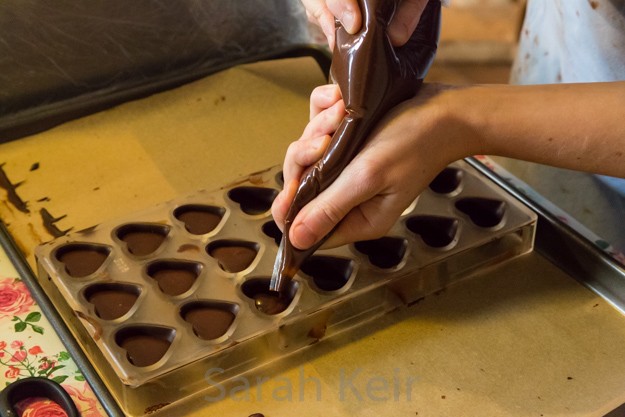
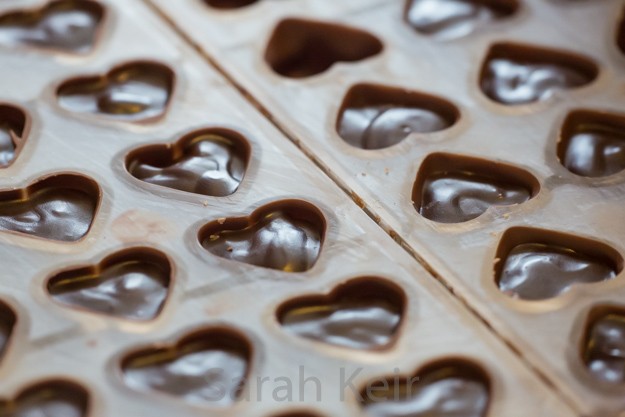
    Filling molded chocolates – with a gingerbread ganache in this one.

    chocs-005

    Intense look of concentration as I temper the milk chocolate.

    chocs-007

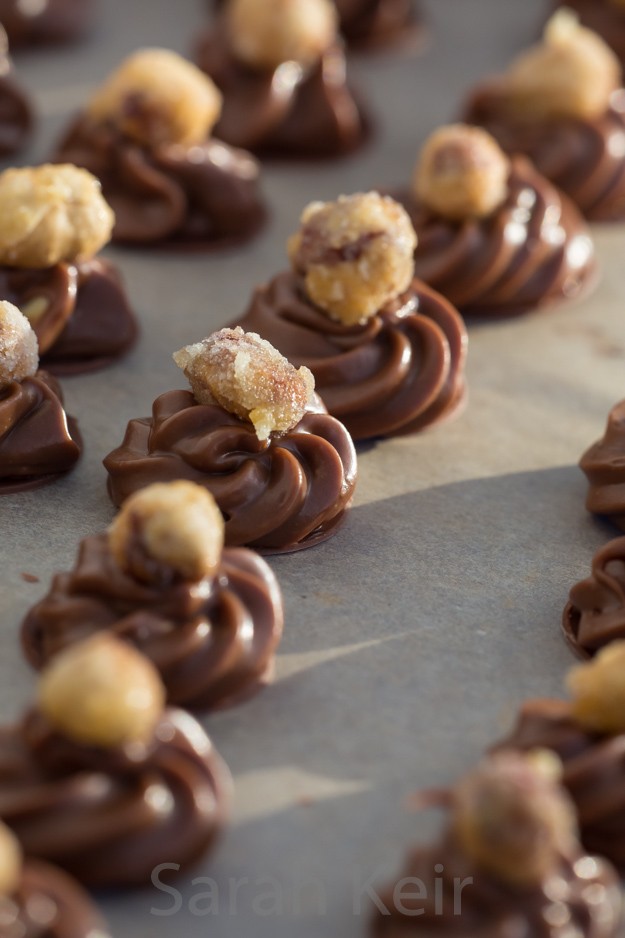
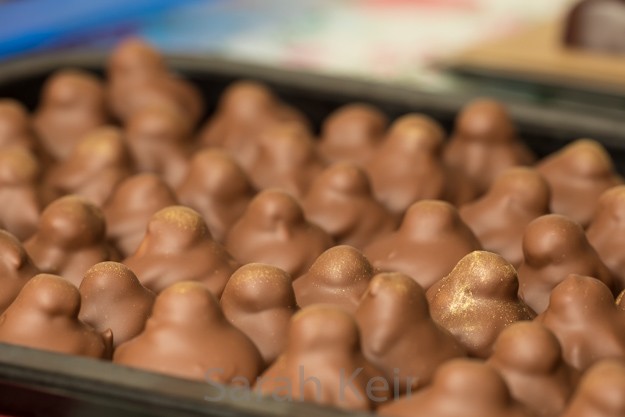
    Hazelnut praline whips with crystallised hazelnuts, waiting to be dipped.

    chocs-008

    Molded chocolates waiting to be capped.

    chocs-009

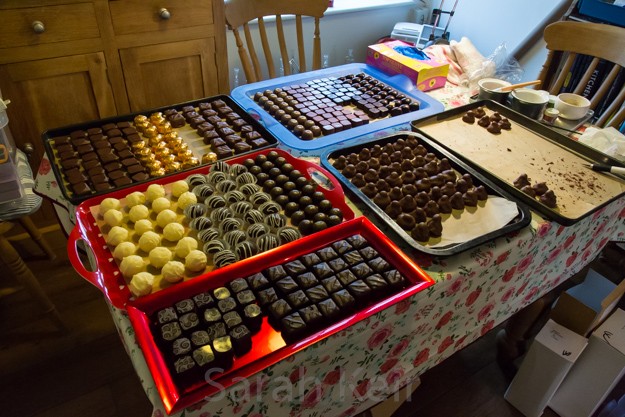
    All the chocolates laid out, nearly ready for boxing up!

    chocs-010

    Don’t they looks pretty?

    chocs-014

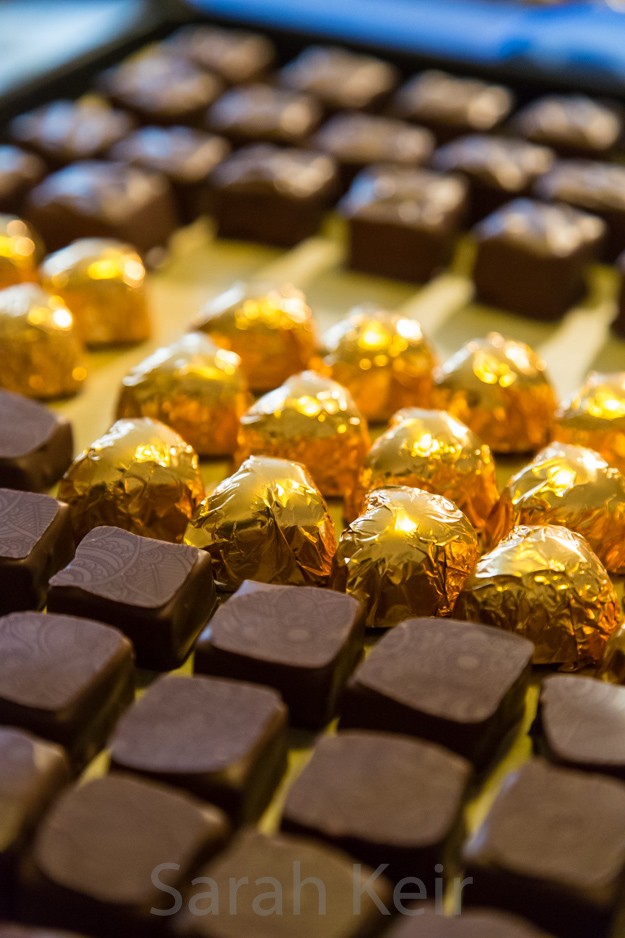
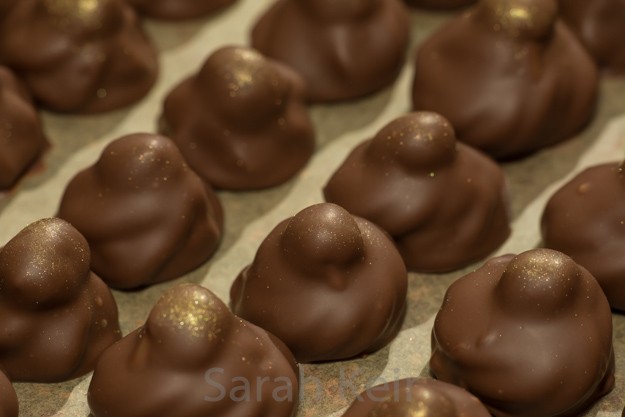
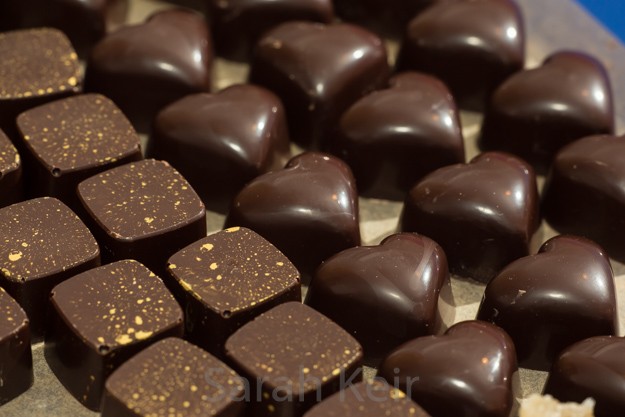
    Hazelnut praline whips finished with a dusting of gold.

    chocs-015

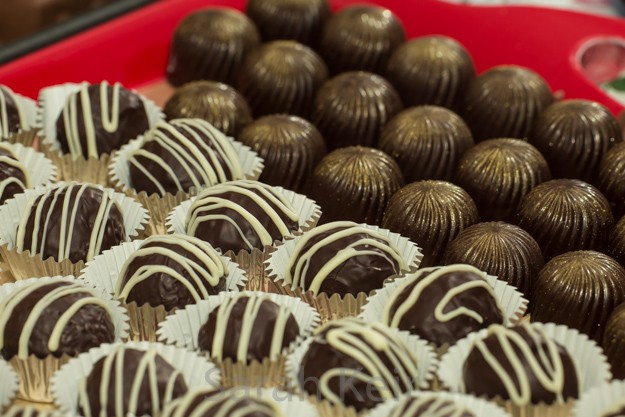
    Black forest hand rolled truffles in the fore ground and port ganache swirls behind.

    chocs-016

    Close up of the hazelnut praline whips.

    chocs-017

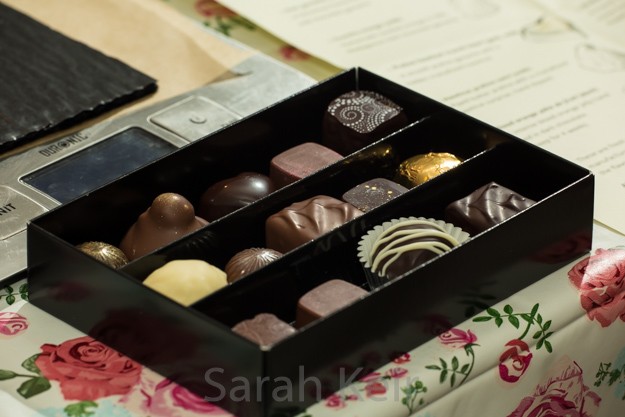
    Boxed chocolates

    chocs-018

    Caramel squares in dark and gingerbread ganache hearts.

    chocs-020

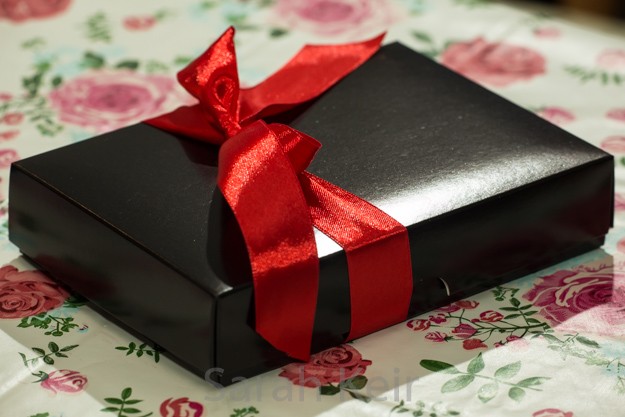
    A box ready to be dispatched.


  2. Chocolate Caramels

    August 23, 2015 by sarah

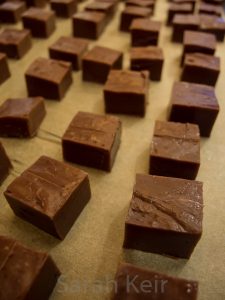
    When we were in Paris, which seems a life time ago even though it was only three months hence, I bought some Breton caramels from a posh Parisian shop. I was disappointed in them to tell the truth. All I could taste was sugar, and yes, the ingredients do contain sugar but they should also be buttery and creamy. Also they were crumbly like fudge, instead of smooth and almost chewy like a caramel should be. Only one thing for it; to make them myself. Which is what I did a few weeks ago. Unfortunately I forgot to take any decent photographs of them before they got devoured so you will just have to take my word for it as to how good they were. And the people at the Tea Party; they got to try them. They were so moreish that just one was not enough.

    caramels-001


    I used a combination of recipes from this blog and my ‘Patisserie Maison’ book by Richard Bertinet, a Christmas present from my Mother. A sugar thermometer is a must for this recipe. Use the best possible ingredients you can afford because you taste it all; I splashed out on proper French 40% crème fraîche and butter from Waitrose.

    Chocolate Caramels

    125g food quality chocolate, chopped
    100ml double cream
    100g crème fraîche
    200g caster sugar
    75ml water
    150ml liquid glucose (you can use light corn syrup if you are in the USA, or golden syrup)
    25g salted butter
    1 teaspoon sea salt

    Line a 8-9 inch (20-23cm) square pan with baking parchment.

    Heat the double cream and crème fraîche in a medium pan until just coming to the boil and the crème fraîche has melted. Remove from the heat but keep warm.

    In a separate pan with a heavy bottom, heat the sugar and water until the sugar has dissolved; then bring to the boil without stirring and add the glucose syrup. Simmer until the mixture is thick and syrupy; this took me about 15-20 minutes.

    Take off the heat and stir in the butter and the cream mixture. Put back on the heat and stir continuously and monitor the temperature until you reach 120 ºC. Take off the heat and stir in the chocolate and sea salt, stirring until the chocolate is completely melted.

    Pour the mixture into the prepared tin and leave until completely cool. Slice the caramel into squares and wrap individually in cellophane or parchment paper. They will easily keep for up to a month in a sealed container in the fridge.


    caramels-003


    Update 22/9/17 – recipe for a 8″ x 8″ pan to give a good even depth for dipping. Also cut in to 25mm x 25mm squares so this recipes gives 64.

    155g chocolate
    125ml double cream
    125g creme fraiche
    250g caster sugar
    95ml water
    185g liquid glucose
    30g salted butter
    1 teaspoon sea salt, ground in pestle and mortar

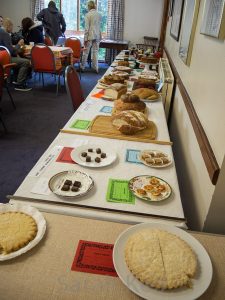
    These won first prize in the Wigginton Show this year!


  3. Chocolate Cherry Layer Cake

    March 18, 2015 by sarah

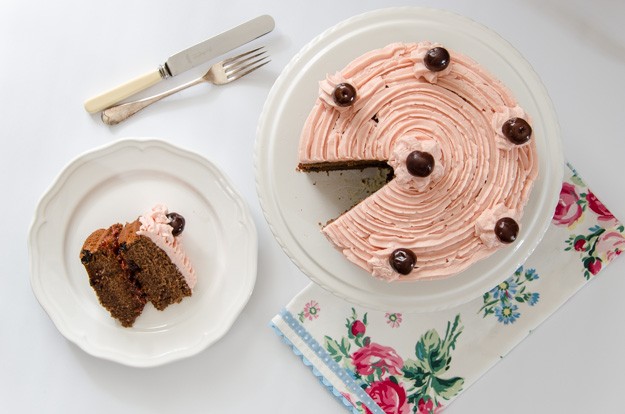
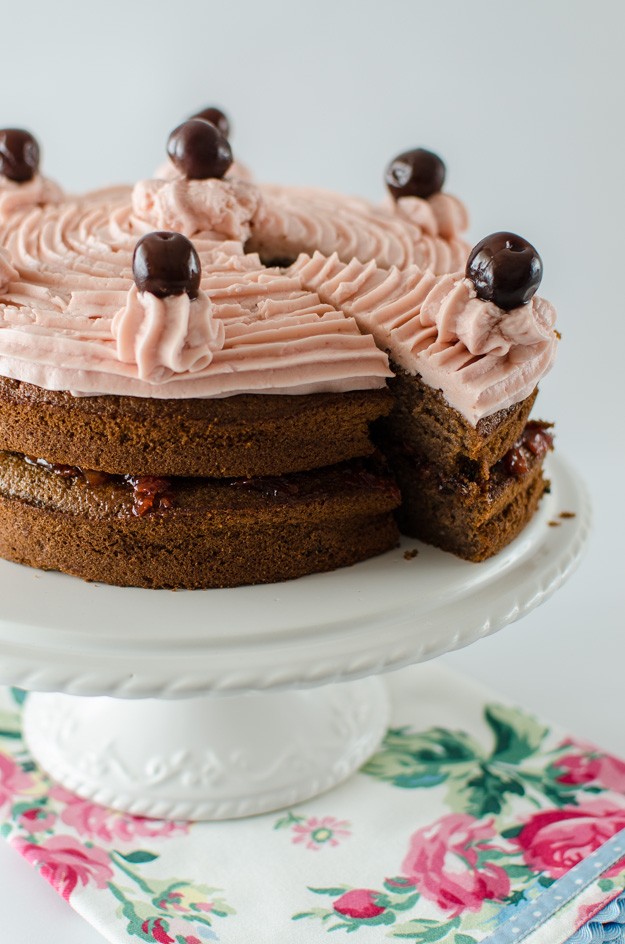
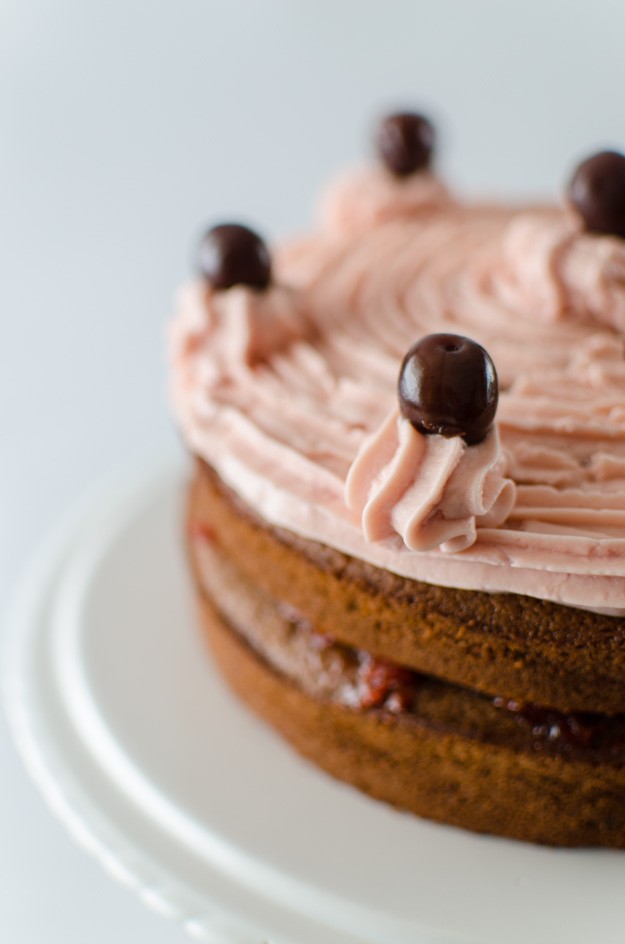
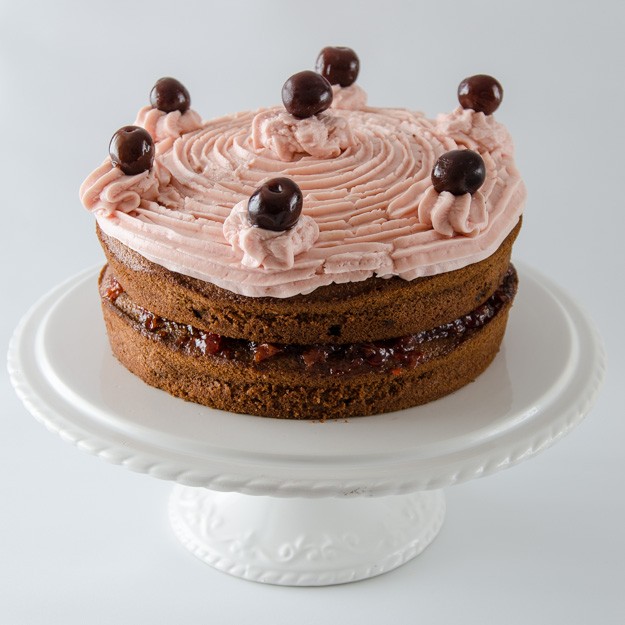
    Sometimes a cake has to made for the sheer beauty of the thing. Don’t get me wrong; flavour is still my primary aim but sometimes it is nice to luxuriate in the beauty of a cake before devouring it. And this cake has it in spades. The delicate pink icing and filling contrasting with the dark brown moist cake and the cherries on the top. Like a cute black forest gateau.

    cherry-004


    I wandered hungry and alone

    Downstairs to the kitchen

    Where upon I came across

    A recipe for a cherry chocolate cake.

    It was baked and made and iced

    And I drowned in the beauty of the cake I beheld.’

    cherry-002

    Chocolate Cherry Cake


    225g butter at room temperature
    225g caster suagr
    175g plain flour
    50g cocoa powder
    2 teaspoons baking powder
    1/2 teaspoon fine salt
    5 medium eggs
    200ml greek yogurt or cream or buttermilk
    1 teaspoon vanilla extract
    Handful (about 50g) of sour dried cherries

    Cherry jam, preferably sour cherry
    Swiss meringue buttercream (recipe here), add some cherry puree made from blended frozen cherries
    Cherries in alcohol for decorating, reserving some of the syrup/alcohol.

    Preheat the oven to 180 ºC/160 ºC fan. Grease and line the base of two 20cm/8″ sponge tins.

    Beat together the butter and sugar until creamed well. Sift over the dry ingredients. Beat together the wet ingredients to break up the eggs then add this to the bowl. Beat all together until well mixed, scraping down the sides of the bowl a few times. Fold in the dried cherries and then pour the batter into the prepared tins, trying to divide it equally.

    Cook for 30-35 minutes until a skewer comes out clean. While the cakes are cooking, make a cherry flavoured syrup by heating the cherry syrup or alcohol base with some extra sugar to make it syrupy. Allow the cakes to cool for 10 minutes in the tins then brush over this syrup. After half an hour, take the cakes out of the tins and allow to cool fully on cooling wracks.

    Assemble the cake with some cherry jam as the filling and pipe the pink tinged buttercream on top. Decorate with the reserved preserved cherries, or fresh cherries if they are in season.

    cherry-003 cherry-001


  4. Why I Cook and Blog – and Chocolate Truffles

    February 24, 2015 by sarah

    I am often asked why I put so much effort in to cooking and how I find time to write, photograph and publish this blog. I have been wondering the same thing myself lately. I have just finished 2 weeks of study time, cramming in an amazing amount of information into a sluggish and aging brain. But yet, instead of being sensible and filling the fridge with Marks and Spencer ready meals, I continued to cook our everyday suppers most nights and some treats too. I make the time because it is important to me. Yes, I could eat ready prepared food and it would be nutritious (mostly) and quick but it would not satisfy my soul. This blog may look like a collection of recipes but that is wrong way to look at it. This blog is about my cooking and cooking is about my life, not a list of recipes… I made this dish because I needed cheering up, I made this dish because it was January cupboard clear out, I made this cake for a special event. And so in my way, I am writing about life, my life.
    truffles-004


    Cooking makes me happy and happiness is an art and therefore requires practice and concentration; a different type of concentration to my studies and day-to-day work but no less demanding.  There are few true masters of happiness but we can all dabble, practice and improve. Like art, happiness is ‘in the eye of the beholder’ so whether something makes you happy or not is your choice. Food and cooking makes me happy so I continue to play with it. And the photography too. Also I am not hugging person and being an introvert it is difficult for me to express my care for other people except through my cooking for others and so this has become a tangible way of loving them. I hope they appreciate that. Cakes taste better if made with love.

    I thrive on being busy, when everything (especially emotionally) is in balance. Give me a challenge and I can think of nothing better than running with as far as I can, or until something better comes along. At school I was told I couldn’t do three sciences, so I did; I was told it was too hard to get into vet school, aim your sights lower, so I aimed higher; I was told I was just average and was bullied so strived to prove I wasn’t; I was getting too comfortable in my job so I aimed for a postgraduate certificate. And this blog is part of this journey of my life. I laugh at the photos I took just 18 months ago but look how I play with light now! But it is not easy and I constantly have to push myself to improve and currently this means getting up for work an hour early so I get the photography done in the short daylight hours of a British winter. No 12 hours of sunshine here, unlike the blogs I follow that are written in sunny California.

    Go find the happiness and importance in all you do.
    truffles-003


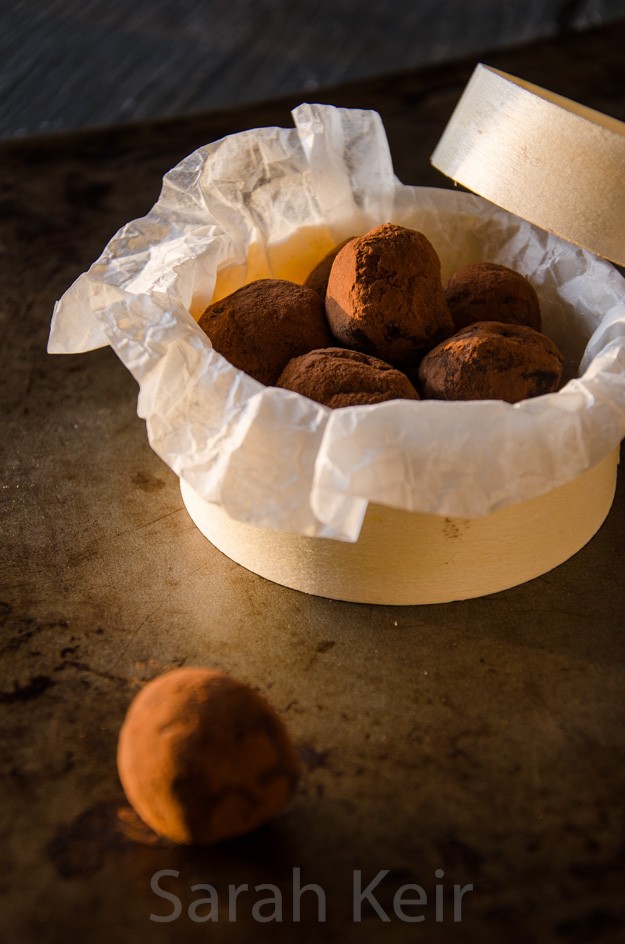
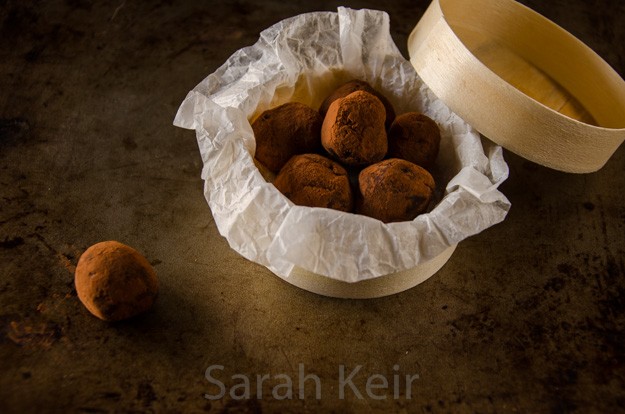
    I had meant to make these in time for Valentines Day. But it didn’t happen. I suppose part of me despises the crass commercialisation that comes with Valentines Day; the shops fill with pink and heart shaped things and ugly teddies and over priced flowers and cards with sickly sweet sentiments and overpriced heart-shaped food in a restaurant packed out with courting couples. So rather than have one overblown day of the year, my husband and I reaffirm our love on a regular basis with a simple ‘I love you’ when getting in from work, a spontaneous gift, a box of home made truffles…

    Chocolate truffles

    120ml double cream
    120g good quality plain chocolate
    1 tablespoon butter
    1 tablespoon golden syrup
    cocoa powder
    flavouring (optional) - orange liqueur, coffee liqueur

    Place all the ingredients (except the cocoa powder and flavouring) in a double boiler pan or a pyrex bowl over a pan of barely simmering water. The key is to make sure that the mixture is heated very gently. Stir occassionally until almost fully melted, take off the heat and stir until fully melted and smooth and glossy. Stir in your chosen flavouring if wished.

    Place in the fridge for a few hours or overnight until set.

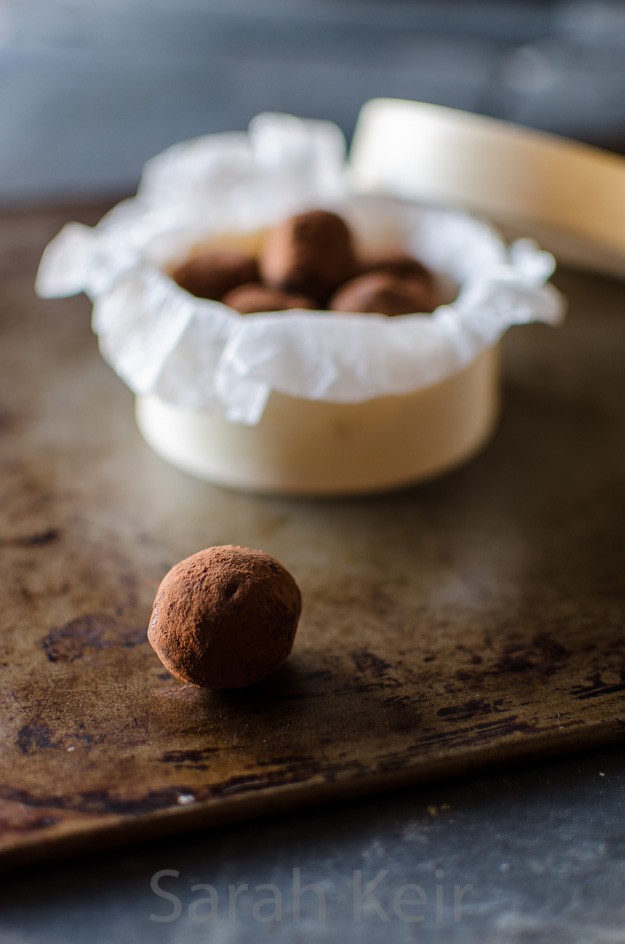
    On a small plate, sift a good dredging of the cocoa powder. Have a second plate nearby. With a teaspoon (or melon baller of you have one), scoop out small scoops of ganache, roll quickly in your hands until roughly spherical, drop on to the cocoa powder and roll around until covered. Store on the second plate. If the chocolate ganache is turning into a sticky mess, cool it down by sitting it in the freezer for 15 minutes or so and cool your hands down (under a cool running tap if you can stand it).

    Once made, store the truffles in the fridge and eat within a week. You can customise these to your favourite flavour by adding a dash of spirits or flavourings to the mix before it sets. Or alter the outside by rolling in desiccated coconut or cocoa nibs.
    truffles-001


  5. Chocolate Cake and Swiss Meringue Buttercream

    January 3, 2015 by sarah

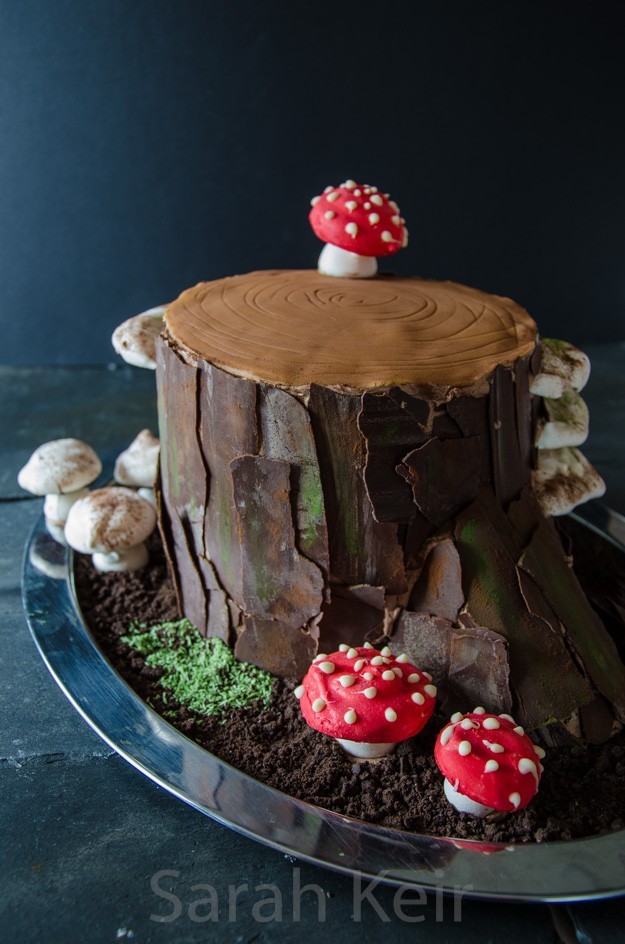
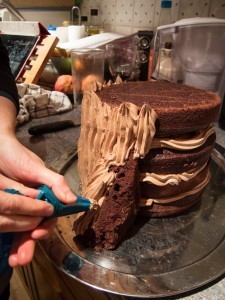
    To remind you what I used these recipes for, here a picture of the finished cake. Unfortunately I haven’t got a picture of the layers inside as I forgot to take my camera to the party where it was served and I was asked to be the one to serve up the cake. It is kind of hard destroying your own piece of art but it was in a good cake eating cause!

    noel-006


    The cake recipe is slightly modified one from Donna Hay, an Australian online magazine, but has been extensively reused in blog land. Despite having never made this recipe before and it being a little odd (gallons of water in the recipe) I felt sure enough to give it a go for the cake proper, though I did have back up ingredients in case I needed to go back to a regular sponge cake. I used one batch of the cake recipe to make three 8″/20cm layers and a second batch to make one more tier and a tray bake of 25 x 35 centimeters . The orginal recipe states to cook in two 20cm tins and then cut each in half to get the four layers but I wanted stouter layers for the stump cake so went with an extra layer. I think either would work. This cake is lovely and moist and despite being flavoured only with cocoa powder, has a surprisingly good chocolate taste. I don’t think it would last very long as it is made with a lot of water so is likely to dry out quickly. It didn’t last long enough to find out this time!

    Chocolate Buttermilk Layer Cake

    375ml water
    190g unsalted butter, chopped into chunks
    50g cocoa powder
    450g plain flour
    1 and 1/2 teaspoons bicarbonate of soda
    550g caster sugar, golden if you have it
    4 medium eggs
    180ml buttermilk, or couple tablespoons natural yogurt in 150ml milk
    1 and 1/2 teaspoon vanilla extract
     
    Grease and line with baking parchment (silicone paper)  two or three 8″/20cm cake tins.
    Preheat the oven to 180 ºC/ fan 160 ºC.
    Place the water, butter and cocoa powder in a medium saucepan over a low to medium heat, stirring occassionally until all the butter is melted and the cocoa powder has dissolved and then take off the heat.
    In a large bowl, mix the flour, sugar and bicarbonate of soda.
    In a jug beat the eggs and then beat in the buttermilk (or yogurt/milk mixture) and vanilla extract.
    Mix the wet ingredients into the dry (make sure the cocoa/butter mix is no warmer than blood temperature), scrapping down the sides of the bowl and bottom a couple of times. This is much easier to mix in a stand mixer with the mixer paddle attachment.
    Divide the batter between the prepared tins and place all the cakes on the same shelf in the preheated oven. Cook for 40-45 minutes. They are done when a skewer inserted into the middle of the cake comes out clean and the cake has shrink away from the sides of the tin a little. 
    Leave to cool in the tins for 10-15 minutes then turn out on a wire rack to cool completely. I covered them with a clean tea towel while they cooled to stop them drying out (and stop cat hairs getting on them!). Trim the tops of the cakes level before assembling.
     
     
     noel-001 noel-003


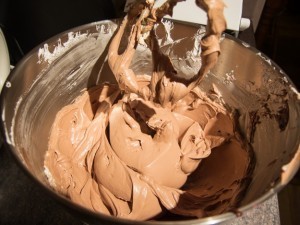
    Swiss meringue buttercream sends even experienced bakers into fits of weeping. Too many bowls of wasted buttercream when it splits, curdles or seizes. My previous attempts at this type of icing where not particularly successful (see last years icing for the wedding cake) but the more I read about it, the more I wanted to give it another try. Several times during the process I thought it looked a disaster, but as I read other blogs about just keep whipping it and it will come right, low and behold that is what happened. I thought the butter had been too cold when I added it because half way through I could still see lumps of butter but I just turned the mixer up to medium/high and left it for 15 minutes to console myself reading about other peoples Swiss meringue buttercream disasters. When I looked back, it was perfectly smooth and just as it should be. It wasn’t a fast process to make this icing but the results are spectacular – soft, silky smooth with a perfect balance of butteriness and sweet without cloying. Just like eating chocolate mousse on a cake! Perfect!

    This recipe made enough to ice the 4 layer stump cake (between layers and all over) and a small amount for the top of the tray bake. This icing pipes very well but you would need probably double if you were going to pipe on the textures, whereas I only needed a thinner layer which would hold on the chocolate bark. This icing keeps for up to a week in the refrigerator but it needs to come up to room temperature before using (and will need rewhipping for 5 minutes) or eating. It can apparently be frozen for a month or two but I haven’t tried this.

    Chocolate Swiss Meringue Buttercream


    6 egg whites (180g)
    300g white granulated sugar
    400g unsalted butter, take out of fridge and cut into cubes
    1/4 teapoon fine salt
    200g dark chocolate, melted
     
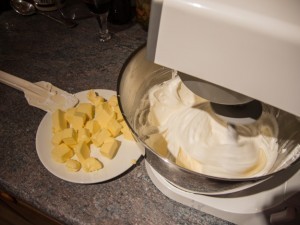
    Place the egg whites and sugar in the mixing bowl of the stand mixer and sit this over a saucepan of barely simmering water (a bain marie). Using the whisk attachment from the stand mixer, whisk pretty well continuously (but it doesn’t need to be vigorous) until the sugar has completely dissolved (cannot feel any grains under fingers) and the mixture looks opaque white. If you have a sugar thermometer, you are aiming for 60-70 ºC or 150-160 ºF.
    Remove the bowl from the heat and fit to the stand mixer with the whisk attachment. Whip on high speed until completely cold i.e. the bowl feels neutral to the touch. This took me at least 15 minutes and I was getting impatient to I took the bowl out of the stand mixer and put it outside for half an hour and that cooled it down.
    The critical bit now is the temperature of the meringue and the butter. The meringue must be cool and the butter must be soft but still cool (I had to put it back in the fridge for a little to cool off as the kitchen was too warm as the oven was on). 
    Switch over to the paddle attachment on the mixer and add the butter a cube at a time, allowing about 15 seconds between cubes, with the mixer on low to medium speed. *
    Once all the butter is added, you can add the flavourings and salt, and colourings you might like. In this case it was chocolate, but like the butter it must not be warm when added. Vanilla extract and bean puree can be added, or lemon zest and oil, fruit purees (make sure concentrated so minimal water is added).
     
    *If the mixture looks like it is curdling or lumpy then don’t add any more butter, set the mixer up to high and leave until it has come back together then you can resume adding the butter. If the buttercream seems too loose then put in the fridge for a while before trying to pipe or ice. Conversely, if the buttercream has become too firm (for example kept in the fridge) and it does not become satiny smooth after 5 minutes of rewhipping then microwave a quarter of the buttercream for just 10 seconds, add this back into the main buttercream and continue whipping.
     
     SMB-001 noel-002

  6. Meringue Mushrooms

    December 30, 2014 by sarah

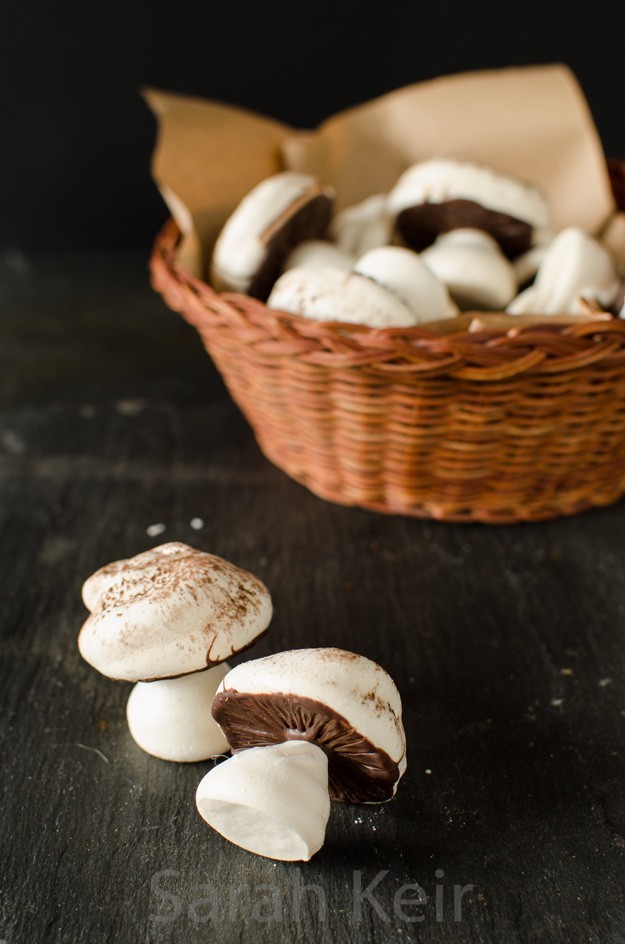
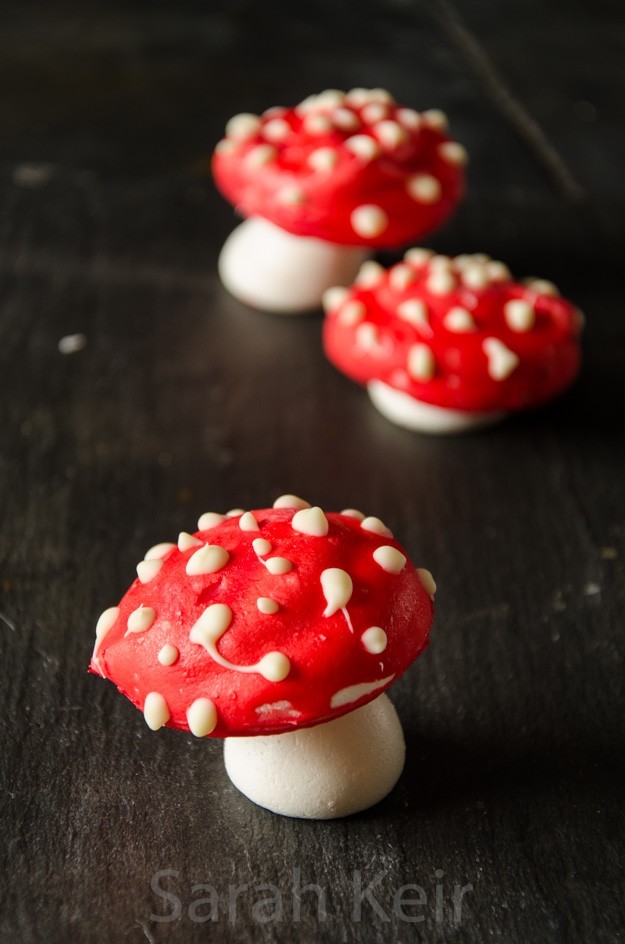
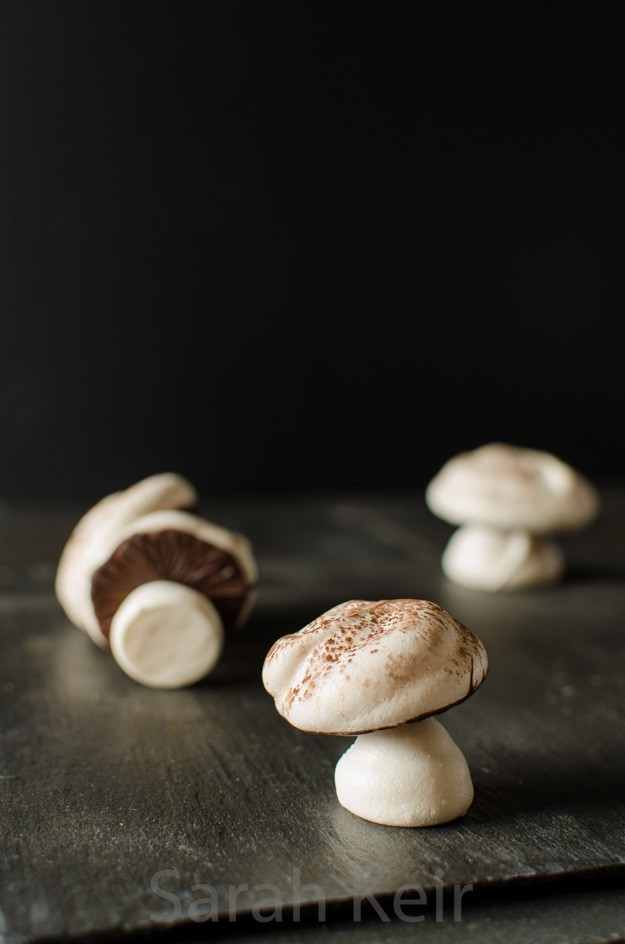
    My idea for the stump de Noël cake came indirectly. I saw pictures of beautiful traditional bûche de Noël that were decorated with meringue mushrooms but a bûche would not be large enough to feed the number of people expected at the Christmas party so the cake metamorphosed into a larger stump which required more and more elaborate mushrooms. They are all made very simply from French meringue; field mushrooms with dark chocolate gills, bracket fungi from half moons of meringue dusted with cocoa powder and fly agarics decorated with the quintessential toadstool red cap with white spots.

    meringue-003


    I felt I had to try and make the fly acargic toadstools; the myth from the far icy North of reindeer flying apparently comes the eating of fly agarics which are supposedly hallucinogenic. I don’t recommend trying them; all our mushroom collecting books suggest they are nasty poisonous. The fly agarics were the hardest to make because white chocolate is a nightmare to work with. Three times I melted white chocolate and added red gel paste and three times the chocolate seized. I read all the tricks I could; I added it before melting the chocolate, I added it to some melted chocolate and then added it to the rest. I tried freeze dried raspberry dust moistened with water instead but that wasn’t red enough. In a fit of desperation I read somewhere in blogland that adding a little water to chocolate is a disaster (it seizes) but if you add alot then something miraculous happens. And it did. I added about equal volume of hot (almost boiling) water to a lump of seized white chocolate which I had coloured red, beat it vigorously with a wooden spoon and lo and behold, liquid red chocolate! I used this to dip half the cooked meringue tops (I did it twice, repeating the process when the first layer was set in order to get a good strong red colour). Once set, I added white dots in melted white chocolate. I think next time I make them, I will try colouring the meringue for the tops red so there is no messing around with finicky white chocolate.

    meringue-004

    Meringue Mushrooms

     
    3 medium egg whites (60g) at room temperature
    1/4 teaspoon cream of tartar
    pinch of salt
    75g caster sugar
    25g icing sugar
    cocoa powder and melted chocolate to decorate
     
    Prepare two large baking sheets by lining them with baking parchment (siliconised paper). 
    Preheat the oven to 100 ºC.
    Make sure a large glass/pyrex bowl and whisks are completely clean of any grease – I wipe down with kitchen paper dampened with vinegar.
    In the large bowl, whisk the egg whites, cream of tartar and salt until soft peaks form.
    At this stage, add the caster sugar one tablespoonful at a time, whisking well between each addition. When all the caster sugar is added, sift over the icing sugar and then whisk again until the mixture is thick and glossy. Stop at this stage otherwise over beating will cause the bubbles in the egg whites to breakdown and you’ll end up with runny meringue.
    Put the meringue in a pipping bag fitted with a 1 to 1.5cm plain nozzle.
    To pipe the caps, hold the bag vertically just above the baking sheet and squeeze the bag with even pressure until a round is formed – size and height up to you. Stop squeezing and twist the bag to remove. If any meringue peaks stay sticking up then you can flatten them with a dampened finger. Repeat this to make about 20 caps, leaving at least a couple of centimeters between each disc.
    To pipe the stems, hold the bag vertically again but as you squeeze the bag, pull upwards to form a vertical stem of meringue. Don’t worry if they are a little lopsided – it adds to the mushrooms charm. Use the remaining meringue to make as many stems as possible.
    The bracket fungi were made from meringue piped into semi-circles with the inner circumference roughly what I though the curve of the cake would be.
    Dust with a light shower of cocoa powder over the meringue caps that will become regular mushrooms (I did half and half without).
    Place in the preheated oven for about an hour and half. Turn the oven off, prop the door open ajar and leave to completely cool.
    To assemble the mushrooms, use a metal skewer or small knife to make a small hole about 0.5cm diameter in the underside of the mushroom caps.
    Melt plain chocolate and when cooling down, paint the underside of the caps with the chocolate, use a toothpick to draw gill lines in the chocolate, drawing into the centre and firmly press a meringue stem into the centre of the underside of the cap so that it seats itself into the hole you made with a good glob of chocolate around. Set upside down on a baking tray until the chocolate has set.
    For the fly agarics, I made the holes in the underside of the caps then decorated the caps with red chocolate and piped on white chocolate spots and once dry I used some more melted white chocolate to fix the stems into the underside of the caps.
     
    meringue-001

  7. Chestnut and Almond Cake

    December 20, 2014 by sarah

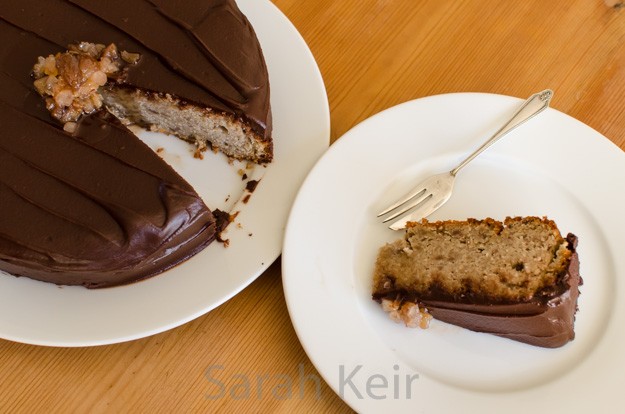
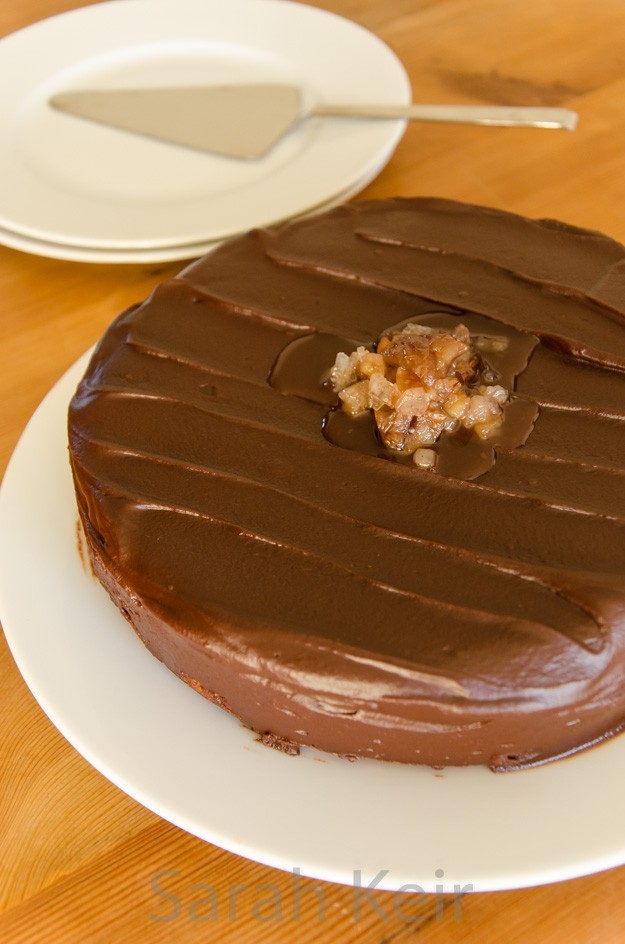
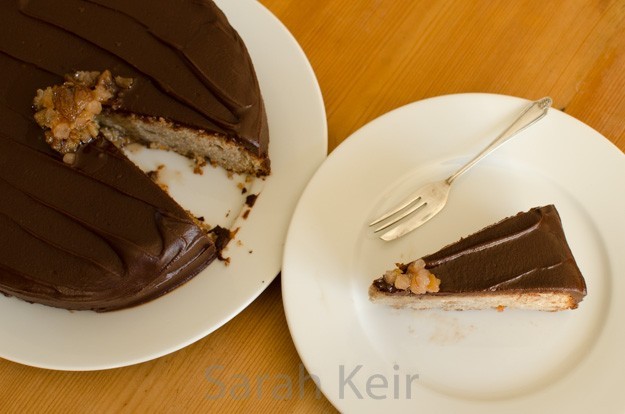
    Being a foodie has it down sides. Apart from the inevitable battle of the bulge (i.e. weight gain, not anything to do with trumpets) and the critical assessment of every meal you eat, you end up with an odd assortment of ingredients lurking in the fridge and cupboards and nothing real to eat on a day to day basis. Or at least I do. After a bit of a cupboard tidy out at the weekend (really to fit in more special buys), I found a tin of chestnut puree (out of date by 6 months) and some tiny jars of homemade marron glacé in syrup (in which the sugar had crystalised – I made them at least 2 years ago). Most of the recipes I searched for required sweetened chestnut puree or marron glacé puree but they sounded too sweet and sickly. So this recipe is a hash up of a couple of different recipes; Nigella in’How to be a Dometic Goddess’ and this recipe on someone else’s blog. My recipe can easy be made dairy free (see the added notes) and is naturally gluten free, being based on ground almonds and the chestnut puree. It is not calorie or guilt free; it is rich and dense but not overwhelmingly sweet or cloying like some chestnut based recipes can be. It is so moreish and decadent; perfect for this for this time of year. And apparently chestnuts are good for you.

    chestnut-002


    This year I bought my chestnuts from Oxford covered market and they are a complete contrast to the ones in the supermarkets. They are so large, moist and sweet. We roasted them on our sitting rom fire last weekend and the sweet nutty smell filled the house with seasonal joy. I made my own marron glacé a few years ago but I have to say it was not worth the effort, no matter how expensive they are! I did find a small jar of crumbled bits in syrup that I had stashed away and that made a perfect finish for this cake. Feel free to buy them rather than make them; I won’t hold it against you. Next time will try adding 250g melted plain chocolate to the mixture, as Nigella has in her recipe. This recipe is very rich and feeds 10-12 easily. It doesn’t need cream to counteract any sweetness but some creme fraiché would go well if serving this cake for desert.

    chestnut-001

    Chestnut and Almond Cake

     
    4 large eggs, separated
    200g caster sugar
    100g butter (or replace with 70ml of vegetable oil for vegan version)
    200g ground almonds
    400g tin of chestnut puree (make sure unsweetened)
    1/2 orange, zested
    1 teaspoon baking powder
    1 teaspoon vanilla extract
    1-2 tablespoon honey flavour liqueur or rum or almond milk
     
    For the chocolate covering
    200g plain chocolate
    1 tablespoon glucose syrup or golden syrup
    pinch salt
    70g butter or 100ml cream or 70g dairy-free margarine
     
    Preheat oven to 180 ºC/160 ºC fan.
    Line the bottom and grease well a 20cm/8 inch springform tin.
    Whisk the egg yolks, sugar and vanilla extract together until light in colour and creamy.
    Add the melted butter – make sure it is only at blood temperature, no hotter.
    In a bowl, tip the chestnut puree and fork up until smooth paste.
    Add the chestnut puree, ground almonds, orange zest and baking powder to the egg/sugar bowl and mix well; add the extra liquid as required so mixture not too stiff (it should fall off the spoon easily).
    In a large clean bowl, whisk the egg whites until stiff peaks form. Add a quarter of these whisked whites to the cake mix and beat to loosen the mixture. Gently fold in the rest of the whites being careful not to knock out too much air.
    Pour into the tin and place in the middle of the oven. Bake for about 45 minutes to an hour until a skewer comes out clean. Leave to cool entirely in the tin before running a knife around the outside and turning upside down onto a plate. Don’t worry if the cake looks dry and cracked – it won’t be dry inside.
    Make the chocolate covering by putting all the ingredients for the covering into a bain marie (i.e. a bowl over a gently simmering pan of water), stir until smooth then pour over the cake. You may need to wait 10 minutes or so for the covering to thicken – if it is too thin it will just run off the cake.
    Allow the covering to set before serving.
     
    chestnut-003

  8. Brownies Not Girl Guides

    November 12, 2014 by sarah

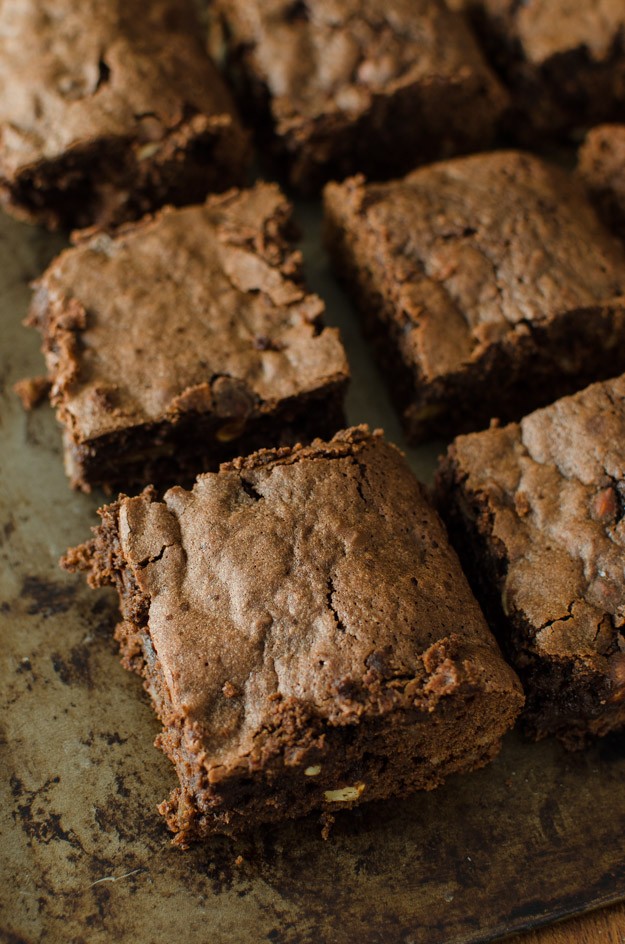
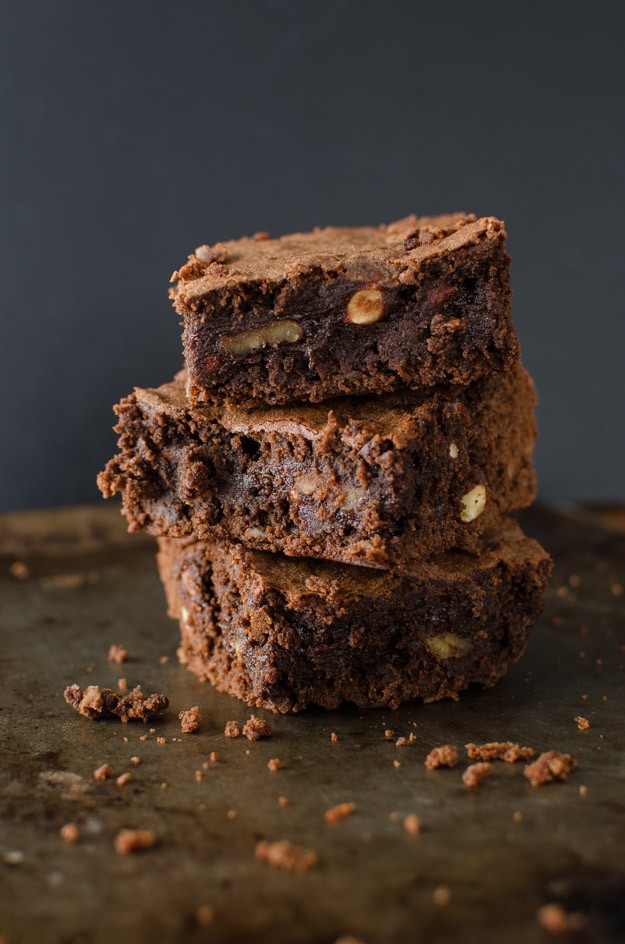
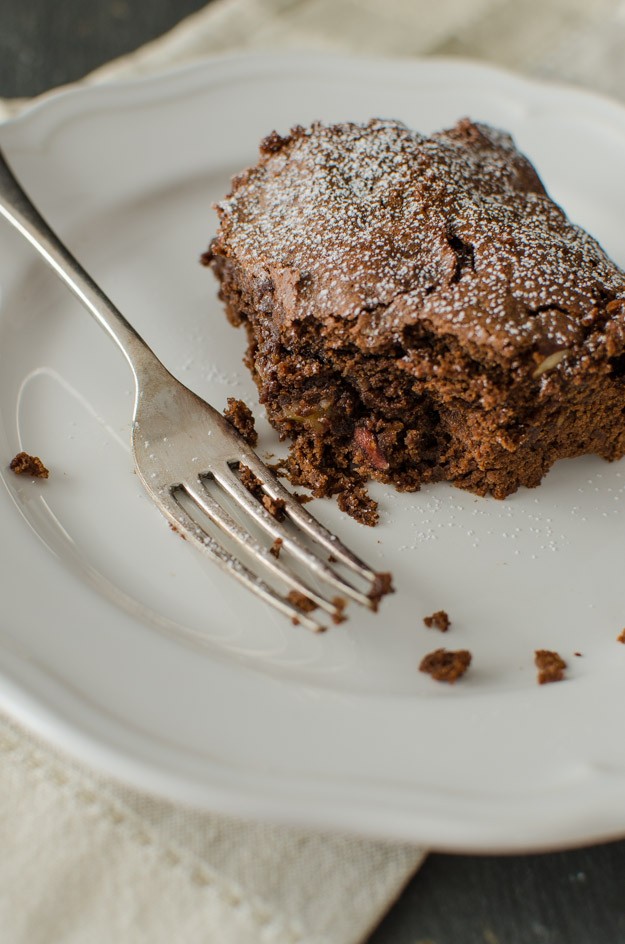
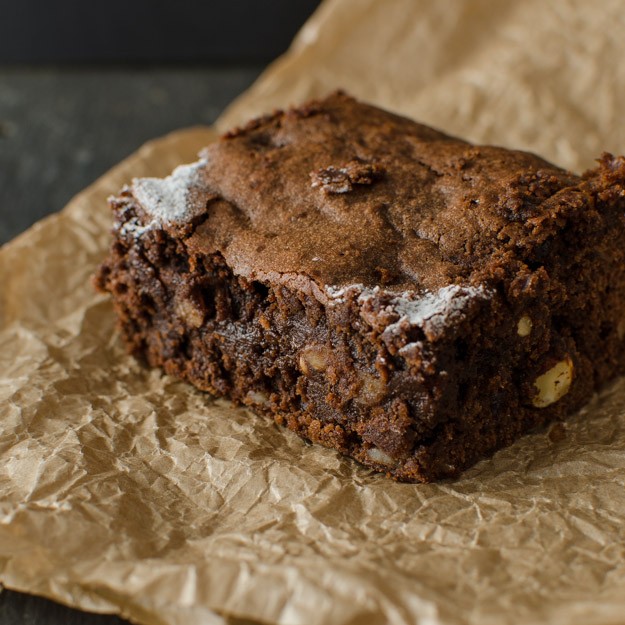
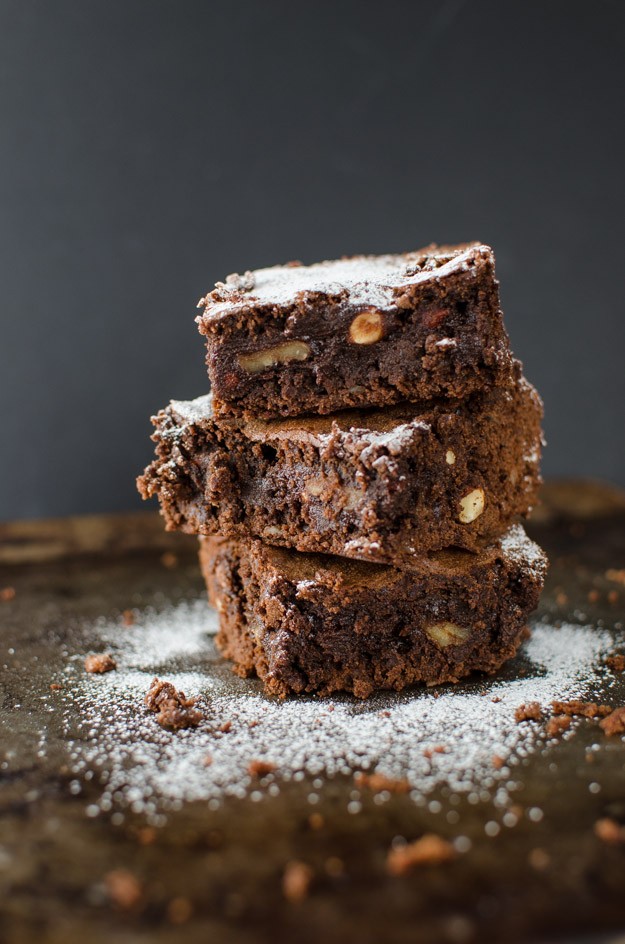
    Truthfully I cannot call this recipe ‘best ever brownies’ or ‘perfect brownies’ because they are not. Despite trying several recipes over the years, I have yet to find one which is not just a little cakey especially around the edges. And that is not what a brownie is about; it must be soft, gooey and almost fudgey in the centre but with a pleasing crispy top. And I like mine to taste of CHOCOLATE! Nuts good, chocolate chunks brilliant, fruit no. I am posting this recipe because it is the closest I have got to home baked brownie perfection and it gives me something to work on next time. I don’t make them very often because they are expensive to make (all that good quality chocolate) and very bad for you (lots of butter and sugar). But what are holidays for if not for spoiling yourself. We ate the whole tray, myself and my husband, during the week we had away.

    brownie-004 brownie-002


    Next time I think I will try less flour, perhaps 100g, and half flour half coco powder. And perhaps try using some soft brown sugar.

    Almost Perfect Brownies


    125g butter, unsalted
    160g plain choclate (good quality, coco solids greater than 60%)
    200g caster sugar (golden if you have it)
    1 tablespoon honey or golden syrup
    4 medium eggs
    150g plain flour
    1/2 teaspoon baking powder
    1 tablespoon ground coffee or instant coffee
    150g mixed nuts – walnuts, almonds, pecans work well
     
    Grease and line a baking tin about 20cm by 20cm (9″ x 9″) with baking parchment. Preheat the oven to 160º C fan.
    In glass bowl over a pan of barely simmering water, melt the butter and chocolate, stirring occasionally until smooth and silky.
    In a separate larger bowl, mix the dry ingredients except the nuts. Do not bother to sift the flour as you don’t want to add extra air.
    Once the butter and chocolate is melted, take off the heat and stand until it is finger temperature (less than 30º C) otherwise you will scramble the eggs. Add the honey or golden syrup and then beat in the eggs one at a time. When well beaten, add this wet mixture to the dry and beat until mixed and then mix in nuts until evenly distributed.
    Pour the brownie mix into the prepared tin and pop in the oven on a middle shelf.
    Start checking after 20-25 minutes. You want to take the brownies out when any wobble is gone from the middle of the tin but not any more – it is better they are slightly under done than over. A skewer will never come out clean so you cannot use this test. Allow to cool in the tin before cutting into squares.
     
    brownie-003 brownie-005 brownie-006
     

  9. Chocolate raspberry cake

    September 14, 2014 by sarah

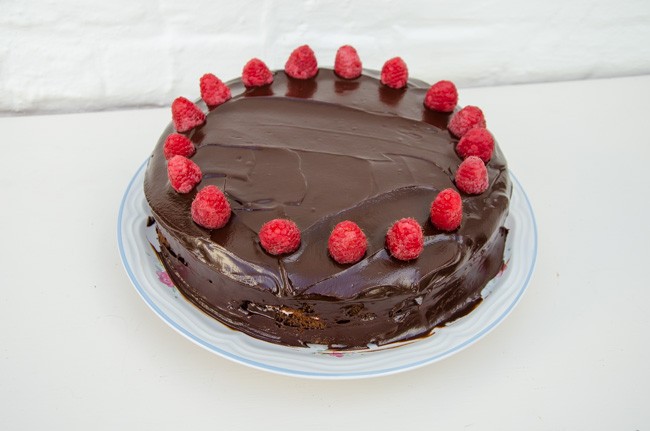
    I have been lusting after a truly chocolatey cake for a few weeks after tasting some rather disappointing imitations (or ‘brown cake’ as I call it). And this cake hit the spot. Unfortunately I made it for friends at work so I couldn’t cut into it to show you what it looked like inside but believe me, it is a gorgeous pink creamy pillow. This cake eats like a dream – powerful chocolate flavour, not too sweet with a creamy centre and the tartness of the raspberries cutting through the richness.

    _1SK7112

    Chocolate Raspberry Cake


    FOR THE CAKE
    150ml milk
    1 tablespoon of butter
    1 teaspoon vanilla extract
    3 eggs
    200g caster sugar
    175g plain flour
    3 tablespoon good quality cocoa
    1 teaspoon bicarbonate of soda
     
    FOR THE FILLING
    150ml double cream
    150g raspberries
     
    FOR THE GANACHE ICING
    120ml double cream
    120g good quality dark chocolate, chopped finely
    1 tablespoon golden syrup
    15g butter
    125g raspberries
     
    Preheat the oven to 180 ºC/fan 160 ºC.
    Grease and line a 23cm springform tin.
    Pour the milk into a small saucepan with the butter and heat until warm and melted. Add the vanilla.
    Whisk the eggs and sugar until very light and thick (ribbon trails). Pour in the milk mixture, whisking all the time. Sift over the dry ingredients and carefully fold in until no trace of flour lumps remain. 
    Pour into the tin and cook for 20-25 minutes until light and springing in the centre. Allow to cool in the tin for 15 minutes then finish cooling on a wire wrack with a tea towel over so it doesn’t dry out.
    The cake must be completely cool before filling and icing. It can be made 24 hours in advance but no longer than that as it will dry out. Make sure it is well wrapped in baking parchment then a carrier bag.
    Split the cake in half.
    Whip the cream until thick but not stiff. Add in the raspberries, crushing them against the side of the bowl to release the juices so you get a wonderfully mottled pink mixture.
    Sandwich the two halves of cake with the raspberry cream.
    To make the icing, place the cream, chocolate, syrup and butter in a glass bowl over a pan of simmering water ( a bain marie) and heat until it looks like the chocolate is half melted. Take off the heat and with a spoon beat until smooth. Leave to cool long enough so it thickens (it took mine about 30 minutes at UK summer temperatures).
    Pour and spread the ganache over the filled cake. Decorate with the raspberries.
    Do not refrigerate this cake and eat within a few hours.
     

  10. Afternoon Tea – chocolate eclairs

    May 25, 2014 by sarah

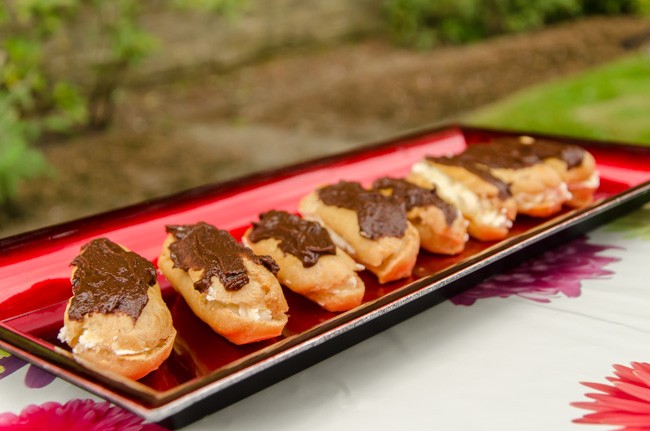
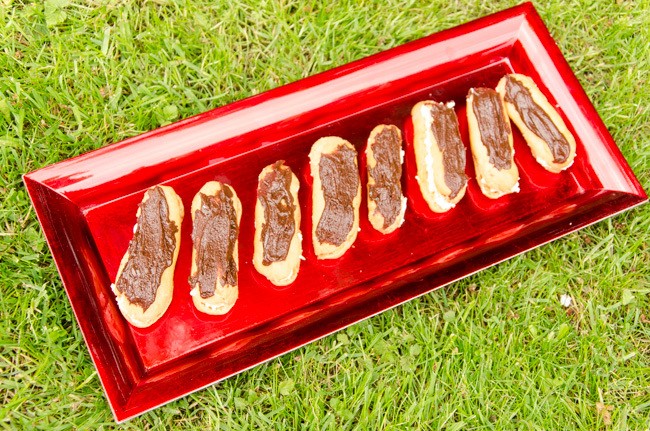
    A lovely thing to do when friends get together is to make something that can be shared around and enjoyed by all. And last Friday I had the occasion as the practice where I work had a communal Birthday lunch so that we could all celebrate (or not) our Birthdays on one day. More like a ‘unbirthday party’, for you who remember Disney’s Alice in Wonderland. The weather wasn’t too bad so we had a BBQ outside in the garden and I made something sweet for after. I love a fresh pastry and rarely eat cream so these pastries were a real treat.

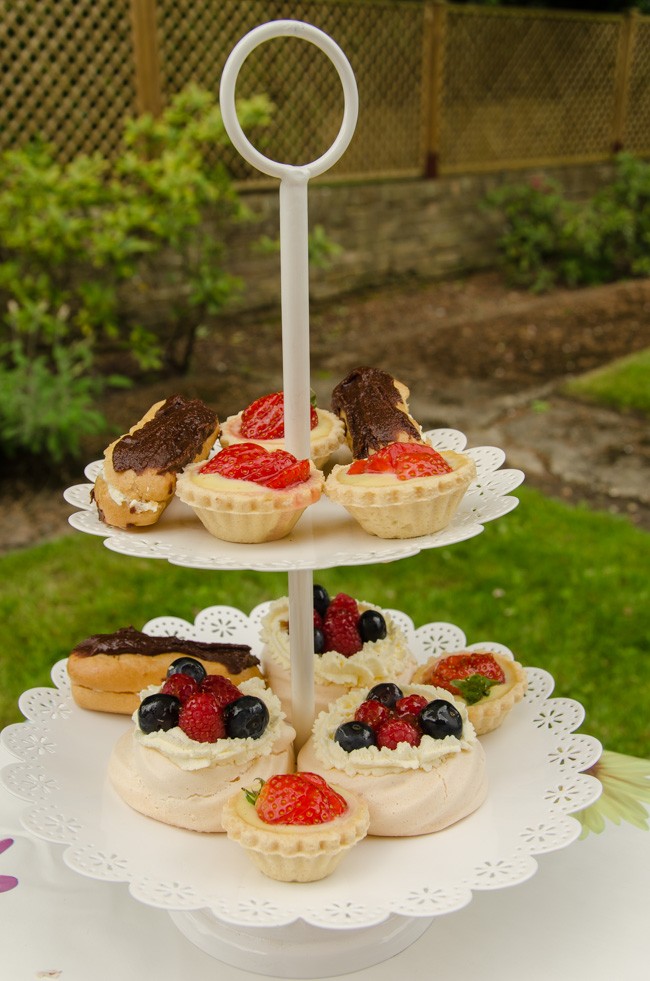
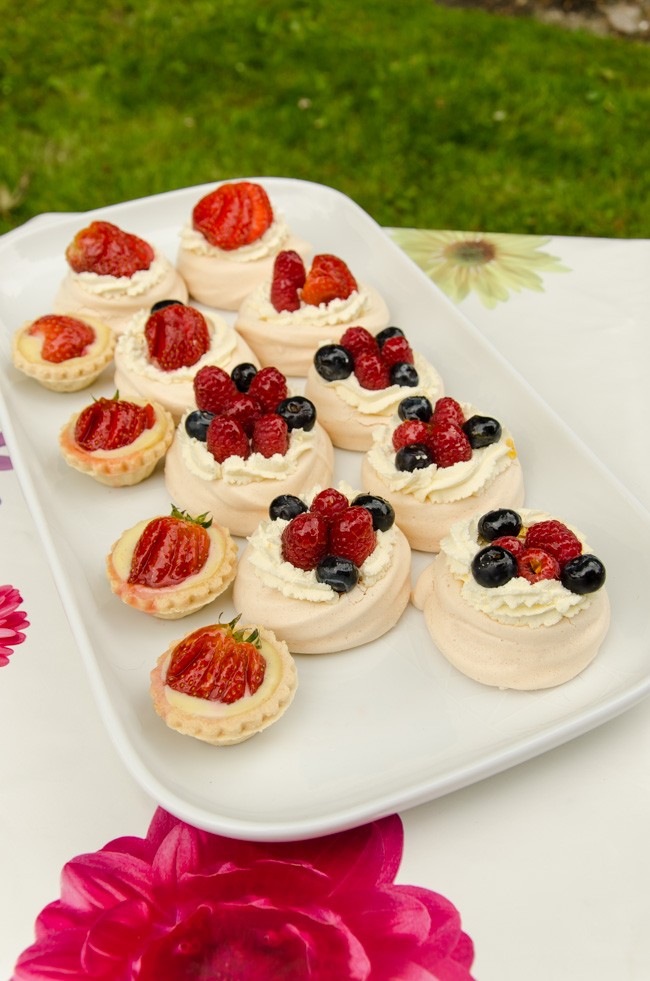
    I made chocolate eclairs, some meringue nests filled with cream and fruit and strawberry tarts. OK, I cheated a little; the pastry tartlet cases are bought not homemade but all the rest was made by my fair hand. This was only the second time I had made choux pastry and I have to say, it really isn’t too hard. In fact, I only just got over my phobia of making shortcrust pastry last year and I think that choux pastry is actually easier! Well, that’s done it. I am sure next time it will be a complete failure! I will share the recipes for meringue nests and crème patissière on a future post. If the weather is good this Bank Holiday weekend, why not treat your loved ones to some home made pastries as part of an afternoon tea. A lovely way to celebrate together.

    chocolate eclair (3 of 4)

    Cake stand of yummy homemade things!

    chocolate eclair (4 of 4)

    Platter of meringues and strawberry tarts

    Chocolate Eclairs

    Makes 18-20 mini eclairs or 12 full sized ones.

    For the choux pastry

    50g unsalted butter

    65ml water and 65ml milk

    Pinch of salt

    100g plain flour, sifted

    3-4 medium free-range eggs, beaten

    For the filling

    300ml whipping cream, whipped to firm peaks

    Or 450g crème patissière

    The icing

    50g plain chocolate

    2 tablespoons of water

    15g butter

    75g icing sugar, sifted


    chocolate eclair (1 of 4)

    Method

    1. Preheat the oven to 220°C/fan 180°C. Lightly greasy 2 baking trays or line with silicone paper.
    2. For the choux pastry, place the water, milk, butter and salt in a medium non-stick saucepan over a medium heat. Heat gently until the butter has melted then bring to the boil.
    3. Quickly take the pan off the heat, add all the flour at once and beat furiously with a wooden spoon until the mixture is completely smooth and comes together in a ball.
    4. Continue to beat on a low heat for a minute so the mixture comes together in a ball.
    5. Allow to cool slightly then beat in the eggs, one spoonful at a time into the dough. This is very hard work and you need to keep going until the pastry has a smooth shiny consistency and is paste like. You may not need all the eggs to reach the correct consistency as it must not be too soft as it needs to be piped.
    6. Transfer this pastry to a piping bag fitted with a 1cm (1/2 inch) plain nozzle and allow it to sit for 5 minutes to firm slightly. Now pipe the pastry in 3 inch (7.5cm) straight lengths (or full size eclairs are 6 “), leaving room between to spread. Apparently for a professional finish you can pipe into long lengths then freeze the pastry. Then cut the frozen lengths into uniform lengths and defrost before cooking.
    7. Bake the pastry at this temperature for 10 minutes then turn the temperature down to 190 °C/fan 170°C and cook for another 20 minutes.
    8. Remove the pastries from the oven and while still hot and pierce or cut to release the steam and if they feel damp on the inside, place back in the oven for 5 minutes.
    9. Allow to cool fully on a wire rack before filling. If not filling immediately, place in an air-tight container and use within a couple of days. If they are slightly soggy when you take them out, give them another 5 minutes in the oven.
    10. Pipe in the whipped cream or cream patisserie (use a star nozzle for the cream, plain nozzle for cream pat).
    11. For the icing, melt the chocolate slowly in a bain mairé with the water and butter. Remove from the heat and beat in the sugar until smooth. Pipe or spread over the top of each eclair.

    One last thing. The icing recipe didn’t work too great (I found it in Mary Berry’s book) but that may have been because it set firm before I was ready for it so I had to rewarm it and that is when it went grainy. Just to warn you if it looks like it is not going to work, perhaps just go with melted chocolate.chocolate eclair (2 of 4)