RSS Feed

Posts Tagged ‘baking’

  1. Meringue nests – Uses for eggs!

    June 15, 2014 by sarah

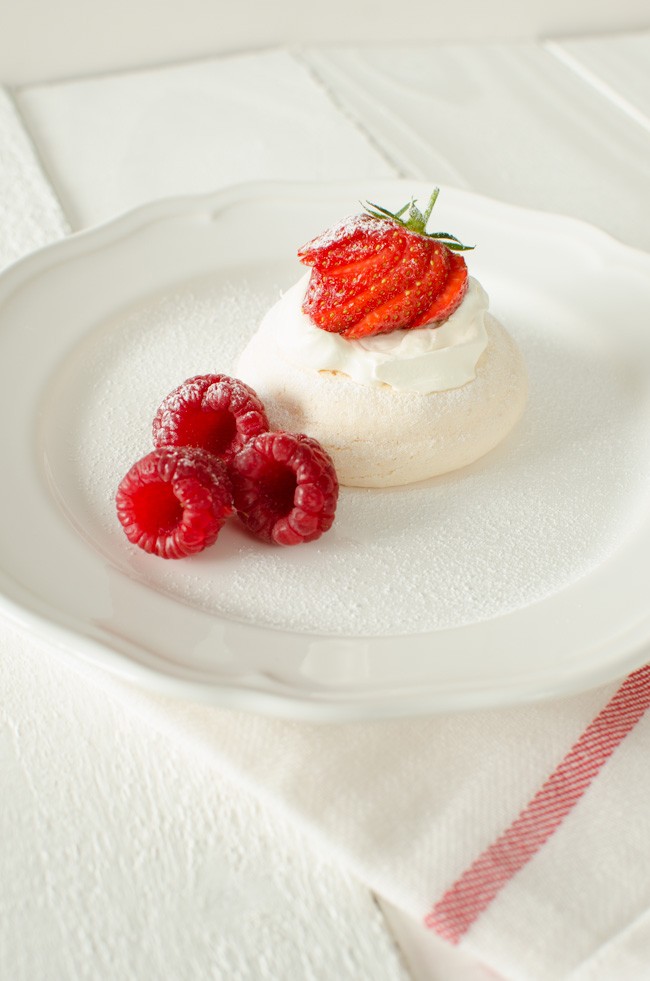
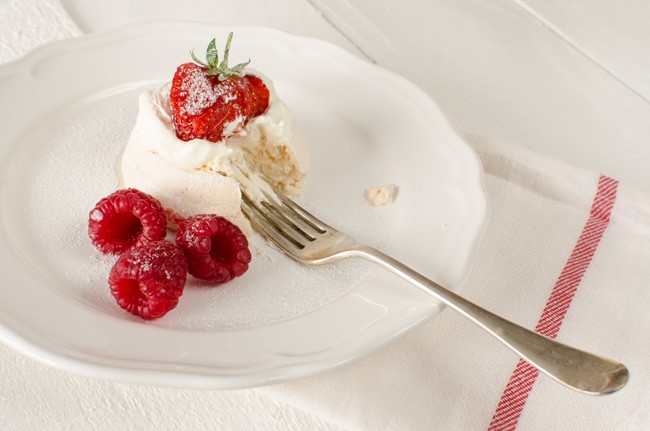
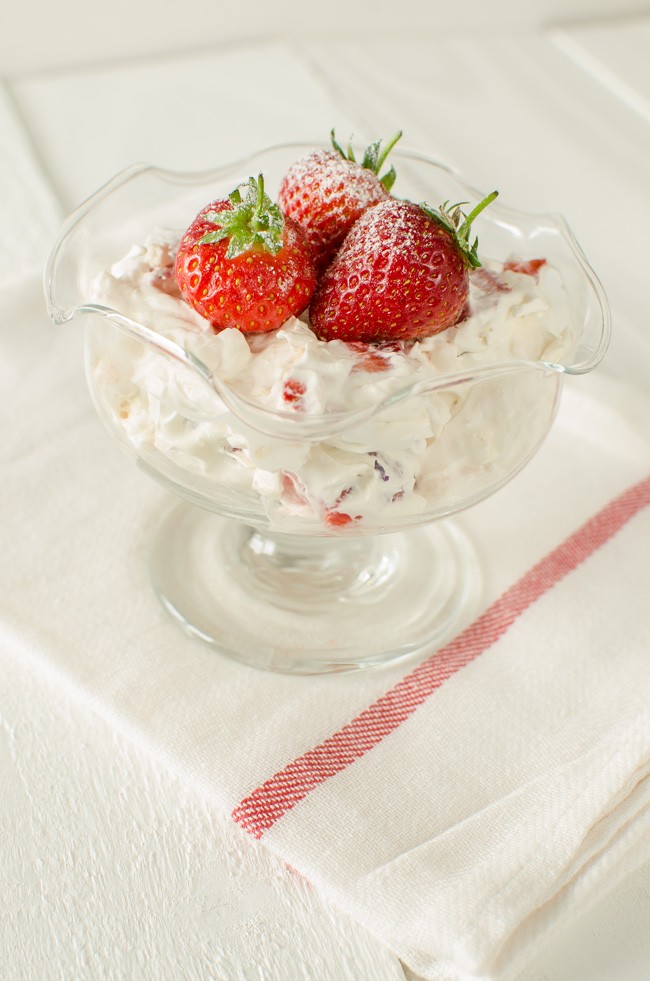
    Meringue. A word that can instill fear into the heart of even the most experienced cook. Sometimes it works and sometimes it doesn’t and usually you can never work out why. But understanding more about eggs and the chemical reaction that makes meringue can help demystify it and hopefully prevent so many failed egg dishes. Though I can knock out a batch of meringues without much thought, I still get some disasters though they always taste better than they look! A meringue is never a failure, you might just have to opt to serve Eton mess rather than neat nests. There is nothing better than sweet meringue, smooth and silky cream and tart berries.

    meringues (7 of 9)

    Eton mess

    meringues (8 of 9)

    Strawberry meringue nest

    Egg whites consist over 90% water and various proteins make up the rest. When you whisk egg whites, you are breaking down the protein structure so that the protein strands lengthen and air bubbles become entrapped within this lattice structure. When whisking egg whites it is very important to have scrupulously clean bowl and whisk. I prefer a metal or bowl as it is supposed to help the egg whites trap more air or if using a glass bowl, I clean it first with kitchen paper with a little vinegar and left to dry. It is also very important not to get a single speck of egg yolk in with the whites so it is a good idea to break the eggs individually into a small bowl before adding the whites to your larger bowl to avoid messing up the whole lot. A drop of lemon juice or a pinch of cream of tartar is often added to the egg whites at the start of beating as it is supposed to help stabilise the bubbles. This is unverified; I think I need to do more experimentation to see if it makes a noticeable difference. Very fresh eggs whisk the best as the white is firm and not runny. This is part of the reason why I got chickens of my own. Interestingly, fresh eggs make awful hard boiled eggs as they are impossible to peel! Remember that eggs you buy in the supermarket will probably be at least a week old by the time you buy them and the ‘best before date’ will be up to 5 weeks after they were laid!

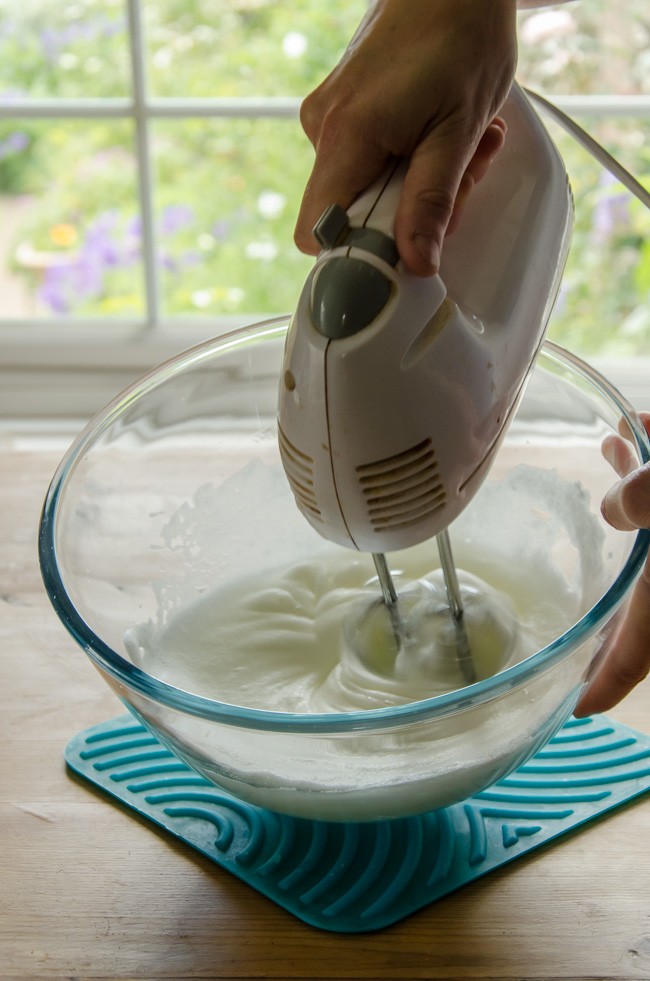
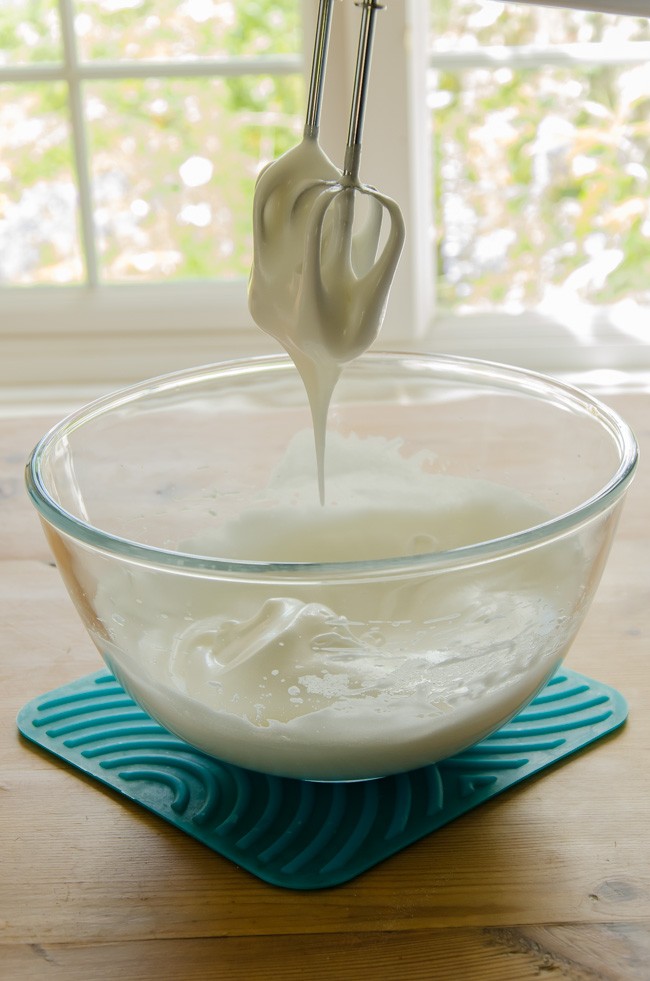
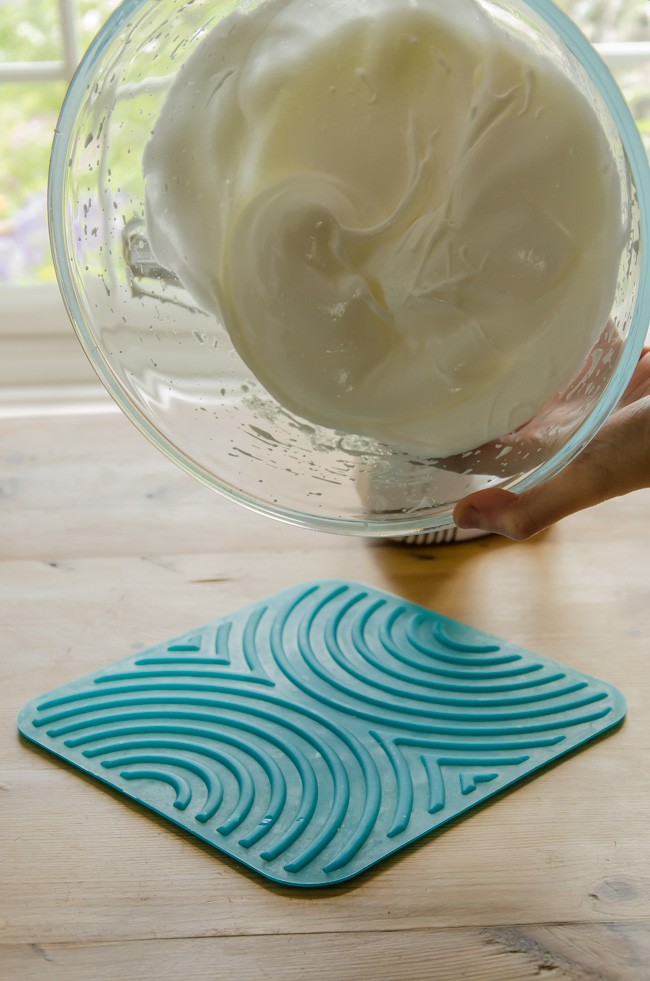
    When you start whisking eggs, start on a slow speed for a minute or so before increasing the speed. The soft peak stage, as used for souffles and mousses, occurs when you lift the whisk out of the egg whites and the peak slowly folds over into the mixture. The bottom of the bowl may feel slightly liquidy and slip around the bowl. The stiff peak stage happen fairly soon after so keep watching and testing. Egg whites beaten to this stage are used for meringues and you can tell when you have reached this stage as the peaks when you lift out the whisk are firm and do not sag. Also the whole bowl should be whisked to the same stage so at firm peak stage you should be able to turn the bowl over your head and not get a santa hat of egg whites! To prevent meringues from weeping when cooking, you must make sure the sugar is thoroughly dissolved in the egg whites and that you use very fine sugar.

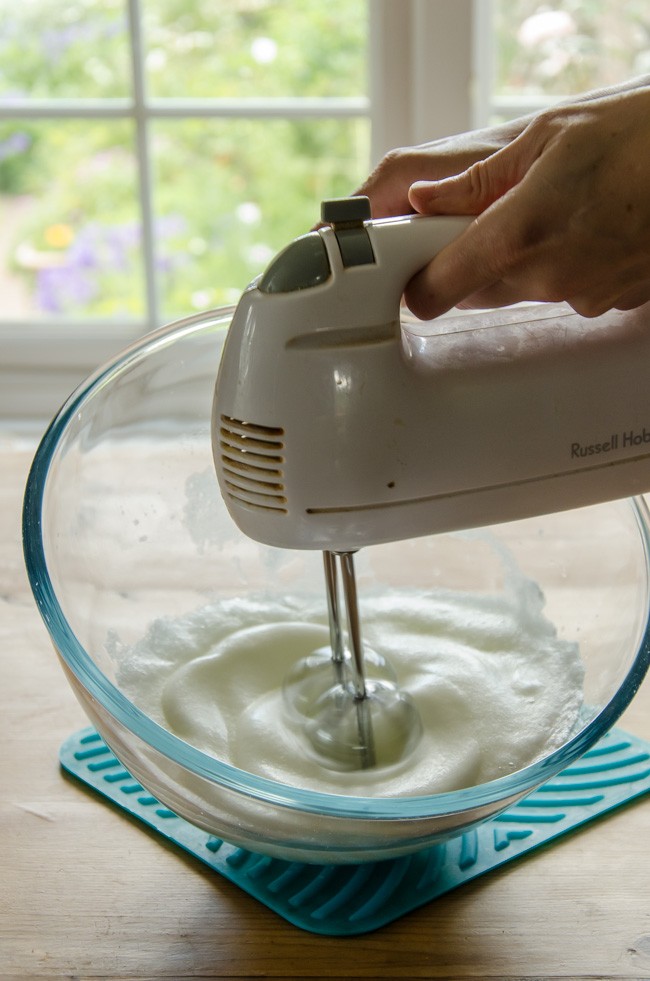
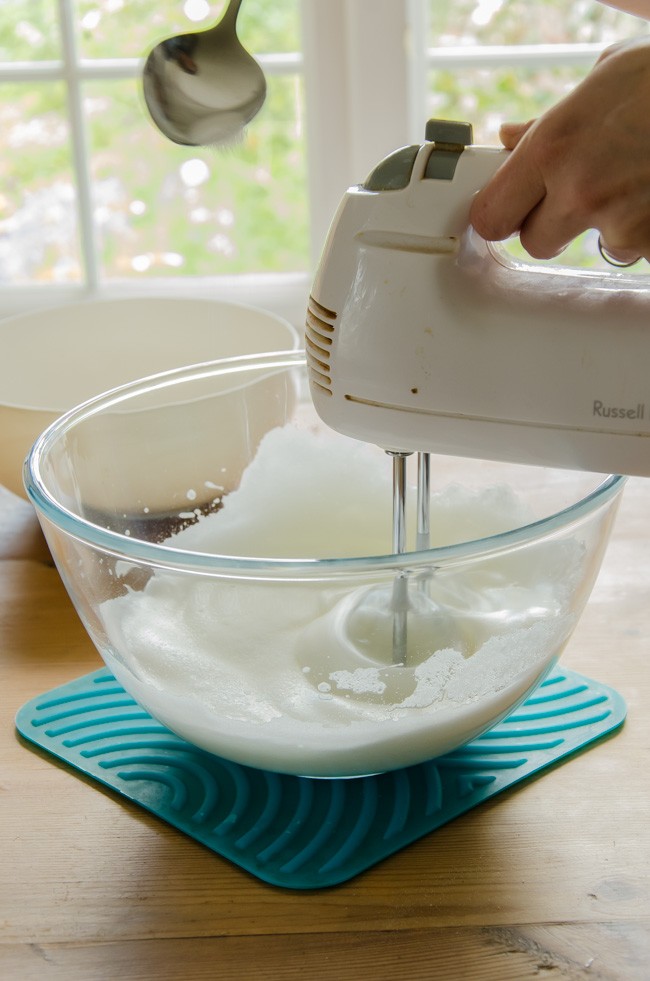
    I don’t know if equipment matters too much when whisking meringues; after all, it used to be done with a hand whisk. Think of those muscles! I use a handheld machine but would love a stand machine, especially if it came with whisk attachments rather than the all purpose ones I currently have. I am not sure it would make a huge difference to my meringues, but there is only one way to tell! I do put a silicone mat under the bowl as I whisk to prevent the bowl from spinning off the counter.

    There are three types of meringues and I will give the recipe for simple ones below. Swiss meringues are probably what we are all familiar with. The egg whites are beaten to soft peak stage, half the sugar is added and whisking continues until stiff peaks are achieved and the mixture is glossy; then the rest of the sugar is folded in. This mixture is suitable for simple piping like the nest I made for the afternoon tea or pavlova layers or toppings for pies, but it must be used quickly other it turns back to liquid. Italian meringue is made by adding hot sugar syrup to whisked egg whites and whisking until cool. This meringue is more stable and is the best choice for piping delicate items. Cooked meringue, also known as meringue cuite, is made by whisking the egg whites with the sugar in a bowl over boiling water and this is the most stable type of meringue.

    One final note on making meringues and that is you MUST use baking parchment, also known as silicone paper, to line the trays. Greaseproof paper has a wax coating that resists water so is used for wrapping and layering food and with sticky food like dough, but the coating melts in the oven so the food then sticks to it unless you pre-grease it like for a sponge cake. Baking parchment has been treated so that the non-stick properties do not disappear in the heat of the oven; essential for high sugar foods such as meringues, macaroons and even sponge cakes that you do not pre-grease the paper lining the tin such as genoese sponge.

    meringues (9 of 9)


    Simple Meringue Recipe

     
    4 large egg whites, cold from fridge – about 120-150g of egg white if mixed egg sizes
    pinch of cream of tartar
    225g caster sugar
     
    Preheat the oven to 110 ºC/ fan 100ºC and line a couple of baking trays with baking parchment/silicone paper.
    Tip the egg whites into a large bowl and whisk on slow speed until foamy and then add the cream of tartar. Continue to whisk on medium speed until soft peaks are reached and just turning to stiff ones.
    Turn the speed up and add the sugar a dessert spoonful at a time, beating for 3-4 seconds between each addition.
    Once half of the sugar has been added and the egg whites are glossy, add the rest of the sugar in one go and beat for a few seconds more until well mixed and not granular when touch between you fingers. But try to resist over beating. If you over beat, put in the fridge until cold again and try again. Theoretically you should fold in the last half of the sugar but I find it doesn’t mix in well so you get sugar bleeding in the finished meringue or to fold it in well enough the mixture becomes deflated and becomes sloppy.
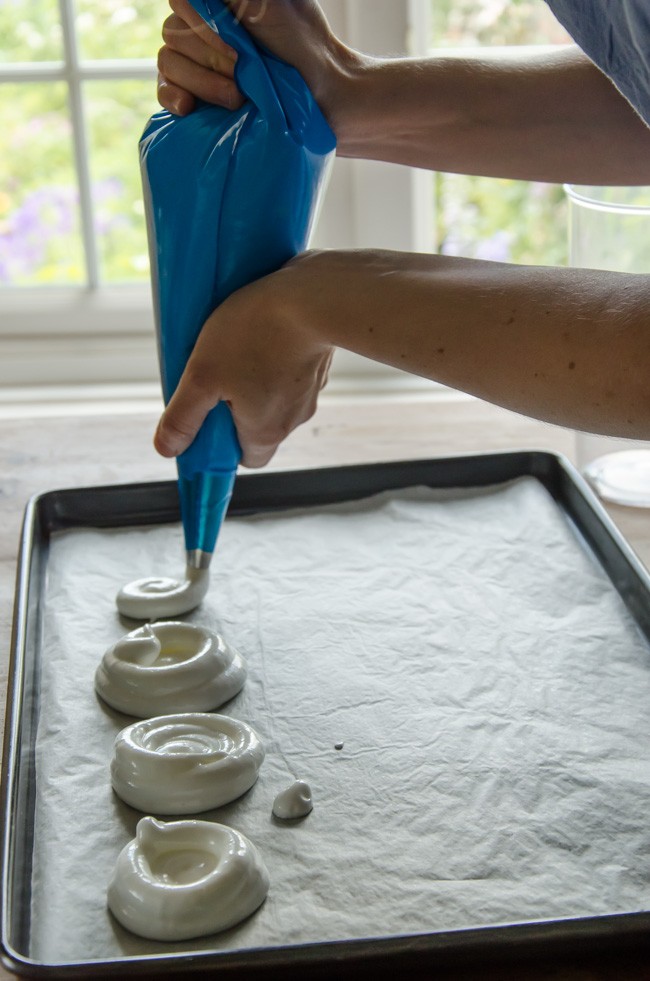
    Pipe or soon the mixture on the lined baking trays – you can only manage rough shapes with this type of meringue.
    Bake for about 1 and half hours. I cook for an hour then prop the oven door open and let them cool in the oven and this leaves the meringues with a soft, chewy centre. If you like them dry all the way through then cook for the full 1 and half hours at least.
    When cool, they can be stored in an airtight container for up to 2 weeks, or frozen indefinitely.
     
    meringues (1 of 9)

    Step 1 – whisk egg whites to soft peak stage.

    meringues (2 of 9)

    Step two – make sure you move the beaters around the bowl.

    meringues (3 of 9)

    Step three – add the sugar a spoonful at a time.

    meringues (4 of 9)

    Step four – keep beating until stiff and glossy.

    meringues (5 of 9)

    See – stiff peaks, shouldn’t slide out the bowl.

    meringues (6 of 9)

    Step five – pipe as required on to baking parchment.


  2. Afternoon Tea – chocolate eclairs

    May 25, 2014 by sarah

    A lovely thing to do when friends get together is to make something that can be shared around and enjoyed by all. And last Friday I had the occasion as the practice where I work had a communal Birthday lunch so that we could all celebrate (or not) our Birthdays on one day. More like a ‘unbirthday party’, for you who remember Disney’s Alice in Wonderland. The weather wasn’t too bad so we had a BBQ outside in the garden and I made something sweet for after. I love a fresh pastry and rarely eat cream so these pastries were a real treat.

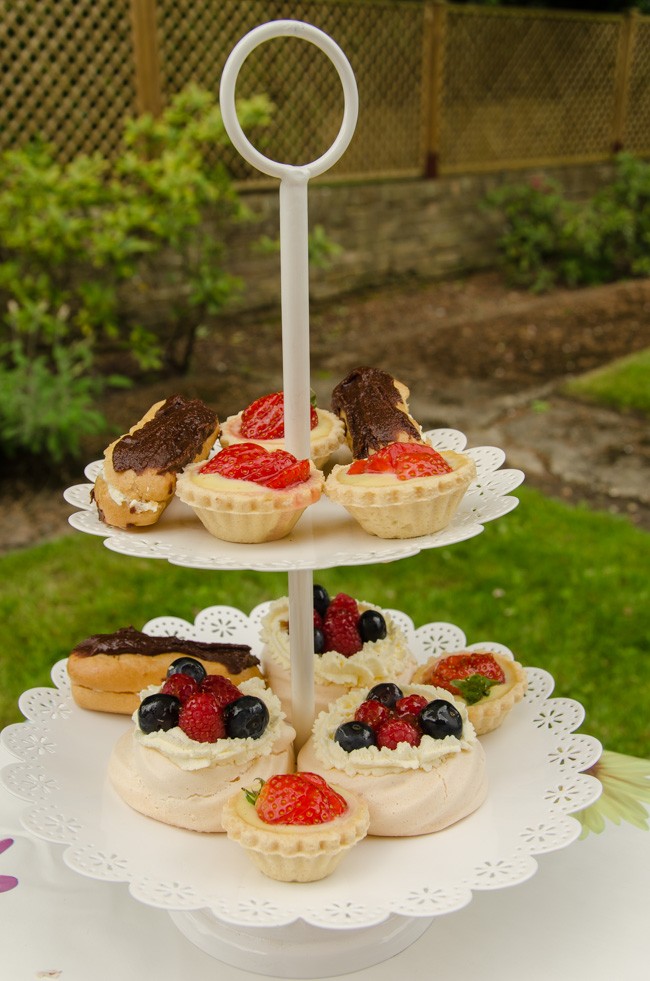
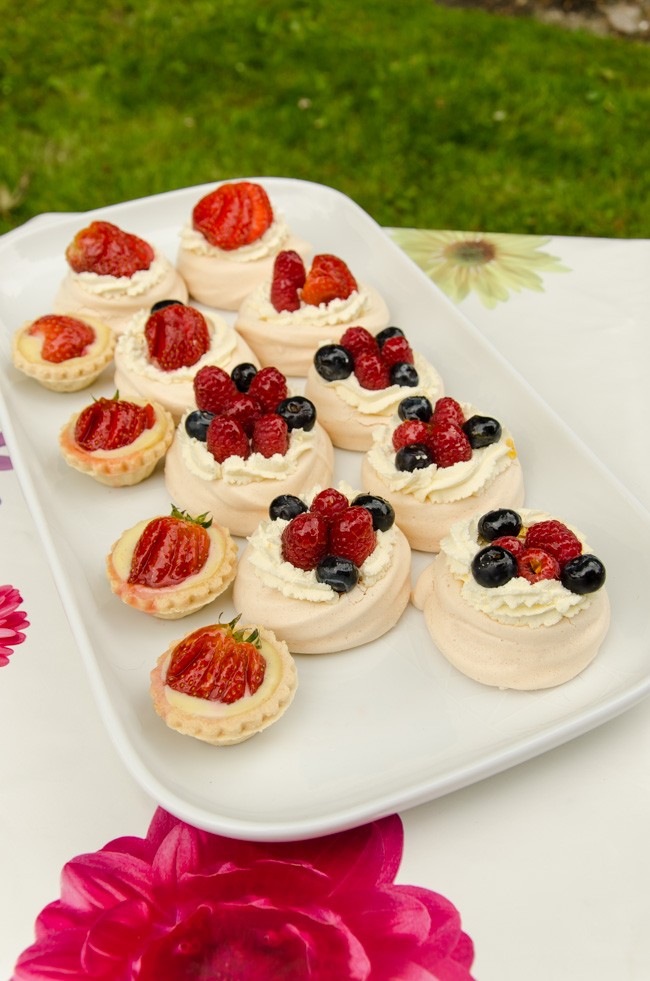
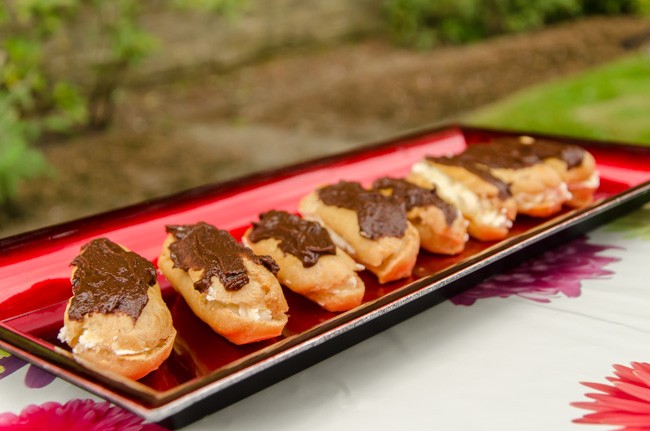
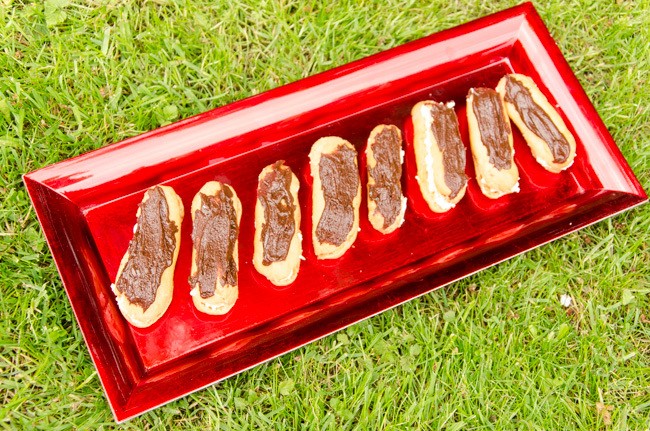
    I made chocolate eclairs, some meringue nests filled with cream and fruit and strawberry tarts. OK, I cheated a little; the pastry tartlet cases are bought not homemade but all the rest was made by my fair hand. This was only the second time I had made choux pastry and I have to say, it really isn’t too hard. In fact, I only just got over my phobia of making shortcrust pastry last year and I think that choux pastry is actually easier! Well, that’s done it. I am sure next time it will be a complete failure! I will share the recipes for meringue nests and crème patissière on a future post. If the weather is good this Bank Holiday weekend, why not treat your loved ones to some home made pastries as part of an afternoon tea. A lovely way to celebrate together.

    chocolate eclair (3 of 4)

    Cake stand of yummy homemade things!

    chocolate eclair (4 of 4)

    Platter of meringues and strawberry tarts

    Chocolate Eclairs

    Makes 18-20 mini eclairs or 12 full sized ones.

    For the choux pastry

    50g unsalted butter

    65ml water and 65ml milk

    Pinch of salt

    100g plain flour, sifted

    3-4 medium free-range eggs, beaten

    For the filling

    300ml whipping cream, whipped to firm peaks

    Or 450g crème patissière

    The icing

    50g plain chocolate

    2 tablespoons of water

    15g butter

    75g icing sugar, sifted


    chocolate eclair (1 of 4)

    Method

    1. Preheat the oven to 220°C/fan 180°C. Lightly greasy 2 baking trays or line with silicone paper.
    2. For the choux pastry, place the water, milk, butter and salt in a medium non-stick saucepan over a medium heat. Heat gently until the butter has melted then bring to the boil.
    3. Quickly take the pan off the heat, add all the flour at once and beat furiously with a wooden spoon until the mixture is completely smooth and comes together in a ball.
    4. Continue to beat on a low heat for a minute so the mixture comes together in a ball.
    5. Allow to cool slightly then beat in the eggs, one spoonful at a time into the dough. This is very hard work and you need to keep going until the pastry has a smooth shiny consistency and is paste like. You may not need all the eggs to reach the correct consistency as it must not be too soft as it needs to be piped.
    6. Transfer this pastry to a piping bag fitted with a 1cm (1/2 inch) plain nozzle and allow it to sit for 5 minutes to firm slightly. Now pipe the pastry in 3 inch (7.5cm) straight lengths (or full size eclairs are 6 “), leaving room between to spread. Apparently for a professional finish you can pipe into long lengths then freeze the pastry. Then cut the frozen lengths into uniform lengths and defrost before cooking.
    7. Bake the pastry at this temperature for 10 minutes then turn the temperature down to 190 °C/fan 170°C and cook for another 20 minutes.
    8. Remove the pastries from the oven and while still hot and pierce or cut to release the steam and if they feel damp on the inside, place back in the oven for 5 minutes.
    9. Allow to cool fully on a wire rack before filling. If not filling immediately, place in an air-tight container and use within a couple of days. If they are slightly soggy when you take them out, give them another 5 minutes in the oven.
    10. Pipe in the whipped cream or cream patisserie (use a star nozzle for the cream, plain nozzle for cream pat).
    11. For the icing, melt the chocolate slowly in a bain mairé with the water and butter. Remove from the heat and beat in the sugar until smooth. Pipe or spread over the top of each eclair.

    One last thing. The icing recipe didn’t work too great (I found it in Mary Berry’s book) but that may have been because it set firm before I was ready for it so I had to rewarm it and that is when it went grainy. Just to warn you if it looks like it is not going to work, perhaps just go with melted chocolate.chocolate eclair (2 of 4)


  3. Marmalade Loaf Cake and Crystallised Flowers

    April 6, 2014 by sarah

    OK folks, a brief posting for a cake I made last weekend as I am totally pooped! I would of thought I would have more energy now Spring has finally arrived, but as usual there is too much to do and too little time! I made some marmalade last Saturday so to make space for the fresh stuff, I went through the cupboards to find any of last years marmalade. There was only one jar left so a third went into this cake. I just need to find a recipe for the rest – any suggestions?

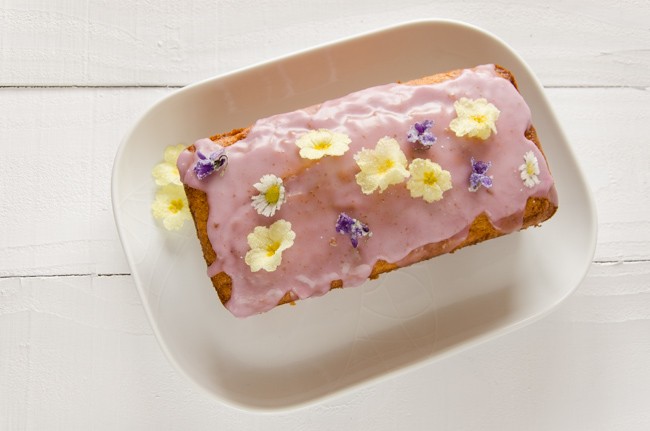
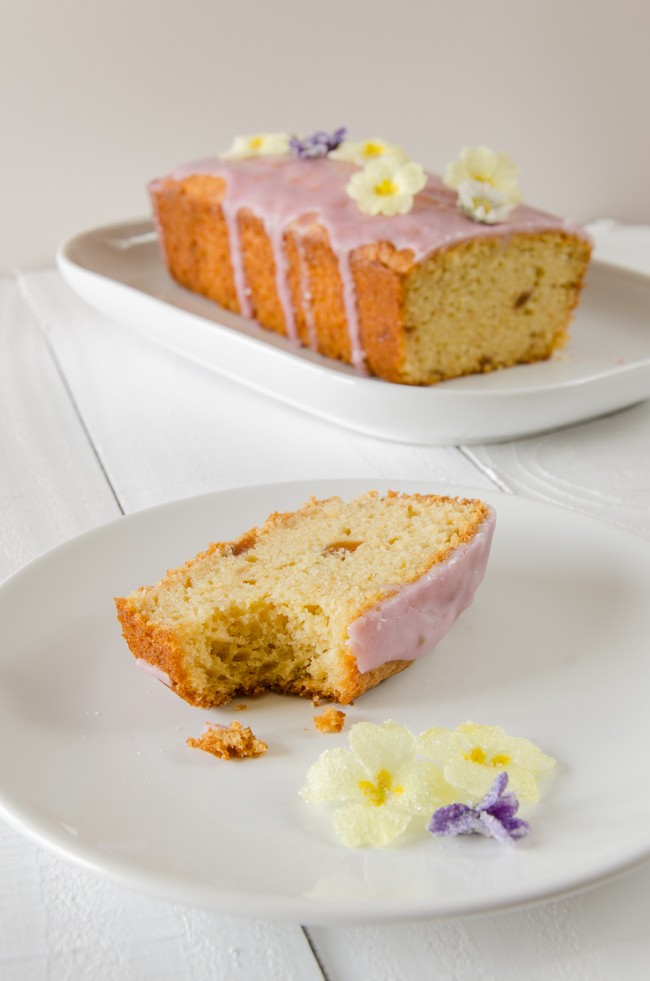
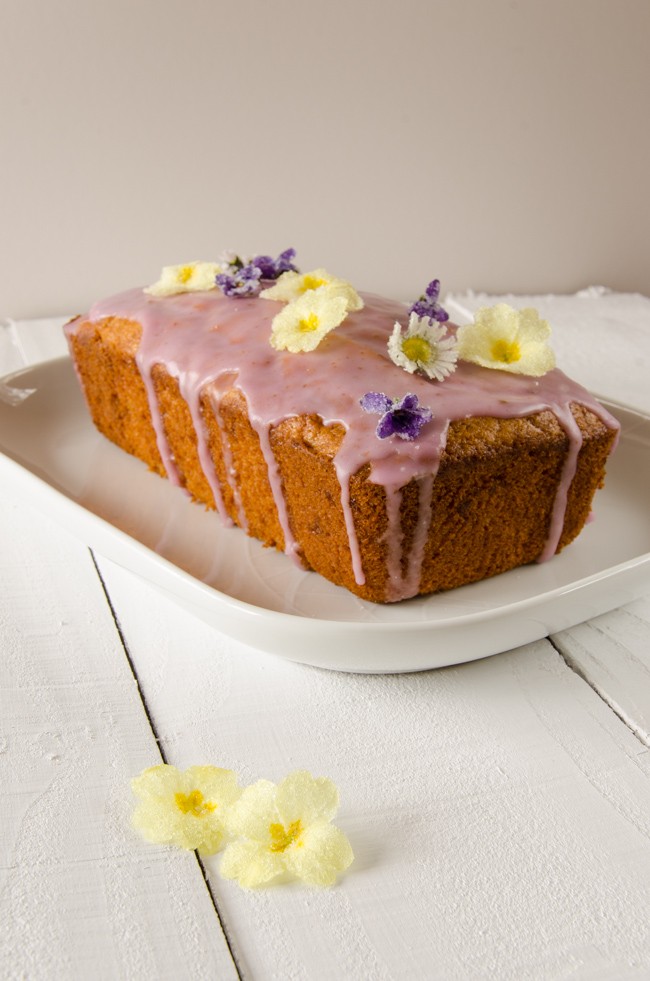
    This cake is lovely and zing and oh so spring like, especially with the crystallised flowers (ahh, pretty). I saw a recipe in a magazine using them recently and jotted it down as something to do. I was thinking of how to decorate this cake and these flowers were surprisingly easy. Take one egg white and add a dash of cold water and whisk to break up the white. Use a small clean paint brush to brush the egg white all over the flowers and then hold over a second bowl and sprinkle over caster sugar. Leave on a baking rack to dry for 24 hours. Make sure you use edible flowers (see this website for a good list of flowers). I used primroses, daisies and violets. I then used the left over egg and sugar in the recipe so nothing was wasted. I am happy when nothing is wasted!

    marmalade cake (1 of 3)

    Marmalade Loaf Cake


    • 225g self-raising flour
    • 1 pinch salt
    • 115g margarine
    • 85g caster sugar
    • 1 teaspoon orange rind, finely grated
    • 1/2 teaspoon baking powder
    • 2 eggs, beaten
    • 2 good tablespoons thick cut orange marmalade
    • 2 tablespoons milk


    1. Preheat the oven to 170 C / fan 150 C. Grease a 1lb loaf tin (or a 6 inch/15cm round cake tin).
    2. Cream the margarine and sugar in a large bowl.
    3. Add all the other ingredients and use hand mixer to mix well but don’t over do it; it should look like thick batter.
    4. Don’t worry about the occasional wee lump, remember there’s orange rind in the mix! Pour the mixture into the prepared tin.
    5. Bake in the center of the preheated oven until golden brown, about 1 hour. Allow to cool for 5 minutes in the tin, then tip out onto a wire rack.
    6. While the cake is still warm, spread a thin layer of warmed marmalade over the top. Allow to cool, then slice and enjoy.
    7. Alternatively, when cool ice with glace icing and decorate with crystallised spring flowers.

    marmalade cake (3 of 3) marmalade cake (2 of 3)


  4. Spice 5 – Cinnamon – Cinnamon Rolls

    March 30, 2014 by sarah

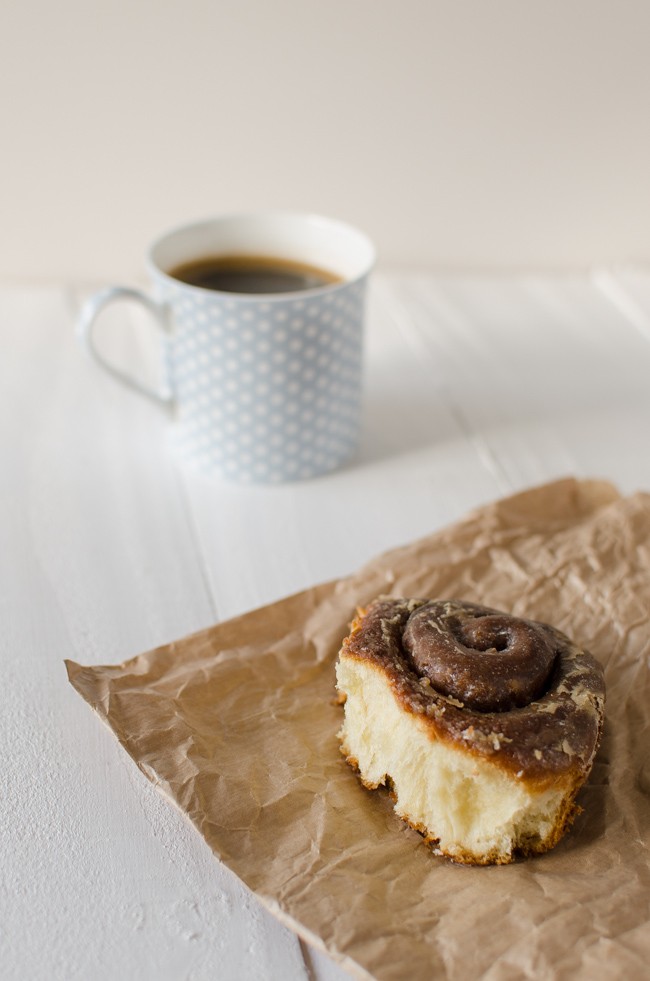
    Cinnamon. A beautiful warm, sweet spice, which I am sure we are all familiar with. Essential in many of the recipes we know and love, such as apple pie and mulled wine. True cinnamon comes from the bark of young saplings of Cinnamomum verum, a tree native to Sri Lanka (also known as Ceylon), which is stripped and rolled by hand to form quills. The cinnamon available in Europe can only come from this source, but it is also possible to get ‘cassia’ which is harvested from other Cinnamomum species, but is less aromatic and subtle than true cinnamon and the bark is much tougher. Cinnamon has many health benefits including anti-clotting and anti-oxidant actions, helping to control blood sugar levels in diabetes, and anti-viral and anti-microbial actions. However, too much cinnamon can be harmful due to it containing coumarin which can cause liver and kidney damage in high concentrations. The EU has set limits to reduce exposure to this but at levels that will actually affect the taste in the produce – so if you want your cinnamon baked goods to actually taste of cinnamon, you know who to blame so make it yourself! See this article on cinnamon!

    cinnamon (4 of 4)


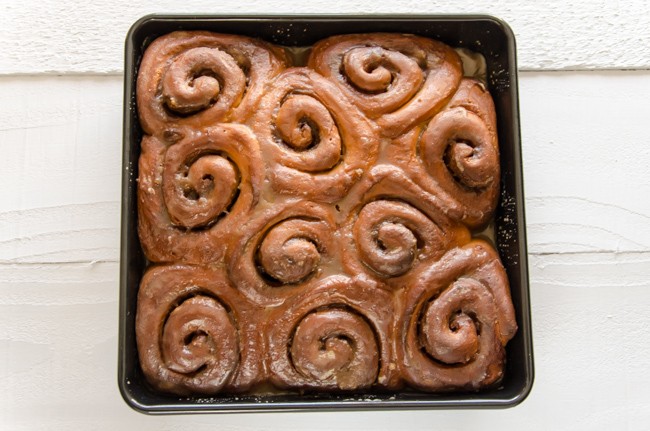
    I decided to make cinnamon rolls as they were made recently on a blog I follow irregularly. However, this and all the other recipes I could find were American so had the usual problems with measurements in cups and using something called all purpose flour. Also, this is an enriched dough and in the past I have had great trouble getting enriched dough, such as for hot cross buns or stollen, to rise. Where do you leave your dough to raise – an airing cupboard or low oven? I found that using a reptile heat mat obtained online for a small sum gave me a specified level of warmth so that even on the coldest winters day when the heating has been off for hours I can still rise dough and make bread. This time I used our conservatory as the sun had been warming it all day but did the second proving on the mat as it was evening by then.

    cinnamon (1 of 4)

    Grown-up Cinnamon Rolls

    Dough
    500g strong white bread flour
    100g caster sugar (golden/unprocessed if you have it)
    75g butter, melted
    2 medium free-range eggs, beaten
    200ml milk
    1 sachet/7g dry yeast
    1 teaspoon salt
    zest of 1 lemon
     
    Filling
    50g unsalted butter, softened
    100g soft brown sugar
    2 teaspoons of ground cinnamon
    1/4 teaspoon freshly ground nutmeg
    1/4 teaspoon salt
     
    Glaze
    150g soft brown sugar
    1 tablespoon whiskey or other alcohol of choice
    1 teaspoon vanillar extract
    30g butter
    115g icing sugar
     
    Make the dough. Heat the milk until body temperature/tepid and add the yeast; leave until starting to foam (how quickly depends on type of yeast). In a large mixing bowl, mix the flour, sugar, salt and lemon zest and make a well in the middle. Into the well add the now activated yeast, the two beaten eggs and the melted butter. Mix with fingers/hand until comes together then turn out onto a well floured surface. Knead for about 5-10 minutes until comes together and is silky smooth. The dough will be quiet wet/tacky to begin with but keep working and will firm up. If it feels very sticky, add a little more flour when kneading.
    Place the kneaded dough into an oiled bowl and cover with oiled cling film. Leave somewhere warm until at least doubled in size.
    How log this takes varies with a lot of factors but allow at least 2-3 hours.
     
    Make the filling. In an small bowl, beat the dry ingredients into the softened butter.
     
    Make the rolls. Punch down the proven dough and roll/stretch out on a work surface until forms a rectangle 15″ long by 9/10″ wide. Sticking the edge closest to you down to the table and then rolling away works best. Spread the filling evening over the rectangle, leaving a 1/2″ border at the long edge furthest from you. Starting at the long end closest to you, tightly roll up the dough over the filling. Seal the final unfilled margin but dampening with water and then pressing the dough firming into it.
    Cut the dough across the roll up to make 1″ sections. This amount should make about 18 slices.
    Lightly grease a couple of pan such as square brownie pans. Put the slices in the pans, allowing a good 1/2″ around each to allow for expansion.
    Cover with greased cling film and leave somewhere warm until doubled in volume – about an hour.
     
    Cook the rolls. Preheat the oven to 180 C or 160 C fan. Bake until golden brown, take about 20-25 minutes.
     
    Make the glaze. While the rolls are cooking, make the glaze. Combine all the ingredients except the icing sugar, in a small pan and gently heat until the sugar has dissolved and the butter melted. Take off the heat and beat in the icing sugar, sieving over the top to stop lumps forming. Alow the rolls to coll for 10 minutes in their pans then pour the glaze over so that it covers all the buns and soaks through to the bottom. Allow the glaze to set for 20 minutes or so before serving with a large mug of coffee.
     
    cinnamon (3 of 4) cinnamon (2 of 4)
     

  5. Jammy Bakewell Slice

    March 13, 2014 by sarah

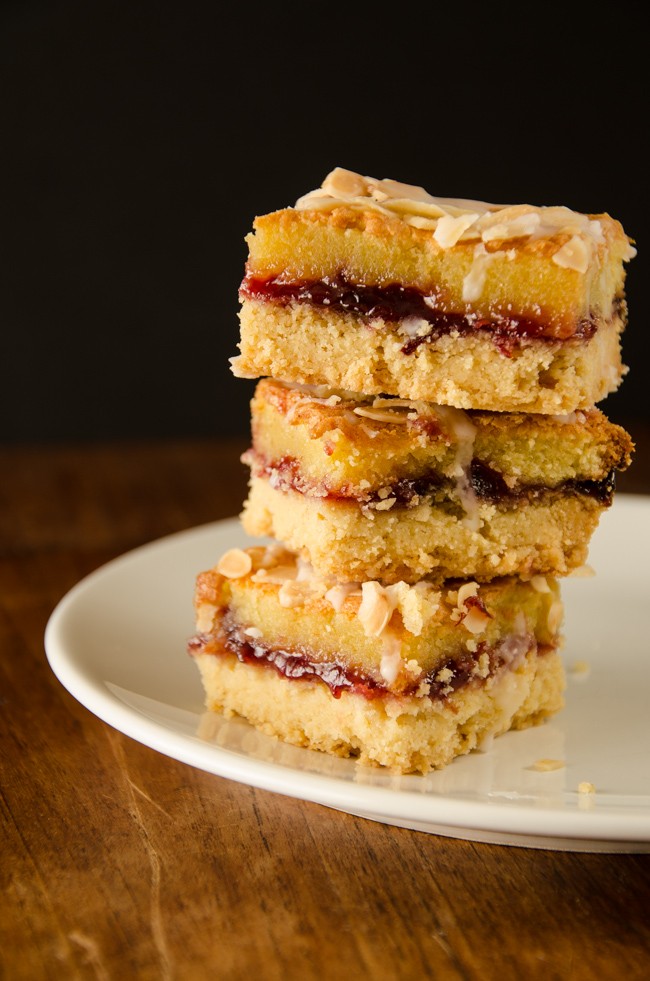
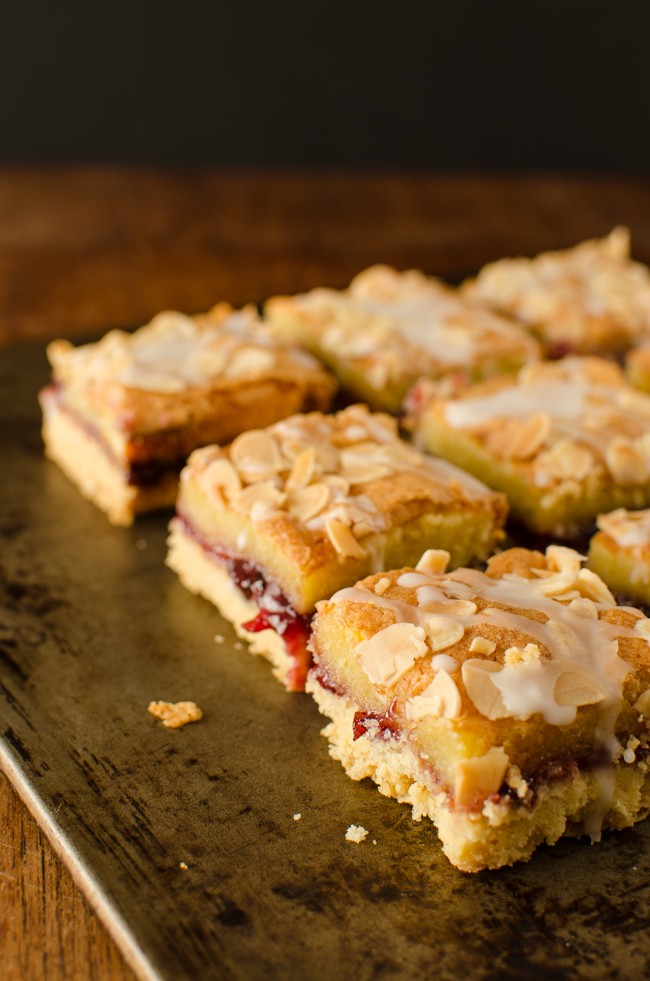
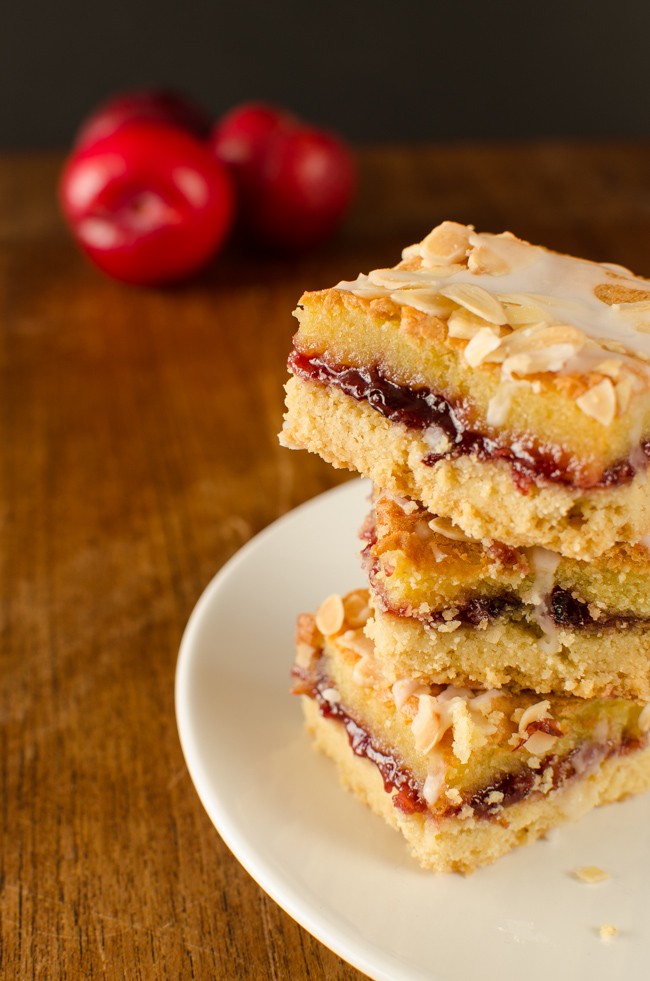
    This past weekend I woke to a sunny Spring day and a yearning for a cakey and biscuity homemade bake. I had been sorting out the jam from last year and found I had rather a lot of damson jam left over and some how a bakewell slice type of cake popped into my head. Perfect; uses up some jam, biscuity base and almost cake like top. I was right; it ticked all the boxes and I polished off 3 slices while taking the photographs. Never mind as a good long dog walk in the sun (probably) burnt off some of the calories and it made me happy to bake it, eat it and and give the leftovers to the guys at work. Top up your vitamin D levels!

    I have adapted a recipe I found online at www.bakingmad.com.

    _1SK5018


    Jammy Bakewell Slices

    300g plain white flour
    65g rice flour
    275g unsalted butter
    50g caster sugar
    1/4 teaspoon baking powder
    1/2 teaspoon salt
     
    good sized jar of good flavoured jam (cherry is traditional)
    4 medium eggs and one extra egg yolk
    150g caster sugar
    175g ground almonds (I only had 150g and added 25g fine semolina and this worked great)
    175g unsalted butter
    1/2 teaspoon vanilla extract
    1/2 teaspoon almond essence/extract
     
    25g flaked almonds
    1 tablespoon icing sugar
     
    Preheat the oven to 180 C or fan 160 C.
    Make the base by rubbing the butter into the flour, rice flour, baking powder and salt until it resembles fine bread crumbs. This made my hands ache like anything so I suggest you use a food processor if you have one.
    Bring the crumbs together into a ball and lightly knead for a few squeezes to make sure it all sticks together. This part is important otherwise your shortbread base will be too crumbly, but in a nice way. Tip in to a large square or rectangular baking tin (about 8″ by 12″, or 20cm by 30cm) and press down so equally covered. Bake for 20 minutes then allow to cool.
    While the base is cooling, make the top layer by whisking the eggs together in a large bowl then adding the other ingredients except the second lot of butter, which you melt first then whisk in.
    Spread the jam in a generous layer over the cooled base then pour over the topping.
    Cook for 20 minutes then sprinkle over the flaked almonds (this stops them getting too brown) and cook for a further 15-20 minutes. It is done when the top is golden and spongey.
    Leave to cool for half an hour and then drizzle over a simple sugar glaze made by mixing the icing sugar with just enough water to allow it to drizzle successfully. Now cut into slices and cool completely on a cooling rack. Makes about 20 pieces.
    _1SK5003 _1SK5028

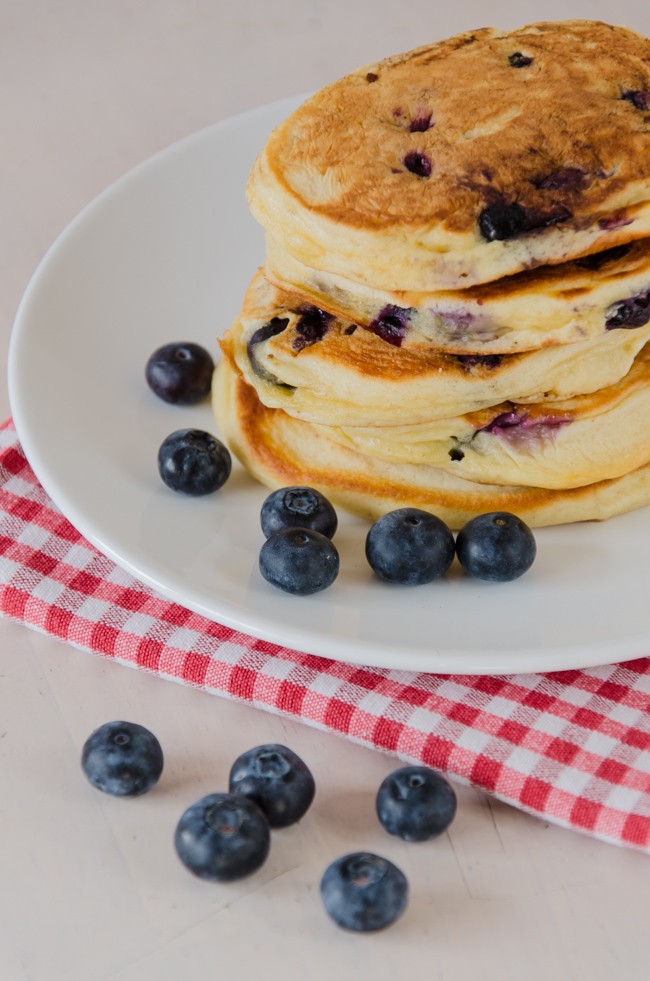
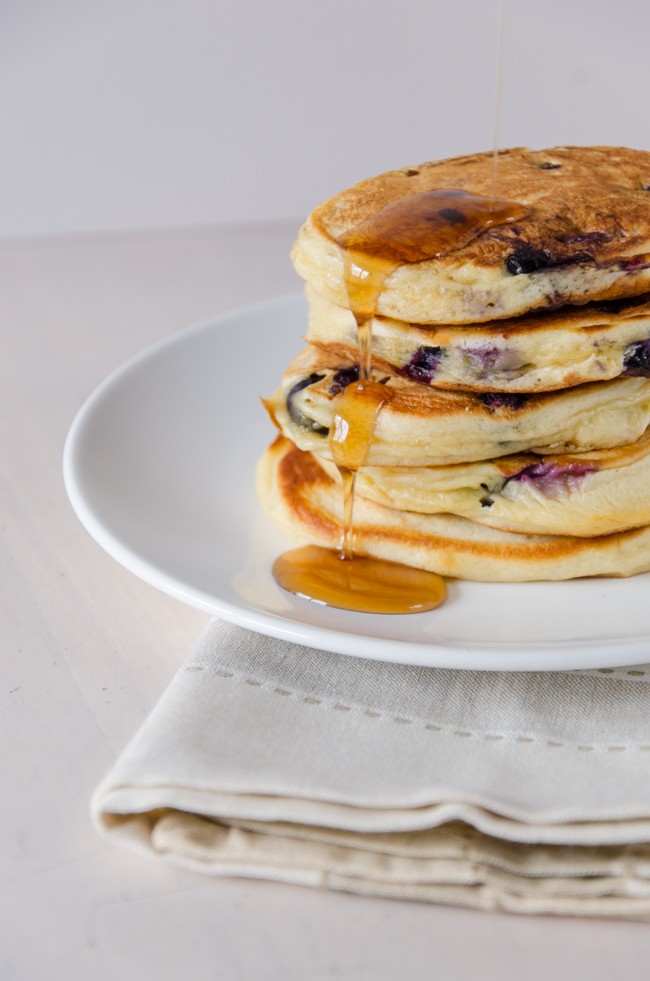
  6. Breakfast Pancakes

    March 2, 2014 by sarah

    Shrove Tuesday, alternatively known as ‘Pancake Day’ these days, is coming up this week so it is time to share a pancake recipe with you. These are not the pancakes of my youth and memories though I am still fond of the tart lemon and sweet sugar drenched crepe type and the excitement of trying to flip them! These pancakes are more of a macho breakfast type and indeed are the type to be found in American diners (or so I gather). They are similar to Scottish drop scones so I guess that is where they originated.

    This recipe is an adaption from the February edition of Waitrose Kitchen magazine. (Dangerous shopping there, but that is another story for another time). I bought buttermilk in readiness for making pancakes but I also made a second batch with an alternative to buttermilk and couldn’t tell the difference. If you don’t have buttermilk then either 1. add a couple of tablespoons of natural low fat yogurt to 250ml milk, or 2. add a good squeeze of lemon juice to 250ml milk (semi-skimmed or full fat) and leave to sit for 10 minutes before using. Some recipes also add a tablespoon or two of melted butter and this would enrich the batter but I try that for my recipe.

    I love the bursts of hot, sweet fruitiness from the blueberries but feel free to add other fruits; I am guessing that raspberries and chopped strawberries would go very well. If you do not add any fruit then try adding half a teaspoon of vanilla extract to flavour the mixture. How you serve these is entirely up to personal preference; my favourite is maple syrup and I finished off the last of the bottle today as I have been using most of it to top my morning porridge. Enjoy your lazy weekend mornings and have a proper breakfast!

    _1SK4879


    Breakfast Pancakes

    150g plain flour
    2 tablespoons of caster sugar
    1 teaspoon of baking powder
    1/4 teaspoon of bicarbonate of soda
    pinch of salt
    250ml buttermilk
    2 medium eggs
    handful of blueberries
    butter for frying the pancakes
     
    Mix together the dry ingredients in a medium sized mixing bowl. In a separate bowl or cup, break the eggs and whisk to break up the yolks. Pour the eggs and buttermilk over the dry ingredients and briefly mix with a whisk or fork but do not over mix – if should still be a little lumpy. Stir in the blueberries
    Heat a heavy based frying pan or cast-iron griddle until smoking hot then turn down to low. Add a knob of butter and spread around the pan. Blob in spoonfuls of the batter, leaving a good distance between they as the spread quite a bit. Leave to cook on the first side for 3-4 minutes until bubbles appear on the surface, then flip and cook on the other side for another 2-3 minutes. 
    The batter doesn’t keep so cook it all but the pancakes are easily warmed the next day in a low oven, microwave or even the toaster.
    _1SK4891

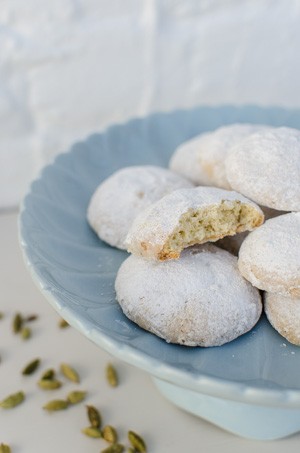
  7. Spice 3 – Cardamom – middle eastern cardamom biscuits

    February 23, 2014 by sarah

    When I started reading about cardamom, I realised that I had been spelling it wrong for years. But then why do we pronounce it ‘cardamon‘? But I suppose that is the English language for you!

    Cardamom are small pods containing little black seeds of the most wondrous, sensuous perfume. It hints of the pages of the Arabian Nights, seductive ladies in diaphanous materials and exotic places! Cardamom is native to the Indian sub-continent so it is little wonder it is used is the cooking of these countries; it is related to ginger. It is the third most expensive spice, surpassed only by saffron and vanilla, but only a little is needed to impart its heady fragrance. Unsurprisingly it is used in a multitude of curries and rice dishes of the Indian subcontinent, but also in milky puddings and kulfi from this region. In the Middle East, it is often used to flavour sweet dishes and coffee, as we had in Morocco. Its furthest reaches of significance is in the multitudes of Scandinavian baked goods that use cardamon such as Finnish pulla, an enriched sweet dough scented with cardamom.

    There is a relative of the green cardamon, the black cardamon, which is definitely savoury and smokey, almost bacony, in flavour. I will use this in another entry as it is almost completely different in flavour and aroma to the green cardamom and cannot be substituted.

    The effort in this recipe in extracting the little seeds from the tough green pods and grinding them fine enough not to notice the bits in what you are cooking. Apparently, you can buy ready ground cardamom but the volatile flavours and aromas are very quickly lost. I achieved my ground cardamom by crushing the pods and using a nail to release the seeds into a pestle and mortar and using old fashioned elbow grease to grind the seeds, sieving them into the recipe to make sure it was fine enough.

    _1SK4790


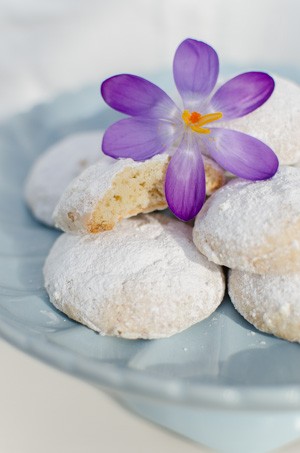
    Middle eastern cardamom biscuits

    225g unsalted butter at room temperature
    100g icing sugar
    1 teaspoon pure vanilla extract
    150g ground almonds
    150g plain flour
    1/2 teaspoon salt
    10 cardamom, seeds ground finely, sieved
    Topping – 100g icing sugar
                      – 20 cardamom pods, seeds ground to give about 1 teaspoon of ground powder when sieved 
     
    Preheat the oven to fan 150 C and line a couple of baking sheets with parchment paper.
    By hand or hand machine, cream the butter and icing sugar until light and fluffy. Add the ground almonds, flour, salt and first lot of ground cardamom and use a wooden spoon to mix thoroughly until comes together in a dough.
    Use a small ice-cream scoop or a dessert spoon to measure out the biscuits and using your hands, roll each into a ball and place on the baking trays with about 1″ between each ball.
    Chill the dough in the fridge for 30 minutes or the freezer for 15 minutes and then bake for 15-20 minutes until slightly coloured gold.
    In a bowl, mix the topping ingredients together. After baking, leave the biscuits on the trays for a few minutes until firmed up and then dunk in the topping mix while still warm. Put on a cooling rack to cool completely and then completely immerse in the topping mixture. They can be stored in the icing sugar mixture for up to a month.
    _1SK4809

  8. Throw-together flapjacks

    February 12, 2014 by sarah

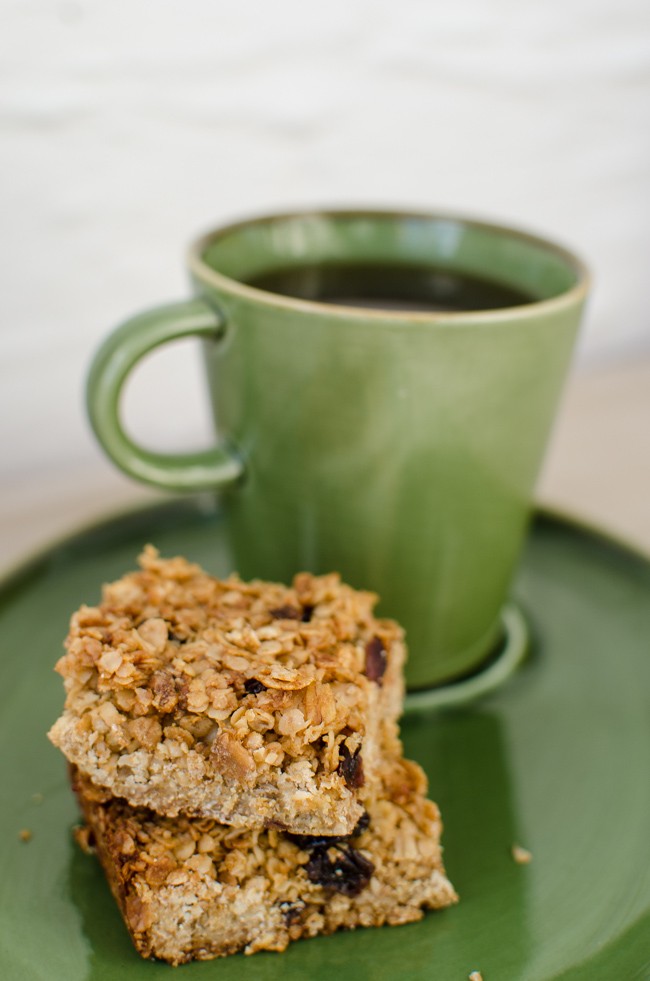
    Working a full 11 days in a row is not fun, I can tell you. So to sustain me (and the other half) through the drought of real food, I made some flapjacks. Because they take like 10 minutes; because they are chewy; because they are crunchy; but because all, they are jummy!

    Throw-together work night flapjacks

    150g butter (NOT veggie spread)
    75g muscovado or soft brown sugar
    about 100g of golden syrup (this is about 4-5 tablespoons)
    350g porridge oats, rolled oats, oat-based museli, quick oats i.e. any oaty thing in the cupboard to make up the weight
    75g raisins, sultanas, chopped apricots, seeds etc. (optional but give character)
     
    Melt the first three ingredients in a pan over a low heat until butter melted and sugar dissolved.
    Mix in a large bowl with the oaty stuff and fruit.
    Tip into a greased or lined tin (around about 9″ square or 30cm x 20cm, or whatever), press down lightly with the spoon or spatula.
    Place in oven preheated to fan 160 C for 20-25mins until golden brown.
    Allow to cool for 15 minutes before cutting into squares, rectangles, triangles, isosceles etc.
    Allow to fully cool in the tin before taking out and storing in air-tight container for up to a week (if it lasts that long).
     
    N.B. the inevitable crumbs in the tin are perfect for sprinkling on breakfast cereal like posh granola.
     
    _1SK4731

  9. Spice Up Your Life – Masala Chai

    January 1, 2014 by sarah

    Here is my first new project for 2014; 40 spices in 40 recipes in two years. This was inspired by the spices seen (and smelt) in Morocco; the lines of market stalls piled high with multi-coloured powders, roots and barks, the pungent spiciness tickling the nose. If you have ever seen inside my ‘flavour additive’ cupboard you will know that spices and the like feature frequently in my cooking. But in this series of blogs I want to take my use of spices to new places so each recipe will highlight one spice, though the recipe may contain other spices and flavour additives the ‘main’ spice will be the predominant flavour. Also, I want to discover new spices and unusual ways of using familiar ones, so look out for traditionally sweet spices in savoury dishes and visa versa.

    What is it about spices? Any flavour additive (a term of my invention) turns a basic dish into something extra-ordinary, something special. Think of the sensations of eating a warmly spiced curry; the burning feeling in the mouth that is exciting and somewhat shocking, dangerous even. But then subtleties of a delicately spiced Christmas biscuit or the richness of vanilla in ice cream.

    So first we need to know what we are using i.e. what is a spice? Well it turns out not to be an easy question to answer. The fountain of all knowledge that is Wikipedia (wink, wink – they like to think they are the bible but some of the information is flawed so take it with a pinch of salt) says a spice is ‘a dried seed, fruit, root, bark or vegetable substance primarily used for flavouring, colouring or preserving food’. So a dried part of a plant other than the leaves because the leaves are herbs. Ok, I think I’ve got it. But what about fresh spices like ginger root or garlic, they don’t HAVE to be dried do they? If they aren’t spices (or herbs) then what are they in a culinary sense? Ginger can be fresh or dried but both forms taste and act differently. Looks from a whiz around the internet that things like ginger, garlic, horseradish and capers are considered vegetable or flavourings rather than spices. Ok, we will stick to dried forms then.

    So we come to our first recipe. I am not going to call this one of the official recipes of the project, because as the name implies, it contains several different spices and not one over-riding flavour. This recipe is adapted from a packet of ‘Chocolate Chai’ I bought in a Whittards shop and had been languishing in the back of the cupboard for a year until I made a pot a few weeks ago and discovered how delicious it was. The bought version was based on coco kernels which look and taste exactly like coco nibs (available from health food shops) so feel free to substitute them for the black tea. It made a fantastic mildly spicy and faintly chocolaty drink.

    _1SK4577_1SK4556

    Masala Chai

    You can add or substitute in really any spice you like, typically things like coriander, fennel, black pepper, star anise.
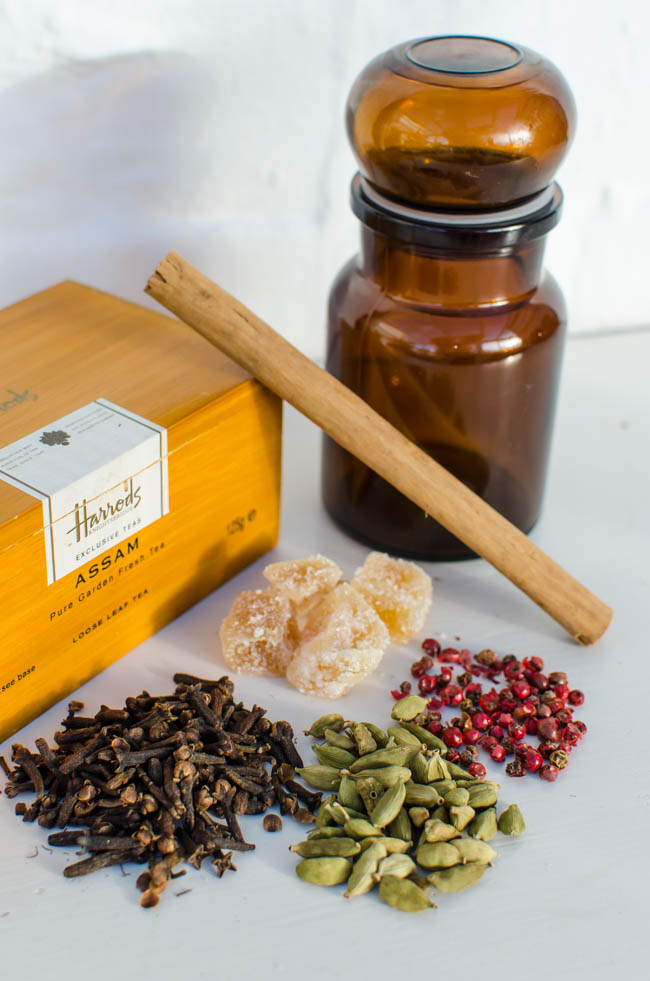
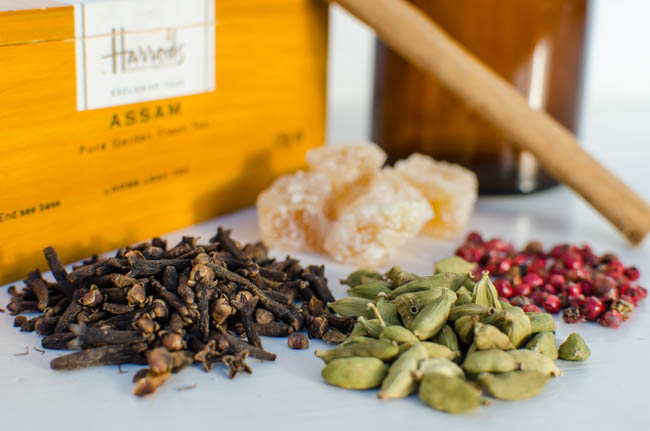
    3 cups loose black tea (about 100g)
    36 green cardamon
    1 teaspoon pink pepper corns
    2 teaspoons cloves
    4″ piece of cinnamon broken into small shards
    8 pieces of candied stem ginger in sugar, finely cut up
     
    Mix all the ingredients together and then store in a kilner jar or other similar jars for gift giving. I bought some empty tea bags with drawstrings which can be filled and then used like regular tea bags.
     
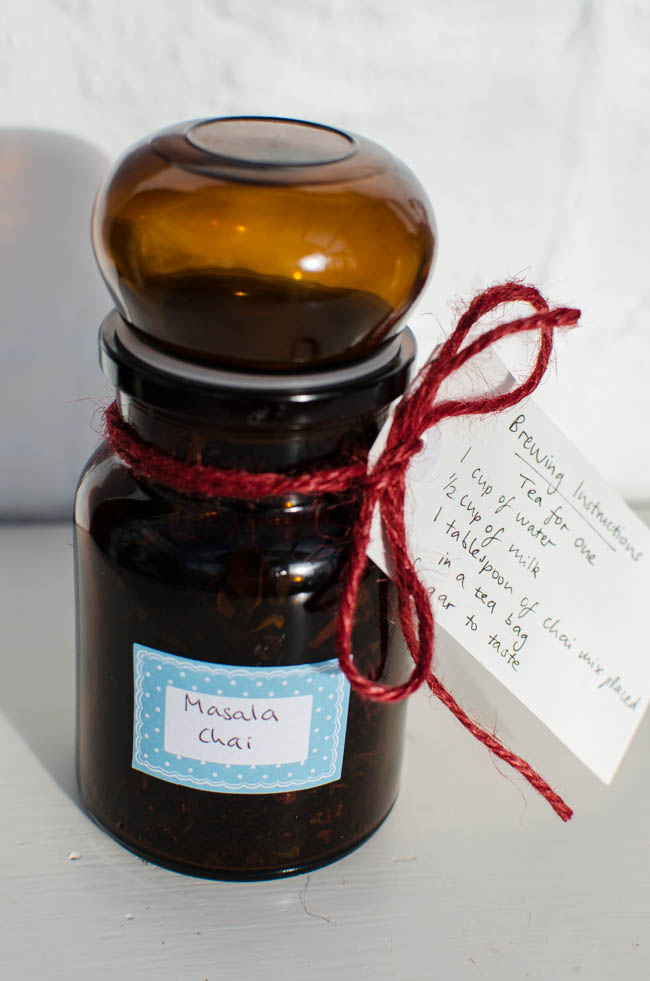
    Brewing Instructions
    tea for one
    200ml of water
    100ml of milk (preferrably whole milk)
    1 tablespoon of Chai Mix placed into a tea bag
    Sugar or honey to tasteBring the water to a boil and add the teabag. Turn off the heat and let steep for about 5 minutes. Add the milk, turn on the flame and reheat until hot. Remove from heat, discard teabag, sweeten to taste, enjoy!
     
    _1SK4551

  10. Posh crackers for cheese

    December 29, 2013 by sarah

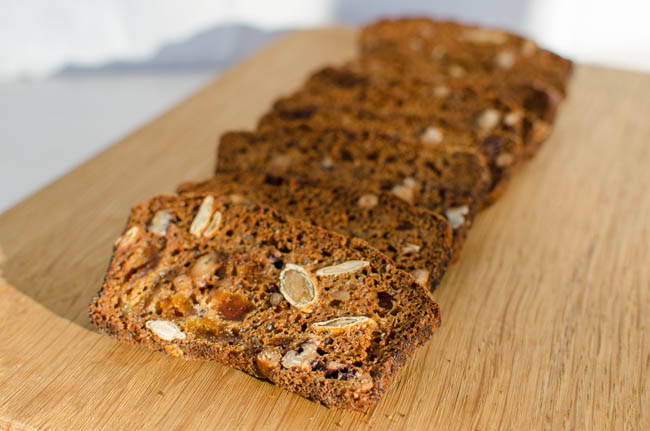
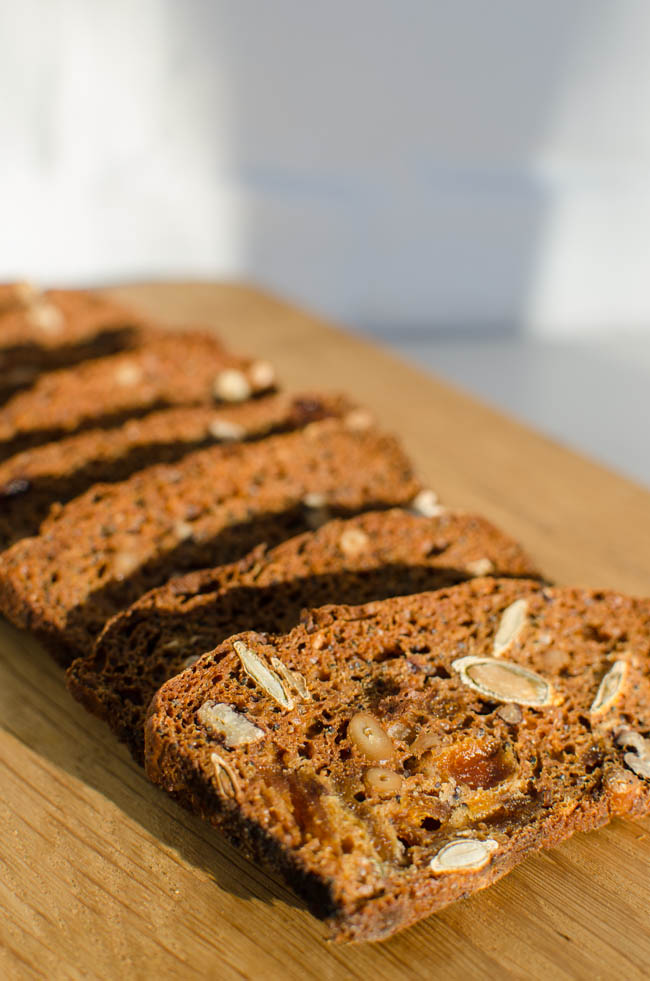
    I made these to go with the cheese board over Christmas. If you know me, you how much I love cheese. But now I have found a recipe for crackers that are good enough to eat in their own right rather than just being a token apparatus to get cheese to the mouth!

    The original recipe is here on ‘theKitchn’ and seems to be very adaptable and forgiving. I don’t normally cook by cup measurements as it doesn’t seem accurate enough for baking (and I don’t own a cup measure) but I used a small plastic cup as the measure and got stuck in. The recipe is based on soda bread. I shoved in some dried apricots and a mix of nuts and seeds as I didn’t have enough of any particular one and the only brown flour I had in the house was strong bread flour. AND they still came out fantastic. I still have one of the loaves in the freezer for another round of crackers when I feel like it! Brill!

    _1SK4583


     1 cup dried fruit e.g. cranberries, apricots, dates, raisins
    3/4 nuts e.g. pecans, walnuts, hazelnuts
    1/2 cup mixed seeds e.g. pumpkin, sunflower
    1 cup plain flour
    1 cup whole wheat, rye, spelt or other whole-grain flour
    1/3 cup soft brown sugar
    1 tablespoon herbs e.g. rosemary or thyme
    2 teaspoon bicarbonate of soda
    1 teaspoon of salt
    2 cups milk with 1/2 teaspoon of lemon juice added, leave for 10 minutes
     
    Preheat oven to 180 °C or 160 °C if fan. Grease two loaf tins.
    Place the dried fruit in a small bowl and pour over very hot water from the kettle. Allow time to plump up while you get the other ingredients together.
    Toast the nuts in the oven until golden brown and fragrant and then roughly chop. Set aside.
    In a large mixing bowl, whisk the flours, herbs, bicarbonate of soda, salt and sugar. Pour over the buttermilk and stir together with a spatula until no dry mixture remains but do not continue mixing beyond this.
    Drain the dried fruit and if using a large fruit such as apricots or dates, roughly chop. Add the fruit with the nuts and seeds to the batter, stir gently to mix. Do not be worried if your batter look very liquid at this stage.
    Divide the batter evenly between the two loaf tins, place on a baking sheet and put in the oven for about 30 minutes, until a skewer comes out clean.
    Remove the cakes from the pans and allow to cool completely on a cooling rack. Then wrap in cling or greaseproof paper, put in a freezer bag and pop in the freezer until you are ready to do the next stage, but they need to be frozen for at least 4 hours before they are firm enough to cut thinly.
     
    When you are ready to turn the cakes into crackers then preheat the oven to 150° C. Remove one of the loaves from the freezer and unwrap. With a very sharp knife, slice  as thin as possible. Lay the slices out on baking trays so they are one layer thick.
    Bake the slices for 15 minutes, turn the slices over and continue cooking for another 10 minutes or so. They should now have turned a darker colour, be starting to curl at the edges but not blacken. Do not worry if they are still a little soft in the centre as they will firm up when you cool them on a cooling rack. Store in a airtight tin until ready to be eaten.
     
    _1SK4602