RSS Feed

Posts Tagged ‘bake’

  1. Meringue nests – Uses for eggs!

    June 15, 2014 by sarah

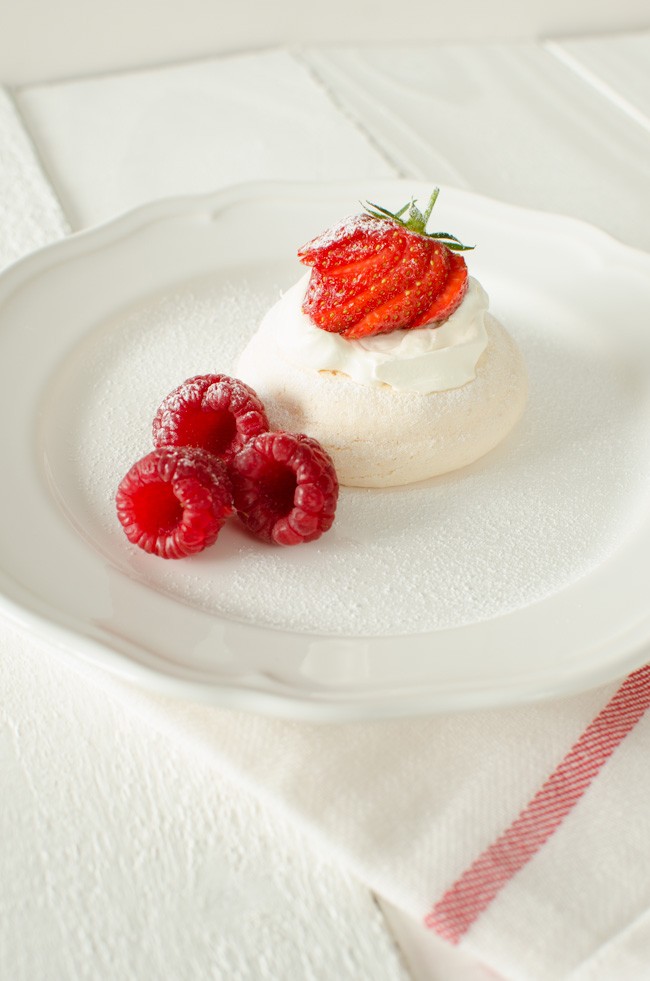
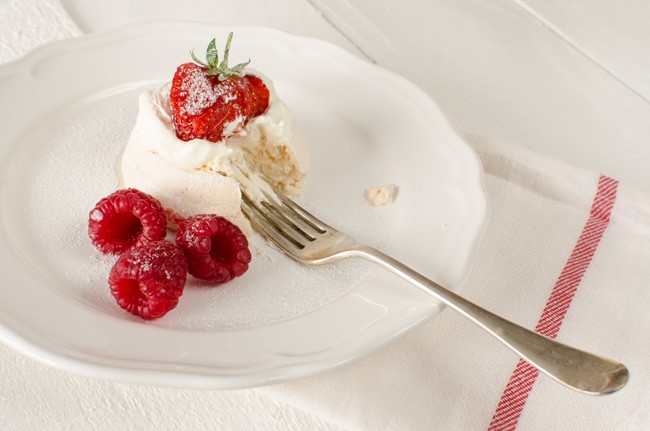
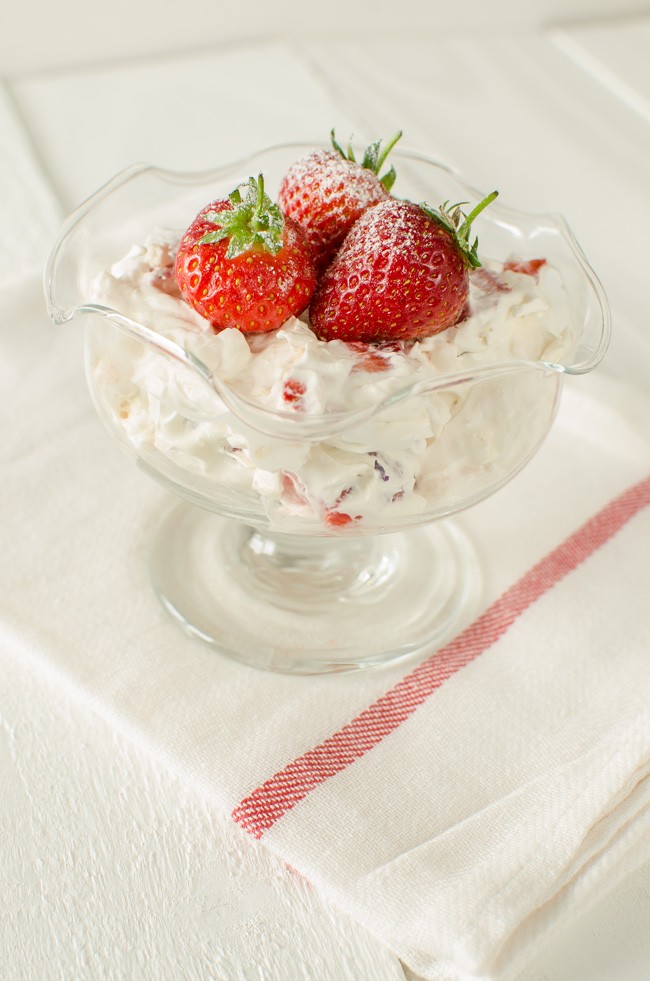
    Meringue. A word that can instill fear into the heart of even the most experienced cook. Sometimes it works and sometimes it doesn’t and usually you can never work out why. But understanding more about eggs and the chemical reaction that makes meringue can help demystify it and hopefully prevent so many failed egg dishes. Though I can knock out a batch of meringues without much thought, I still get some disasters though they always taste better than they look! A meringue is never a failure, you might just have to opt to serve Eton mess rather than neat nests. There is nothing better than sweet meringue, smooth and silky cream and tart berries.

    meringues (7 of 9)

    Eton mess

    meringues (8 of 9)

    Strawberry meringue nest

    Egg whites consist over 90% water and various proteins make up the rest. When you whisk egg whites, you are breaking down the protein structure so that the protein strands lengthen and air bubbles become entrapped within this lattice structure. When whisking egg whites it is very important to have scrupulously clean bowl and whisk. I prefer a metal or bowl as it is supposed to help the egg whites trap more air or if using a glass bowl, I clean it first with kitchen paper with a little vinegar and left to dry. It is also very important not to get a single speck of egg yolk in with the whites so it is a good idea to break the eggs individually into a small bowl before adding the whites to your larger bowl to avoid messing up the whole lot. A drop of lemon juice or a pinch of cream of tartar is often added to the egg whites at the start of beating as it is supposed to help stabilise the bubbles. This is unverified; I think I need to do more experimentation to see if it makes a noticeable difference. Very fresh eggs whisk the best as the white is firm and not runny. This is part of the reason why I got chickens of my own. Interestingly, fresh eggs make awful hard boiled eggs as they are impossible to peel! Remember that eggs you buy in the supermarket will probably be at least a week old by the time you buy them and the ‘best before date’ will be up to 5 weeks after they were laid!

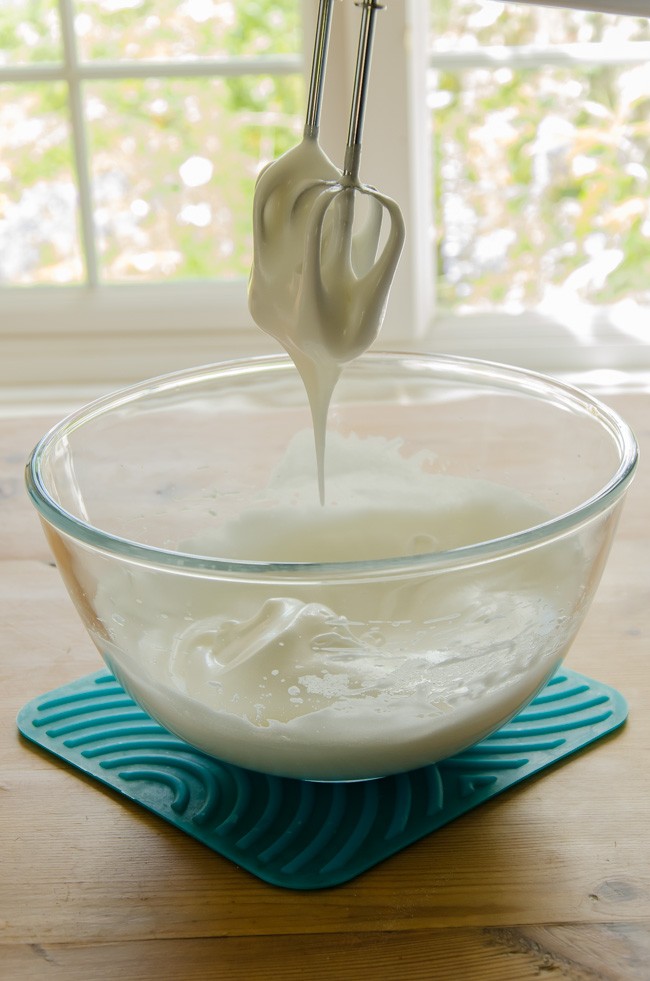
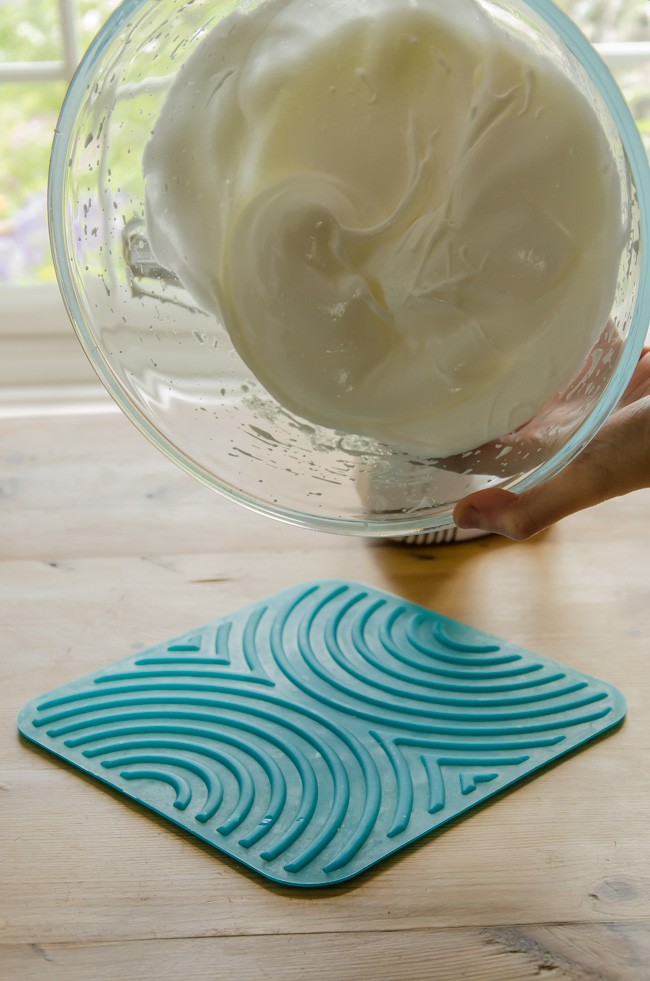
    When you start whisking eggs, start on a slow speed for a minute or so before increasing the speed. The soft peak stage, as used for souffles and mousses, occurs when you lift the whisk out of the egg whites and the peak slowly folds over into the mixture. The bottom of the bowl may feel slightly liquidy and slip around the bowl. The stiff peak stage happen fairly soon after so keep watching and testing. Egg whites beaten to this stage are used for meringues and you can tell when you have reached this stage as the peaks when you lift out the whisk are firm and do not sag. Also the whole bowl should be whisked to the same stage so at firm peak stage you should be able to turn the bowl over your head and not get a santa hat of egg whites! To prevent meringues from weeping when cooking, you must make sure the sugar is thoroughly dissolved in the egg whites and that you use very fine sugar.

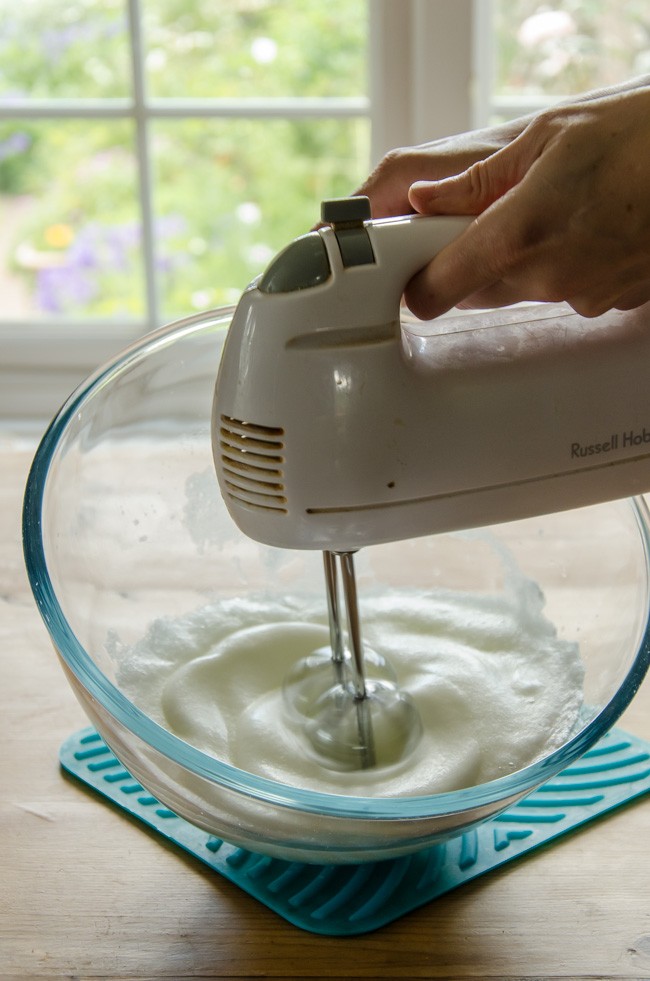
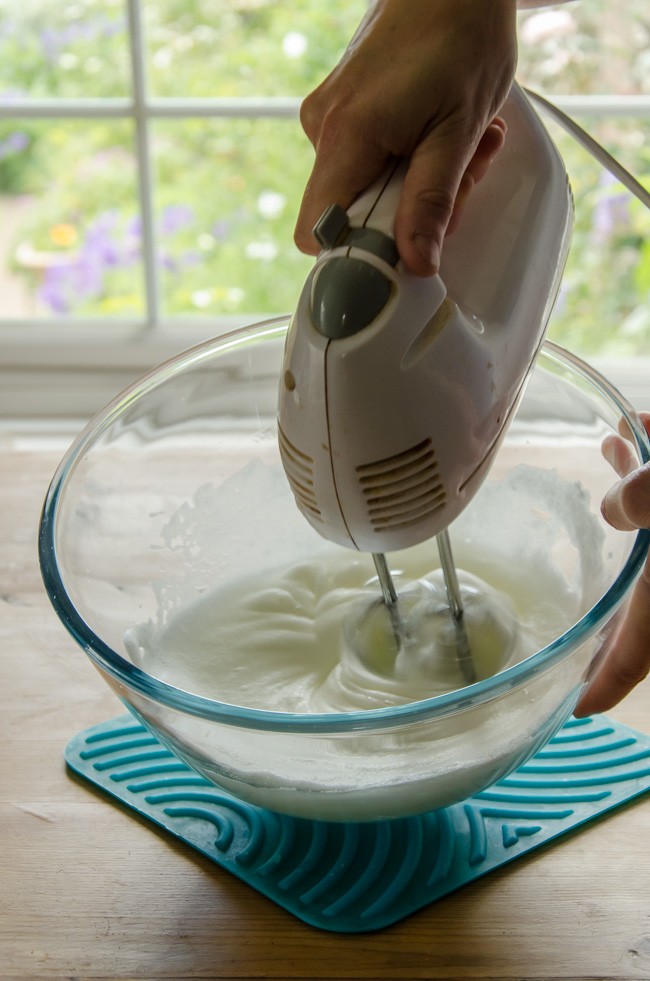
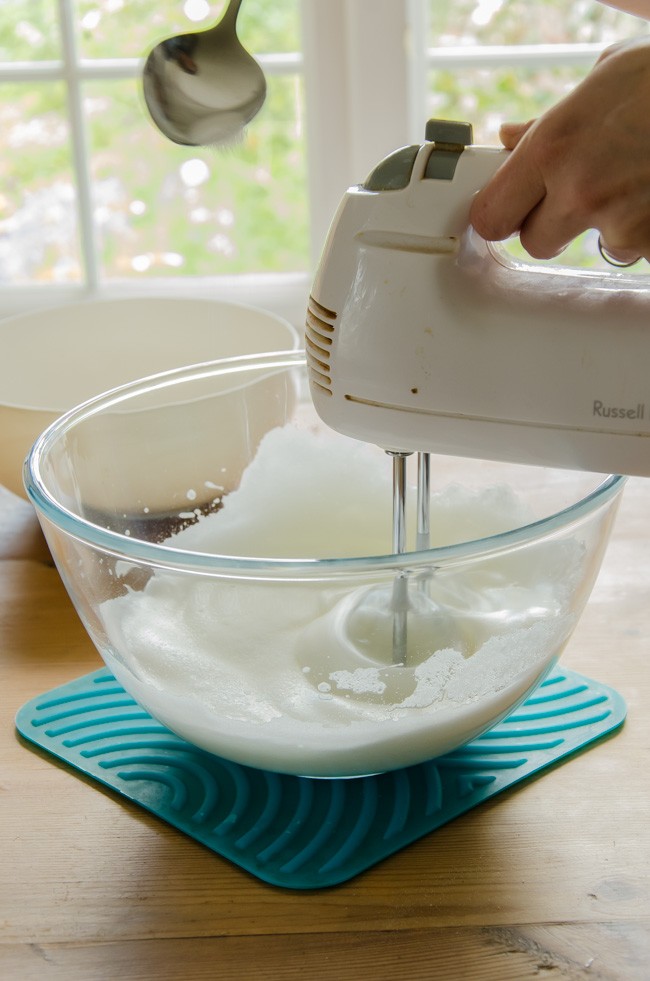
    I don’t know if equipment matters too much when whisking meringues; after all, it used to be done with a hand whisk. Think of those muscles! I use a handheld machine but would love a stand machine, especially if it came with whisk attachments rather than the all purpose ones I currently have. I am not sure it would make a huge difference to my meringues, but there is only one way to tell! I do put a silicone mat under the bowl as I whisk to prevent the bowl from spinning off the counter.

    There are three types of meringues and I will give the recipe for simple ones below. Swiss meringues are probably what we are all familiar with. The egg whites are beaten to soft peak stage, half the sugar is added and whisking continues until stiff peaks are achieved and the mixture is glossy; then the rest of the sugar is folded in. This mixture is suitable for simple piping like the nest I made for the afternoon tea or pavlova layers or toppings for pies, but it must be used quickly other it turns back to liquid. Italian meringue is made by adding hot sugar syrup to whisked egg whites and whisking until cool. This meringue is more stable and is the best choice for piping delicate items. Cooked meringue, also known as meringue cuite, is made by whisking the egg whites with the sugar in a bowl over boiling water and this is the most stable type of meringue.

    One final note on making meringues and that is you MUST use baking parchment, also known as silicone paper, to line the trays. Greaseproof paper has a wax coating that resists water so is used for wrapping and layering food and with sticky food like dough, but the coating melts in the oven so the food then sticks to it unless you pre-grease it like for a sponge cake. Baking parchment has been treated so that the non-stick properties do not disappear in the heat of the oven; essential for high sugar foods such as meringues, macaroons and even sponge cakes that you do not pre-grease the paper lining the tin such as genoese sponge.

    meringues (9 of 9)


    Simple Meringue Recipe

     
    4 large egg whites, cold from fridge – about 120-150g of egg white if mixed egg sizes
    pinch of cream of tartar
    225g caster sugar
     
    Preheat the oven to 110 ºC/ fan 100ºC and line a couple of baking trays with baking parchment/silicone paper.
    Tip the egg whites into a large bowl and whisk on slow speed until foamy and then add the cream of tartar. Continue to whisk on medium speed until soft peaks are reached and just turning to stiff ones.
    Turn the speed up and add the sugar a dessert spoonful at a time, beating for 3-4 seconds between each addition.
    Once half of the sugar has been added and the egg whites are glossy, add the rest of the sugar in one go and beat for a few seconds more until well mixed and not granular when touch between you fingers. But try to resist over beating. If you over beat, put in the fridge until cold again and try again. Theoretically you should fold in the last half of the sugar but I find it doesn’t mix in well so you get sugar bleeding in the finished meringue or to fold it in well enough the mixture becomes deflated and becomes sloppy.
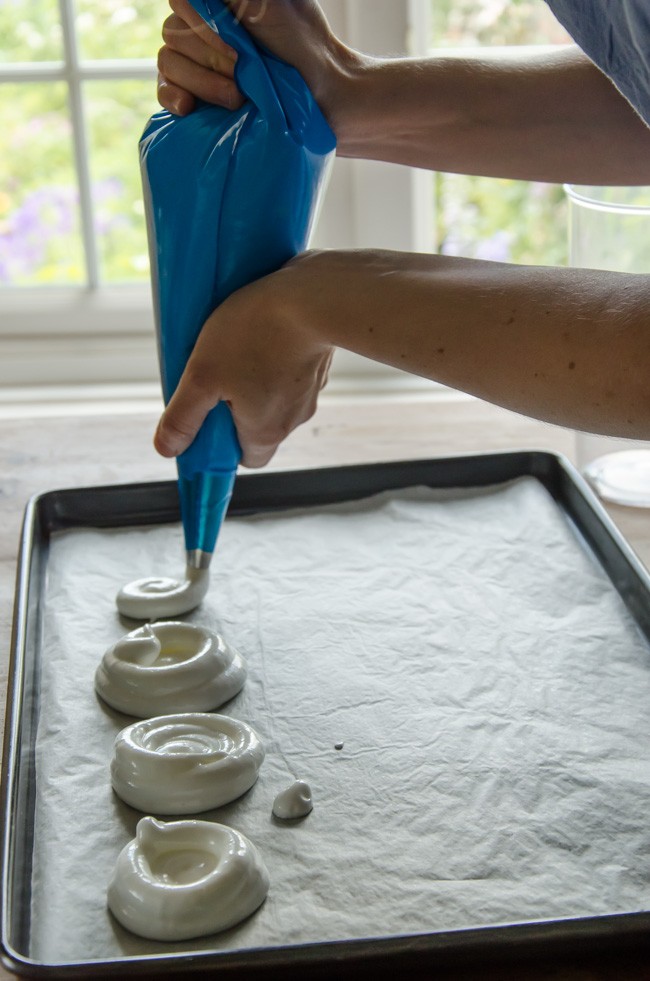
    Pipe or soon the mixture on the lined baking trays – you can only manage rough shapes with this type of meringue.
    Bake for about 1 and half hours. I cook for an hour then prop the oven door open and let them cool in the oven and this leaves the meringues with a soft, chewy centre. If you like them dry all the way through then cook for the full 1 and half hours at least.
    When cool, they can be stored in an airtight container for up to 2 weeks, or frozen indefinitely.
     
    meringues (1 of 9)

    Step 1 – whisk egg whites to soft peak stage.

    meringues (2 of 9)

    Step two – make sure you move the beaters around the bowl.

    meringues (3 of 9)

    Step three – add the sugar a spoonful at a time.

    meringues (4 of 9)

    Step four – keep beating until stiff and glossy.

    meringues (5 of 9)

    See – stiff peaks, shouldn’t slide out the bowl.

    meringues (6 of 9)

    Step five – pipe as required on to baking parchment.


  2. Afternoon Tea – chocolate eclairs

    May 25, 2014 by sarah

    A lovely thing to do when friends get together is to make something that can be shared around and enjoyed by all. And last Friday I had the occasion as the practice where I work had a communal Birthday lunch so that we could all celebrate (or not) our Birthdays on one day. More like a ‘unbirthday party’, for you who remember Disney’s Alice in Wonderland. The weather wasn’t too bad so we had a BBQ outside in the garden and I made something sweet for after. I love a fresh pastry and rarely eat cream so these pastries were a real treat.

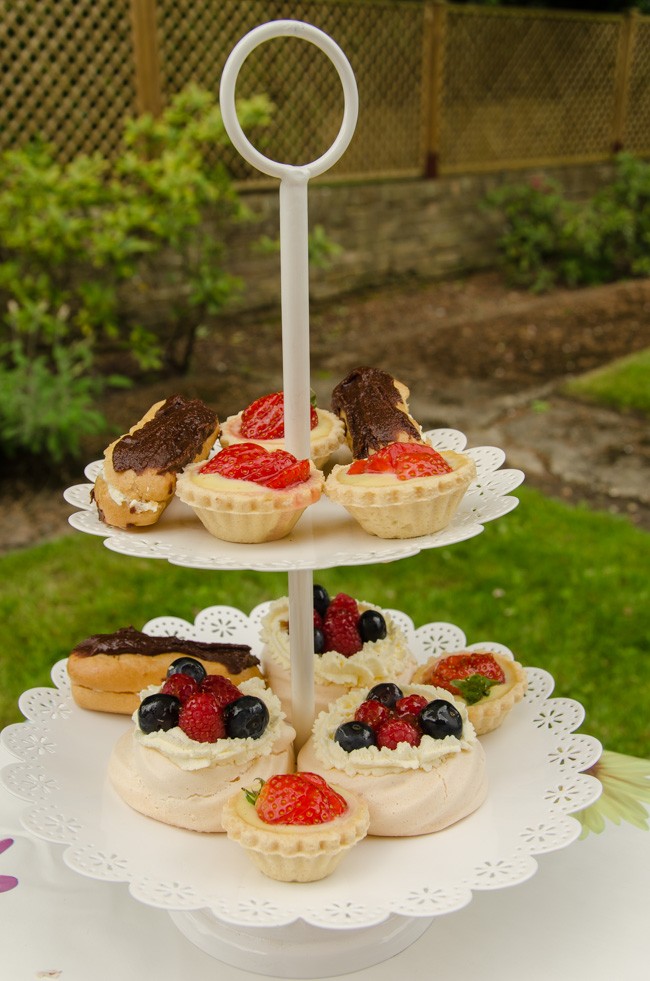
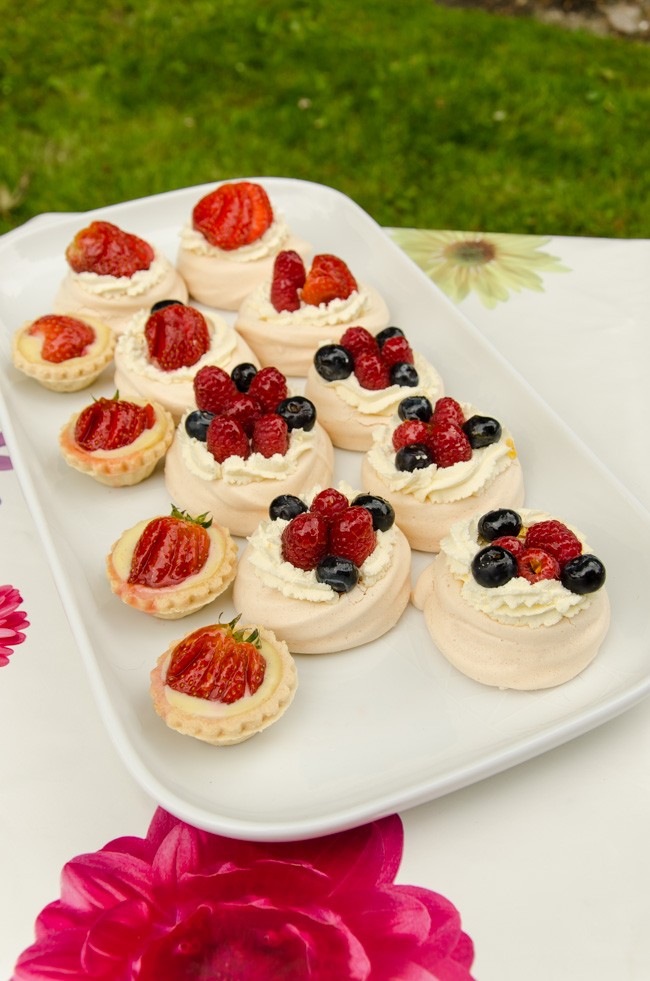
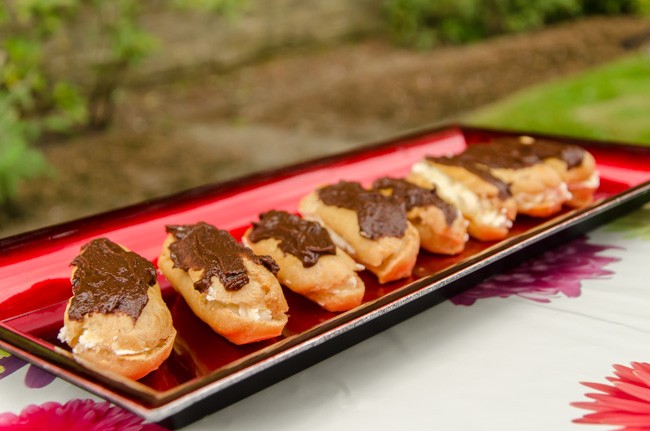
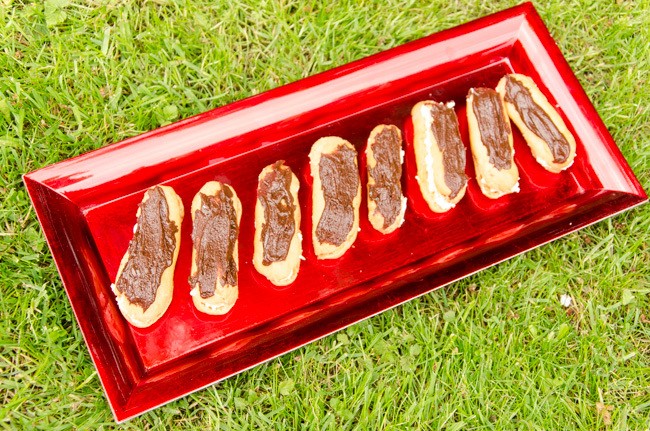
    I made chocolate eclairs, some meringue nests filled with cream and fruit and strawberry tarts. OK, I cheated a little; the pastry tartlet cases are bought not homemade but all the rest was made by my fair hand. This was only the second time I had made choux pastry and I have to say, it really isn’t too hard. In fact, I only just got over my phobia of making shortcrust pastry last year and I think that choux pastry is actually easier! Well, that’s done it. I am sure next time it will be a complete failure! I will share the recipes for meringue nests and crème patissière on a future post. If the weather is good this Bank Holiday weekend, why not treat your loved ones to some home made pastries as part of an afternoon tea. A lovely way to celebrate together.

    chocolate eclair (3 of 4)

    Cake stand of yummy homemade things!

    chocolate eclair (4 of 4)

    Platter of meringues and strawberry tarts

    Chocolate Eclairs

    Makes 18-20 mini eclairs or 12 full sized ones.

    For the choux pastry

    50g unsalted butter

    65ml water and 65ml milk

    Pinch of salt

    100g plain flour, sifted

    3-4 medium free-range eggs, beaten

    For the filling

    300ml whipping cream, whipped to firm peaks

    Or 450g crème patissière

    The icing

    50g plain chocolate

    2 tablespoons of water

    15g butter

    75g icing sugar, sifted


    chocolate eclair (1 of 4)

    Method

    1. Preheat the oven to 220°C/fan 180°C. Lightly greasy 2 baking trays or line with silicone paper.
    2. For the choux pastry, place the water, milk, butter and salt in a medium non-stick saucepan over a medium heat. Heat gently until the butter has melted then bring to the boil.
    3. Quickly take the pan off the heat, add all the flour at once and beat furiously with a wooden spoon until the mixture is completely smooth and comes together in a ball.
    4. Continue to beat on a low heat for a minute so the mixture comes together in a ball.
    5. Allow to cool slightly then beat in the eggs, one spoonful at a time into the dough. This is very hard work and you need to keep going until the pastry has a smooth shiny consistency and is paste like. You may not need all the eggs to reach the correct consistency as it must not be too soft as it needs to be piped.
    6. Transfer this pastry to a piping bag fitted with a 1cm (1/2 inch) plain nozzle and allow it to sit for 5 minutes to firm slightly. Now pipe the pastry in 3 inch (7.5cm) straight lengths (or full size eclairs are 6 “), leaving room between to spread. Apparently for a professional finish you can pipe into long lengths then freeze the pastry. Then cut the frozen lengths into uniform lengths and defrost before cooking.
    7. Bake the pastry at this temperature for 10 minutes then turn the temperature down to 190 °C/fan 170°C and cook for another 20 minutes.
    8. Remove the pastries from the oven and while still hot and pierce or cut to release the steam and if they feel damp on the inside, place back in the oven for 5 minutes.
    9. Allow to cool fully on a wire rack before filling. If not filling immediately, place in an air-tight container and use within a couple of days. If they are slightly soggy when you take them out, give them another 5 minutes in the oven.
    10. Pipe in the whipped cream or cream patisserie (use a star nozzle for the cream, plain nozzle for cream pat).
    11. For the icing, melt the chocolate slowly in a bain mairé with the water and butter. Remove from the heat and beat in the sugar until smooth. Pipe or spread over the top of each eclair.

    One last thing. The icing recipe didn’t work too great (I found it in Mary Berry’s book) but that may have been because it set firm before I was ready for it so I had to rewarm it and that is when it went grainy. Just to warn you if it looks like it is not going to work, perhaps just go with melted chocolate.chocolate eclair (2 of 4)


  3. Marmalade Loaf Cake and Crystallised Flowers

    April 6, 2014 by sarah

    OK folks, a brief posting for a cake I made last weekend as I am totally pooped! I would of thought I would have more energy now Spring has finally arrived, but as usual there is too much to do and too little time! I made some marmalade last Saturday so to make space for the fresh stuff, I went through the cupboards to find any of last years marmalade. There was only one jar left so a third went into this cake. I just need to find a recipe for the rest – any suggestions?

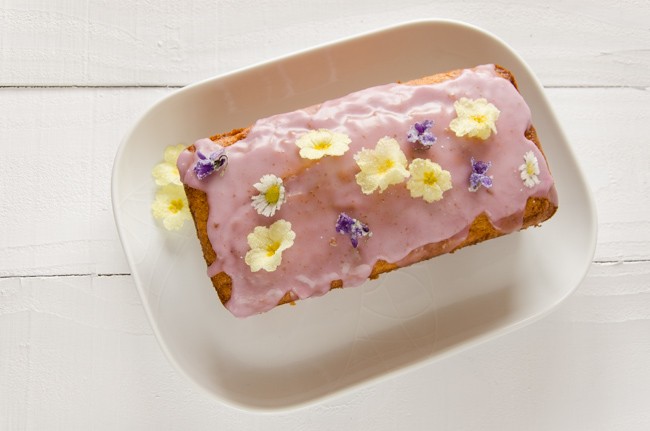
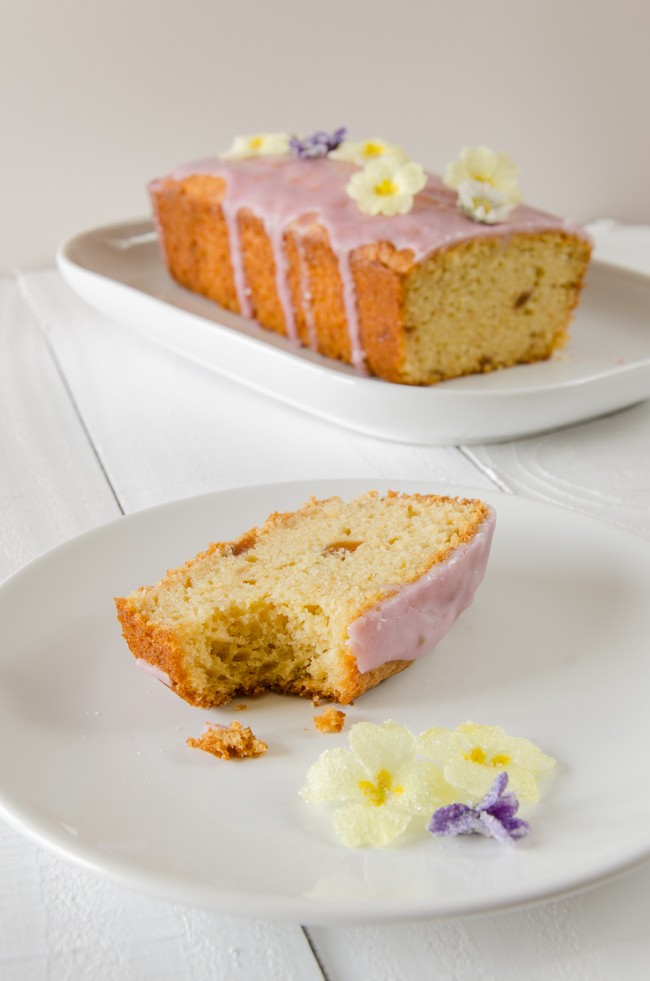
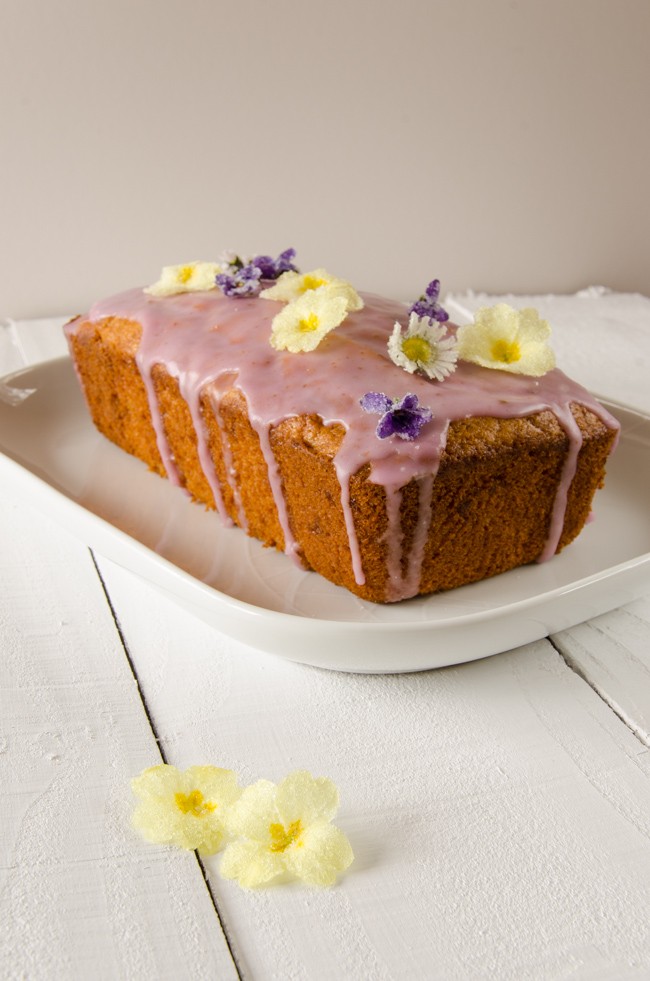
    This cake is lovely and zing and oh so spring like, especially with the crystallised flowers (ahh, pretty). I saw a recipe in a magazine using them recently and jotted it down as something to do. I was thinking of how to decorate this cake and these flowers were surprisingly easy. Take one egg white and add a dash of cold water and whisk to break up the white. Use a small clean paint brush to brush the egg white all over the flowers and then hold over a second bowl and sprinkle over caster sugar. Leave on a baking rack to dry for 24 hours. Make sure you use edible flowers (see this website for a good list of flowers). I used primroses, daisies and violets. I then used the left over egg and sugar in the recipe so nothing was wasted. I am happy when nothing is wasted!

    marmalade cake (1 of 3)

    Marmalade Loaf Cake


    • 225g self-raising flour
    • 1 pinch salt
    • 115g margarine
    • 85g caster sugar
    • 1 teaspoon orange rind, finely grated
    • 1/2 teaspoon baking powder
    • 2 eggs, beaten
    • 2 good tablespoons thick cut orange marmalade
    • 2 tablespoons milk


    1. Preheat the oven to 170 C / fan 150 C. Grease a 1lb loaf tin (or a 6 inch/15cm round cake tin).
    2. Cream the margarine and sugar in a large bowl.
    3. Add all the other ingredients and use hand mixer to mix well but don’t over do it; it should look like thick batter.
    4. Don’t worry about the occasional wee lump, remember there’s orange rind in the mix! Pour the mixture into the prepared tin.
    5. Bake in the center of the preheated oven until golden brown, about 1 hour. Allow to cool for 5 minutes in the tin, then tip out onto a wire rack.
    6. While the cake is still warm, spread a thin layer of warmed marmalade over the top. Allow to cool, then slice and enjoy.
    7. Alternatively, when cool ice with glace icing and decorate with crystallised spring flowers.

    marmalade cake (3 of 3) marmalade cake (2 of 3)


  4. Spice 5 – Cinnamon – Cinnamon Rolls

    March 30, 2014 by sarah

    Cinnamon. A beautiful warm, sweet spice, which I am sure we are all familiar with. Essential in many of the recipes we know and love, such as apple pie and mulled wine. True cinnamon comes from the bark of young saplings of Cinnamomum verum, a tree native to Sri Lanka (also known as Ceylon), which is stripped and rolled by hand to form quills. The cinnamon available in Europe can only come from this source, but it is also possible to get ‘cassia’ which is harvested from other Cinnamomum species, but is less aromatic and subtle than true cinnamon and the bark is much tougher. Cinnamon has many health benefits including anti-clotting and anti-oxidant actions, helping to control blood sugar levels in diabetes, and anti-viral and anti-microbial actions. However, too much cinnamon can be harmful due to it containing coumarin which can cause liver and kidney damage in high concentrations. The EU has set limits to reduce exposure to this but at levels that will actually affect the taste in the produce – so if you want your cinnamon baked goods to actually taste of cinnamon, you know who to blame so make it yourself! See this article on cinnamon!

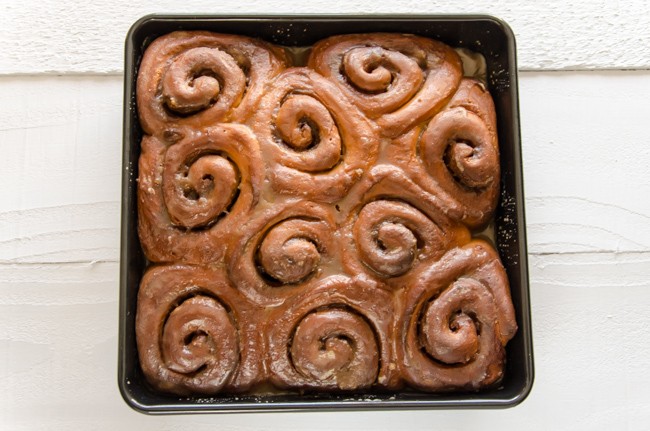
    cinnamon (4 of 4)


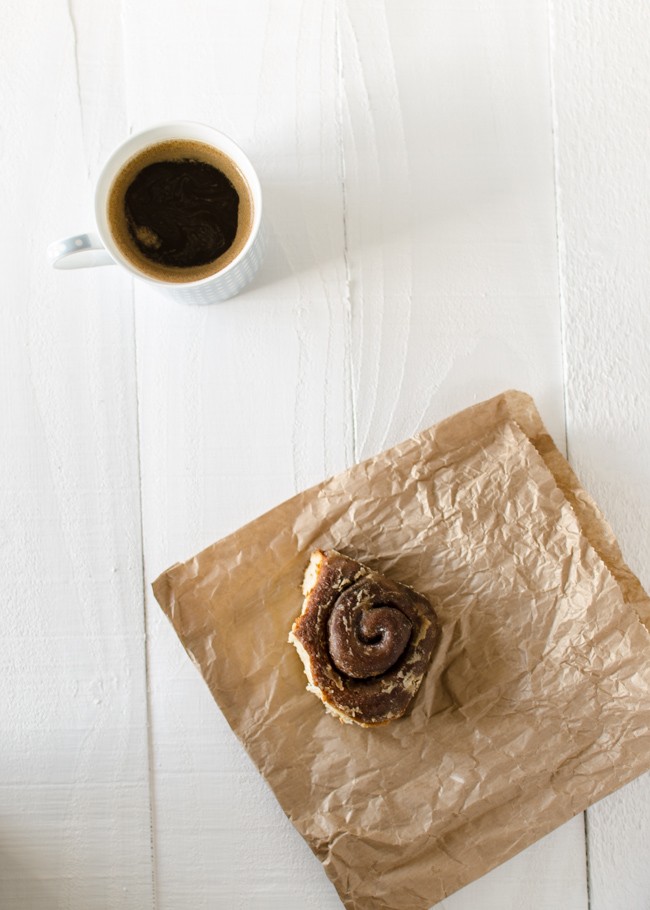
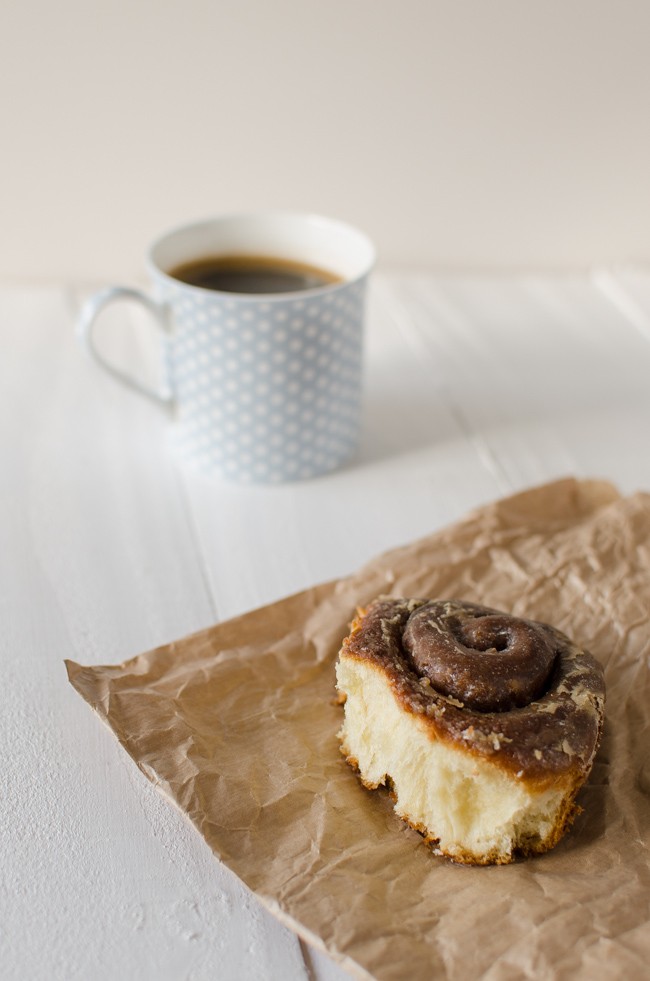
    I decided to make cinnamon rolls as they were made recently on a blog I follow irregularly. However, this and all the other recipes I could find were American so had the usual problems with measurements in cups and using something called all purpose flour. Also, this is an enriched dough and in the past I have had great trouble getting enriched dough, such as for hot cross buns or stollen, to rise. Where do you leave your dough to raise – an airing cupboard or low oven? I found that using a reptile heat mat obtained online for a small sum gave me a specified level of warmth so that even on the coldest winters day when the heating has been off for hours I can still rise dough and make bread. This time I used our conservatory as the sun had been warming it all day but did the second proving on the mat as it was evening by then.

    cinnamon (1 of 4)

    Grown-up Cinnamon Rolls

    Dough
    500g strong white bread flour
    100g caster sugar (golden/unprocessed if you have it)
    75g butter, melted
    2 medium free-range eggs, beaten
    200ml milk
    1 sachet/7g dry yeast
    1 teaspoon salt
    zest of 1 lemon
     
    Filling
    50g unsalted butter, softened
    100g soft brown sugar
    2 teaspoons of ground cinnamon
    1/4 teaspoon freshly ground nutmeg
    1/4 teaspoon salt
     
    Glaze
    150g soft brown sugar
    1 tablespoon whiskey or other alcohol of choice
    1 teaspoon vanillar extract
    30g butter
    115g icing sugar
     
    Make the dough. Heat the milk until body temperature/tepid and add the yeast; leave until starting to foam (how quickly depends on type of yeast). In a large mixing bowl, mix the flour, sugar, salt and lemon zest and make a well in the middle. Into the well add the now activated yeast, the two beaten eggs and the melted butter. Mix with fingers/hand until comes together then turn out onto a well floured surface. Knead for about 5-10 minutes until comes together and is silky smooth. The dough will be quiet wet/tacky to begin with but keep working and will firm up. If it feels very sticky, add a little more flour when kneading.
    Place the kneaded dough into an oiled bowl and cover with oiled cling film. Leave somewhere warm until at least doubled in size.
    How log this takes varies with a lot of factors but allow at least 2-3 hours.
     
    Make the filling. In an small bowl, beat the dry ingredients into the softened butter.
     
    Make the rolls. Punch down the proven dough and roll/stretch out on a work surface until forms a rectangle 15″ long by 9/10″ wide. Sticking the edge closest to you down to the table and then rolling away works best. Spread the filling evening over the rectangle, leaving a 1/2″ border at the long edge furthest from you. Starting at the long end closest to you, tightly roll up the dough over the filling. Seal the final unfilled margin but dampening with water and then pressing the dough firming into it.
    Cut the dough across the roll up to make 1″ sections. This amount should make about 18 slices.
    Lightly grease a couple of pan such as square brownie pans. Put the slices in the pans, allowing a good 1/2″ around each to allow for expansion.
    Cover with greased cling film and leave somewhere warm until doubled in volume – about an hour.
     
    Cook the rolls. Preheat the oven to 180 C or 160 C fan. Bake until golden brown, take about 20-25 minutes.
     
    Make the glaze. While the rolls are cooking, make the glaze. Combine all the ingredients except the icing sugar, in a small pan and gently heat until the sugar has dissolved and the butter melted. Take off the heat and beat in the icing sugar, sieving over the top to stop lumps forming. Alow the rolls to coll for 10 minutes in their pans then pour the glaze over so that it covers all the buns and soaks through to the bottom. Allow the glaze to set for 20 minutes or so before serving with a large mug of coffee.
     
    cinnamon (3 of 4) cinnamon (2 of 4)
     

  5. Quintessential Quinces – Apple and Quince Tart

    December 28, 2013 by sarah

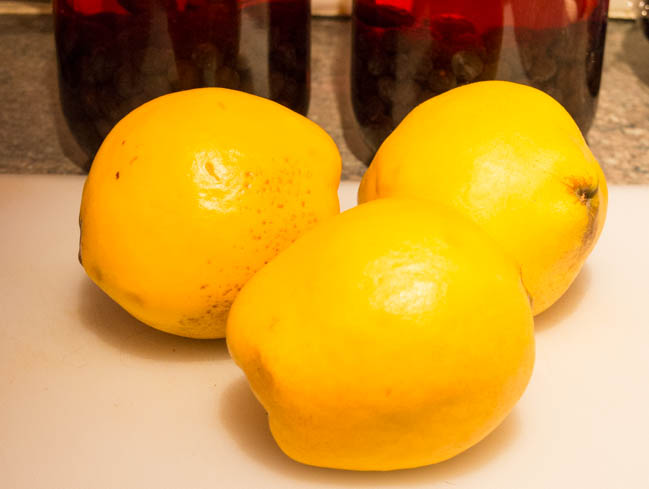
    I bought these quinces a few weeks ago at the Waddesdon Christmas food fair. They had been sitting in the fruit bowl, staring at me, taunting me, ‘go on then, you bought me, now cook me’! Everything I read said they were devils to cook; impossible to peel and needing long slow cooking otherwise they would stay rock hard and inedible but that the pleasures would more than overcome any trials in cooking them, in fragrance and flavour.

    DSCN0595


    I have to say I am disappointed. I had procrastinated about cooking them for several weeks, waiting for this fantastic aroma that is supposed to emanate from them. It didn’t happen so I moved on to cooking with them. They weren’t that hard to peel and chop, or at least my birthday present knives, once sharpened, cut then easy enough. Then I poached them in spiced sugar syrup awaiting the transformation into rose red jewels. Instead of the half an hour of poaching they were supposed to need, they were ready in 15 minutes without a hint of pink. So came the tasting and again disappointment, like a pear crossed with an apple. I had such high hopes for them. In the end two out of the three were eaten on my morning muesli.

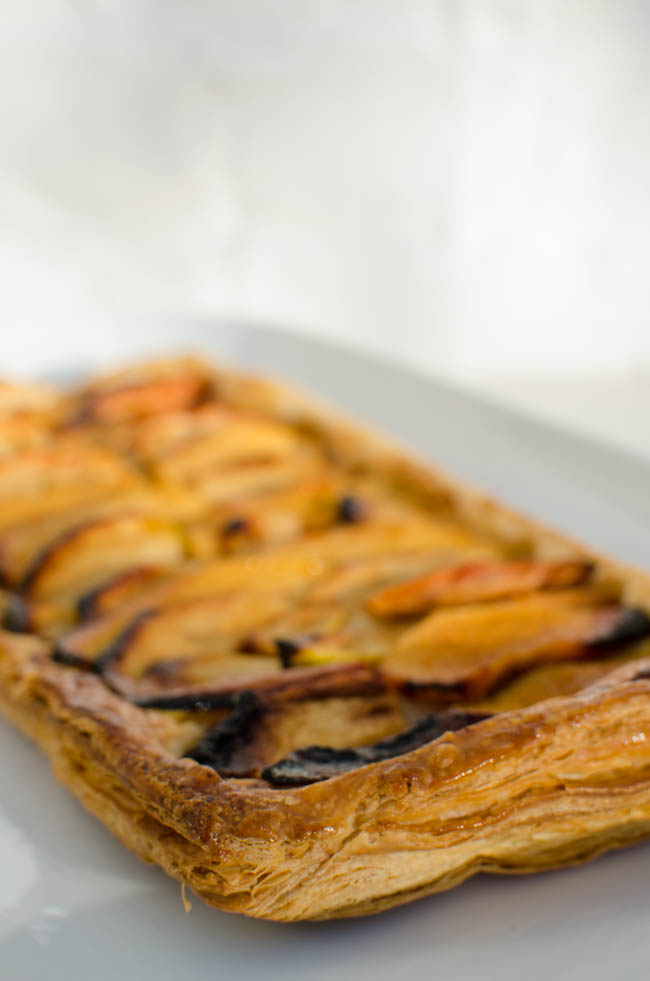
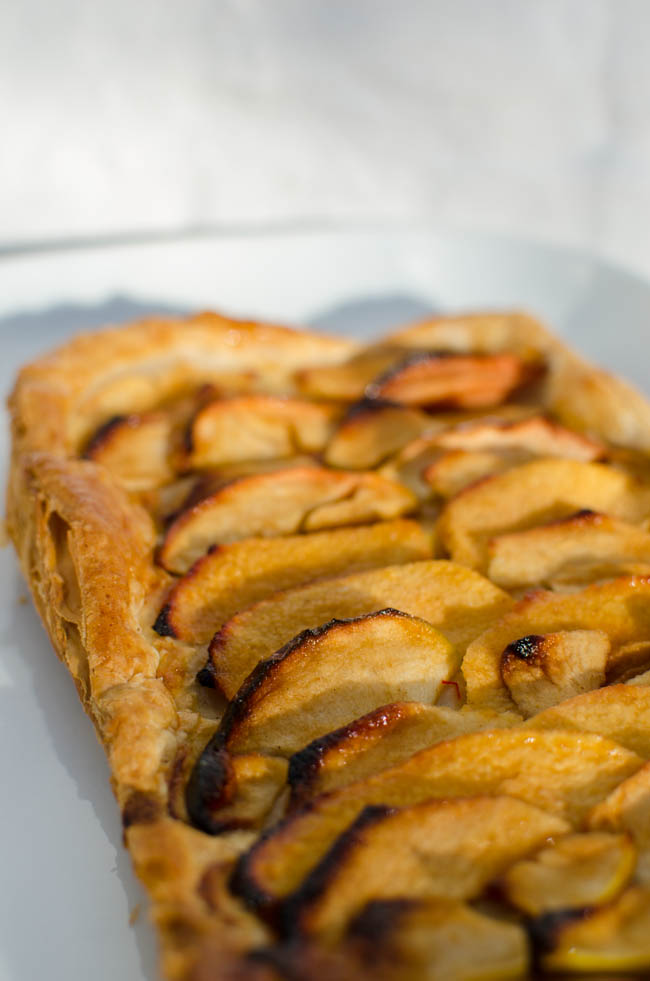
    So we come to the recipe. After leaving organisation to the last minute, I realised on Christmas day that I would need to produce some sort of dessert for the friends coming the next day. I raided the freezer and found a packet of puff pastry and in the fruit bowl a lonely quince and some apples. So we have

    French Apple and Quince Cheats Tart
    packet of puff pastry, defrosted if frozen
    2 eating apples e.g. granny smiths, cored but not peeled
    1 lonely quince, peeled and cored
    2 tablespoons of soft brown sugar mixed with 2 tablespoons of lemon juice
    icing sugar
    fruit jelly e.g. apricot or quince
     
    Roll out the puff pastry to a square about 30 cm on each side and cut in half so two bits about 15cm by 30cm. If it is ready rolled pastry try and find a way of getting the square or rectangle into two lengths that are not too narrow. Place on baking sheets and put in the fridge until ready to cook.
    Finely slice the apples and quince into a large bowl containing the sugar mixed with lemon juice. Set aside until ready to bake.
    When you want to bake them, preheat oven to 220 C or 200 C if fan.
    Take the pastry rectangles out of the fridge and neatly arrange rows of the fruit slices, alternating quince and apple, so that they overlap by about half a slice but leave a clear border of pastry of about a centimetre around the edge.
    Drizzle over any juices left in the bowl and dust over a thin layer of icing sugar.
    Place in the preheated oven for about 20 minutes.
    When they come out, cool on a cooling rack while heating a couple of tablespoons of fruit jelly with a splash of water (in a pan or in the microwave), stir until the jelly has dissolved and then brush over the pastrys with a pastry brush. Serve!
     

    If you are looking for more inspiration for what to do with quinces then see Nigel Slater, he raves about them.

    _1SK4622 _1SK4619
     

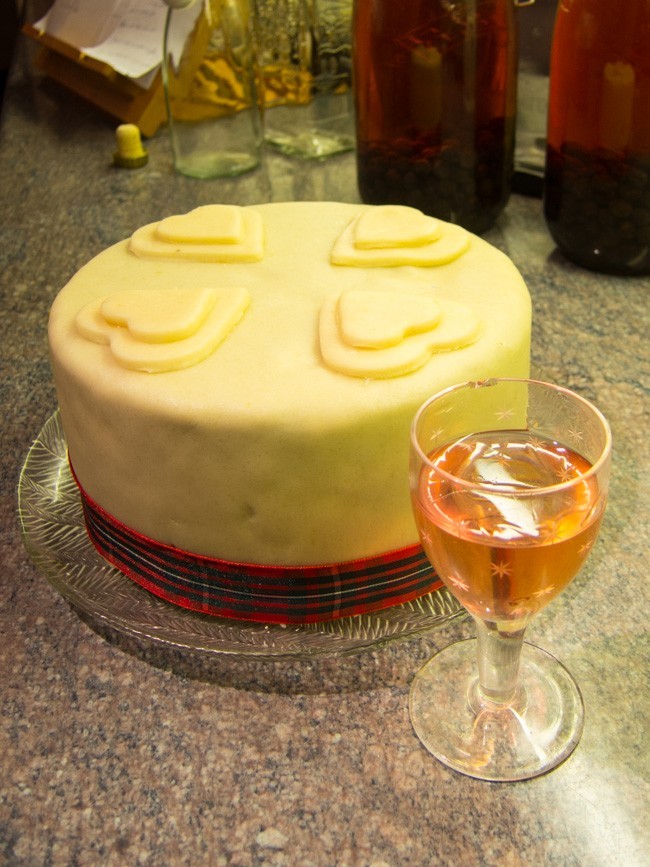
  6. Christmas Cake

    December 19, 2013 by sarah

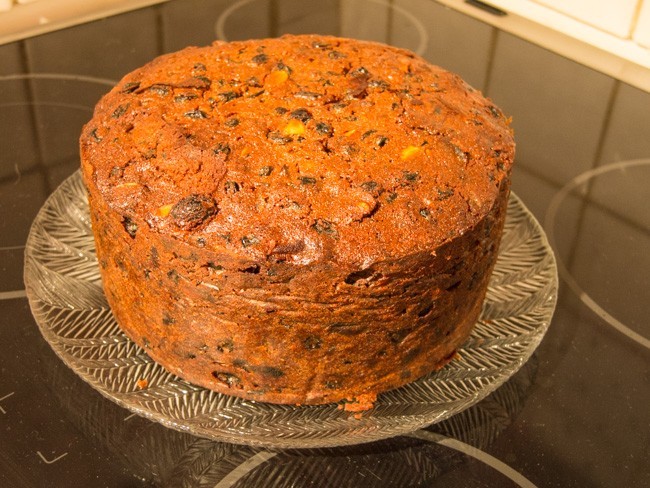
    I only started making our Christmas cake annually a couple of years ago. It seemed like too much hassle and the supermarket one was fine if you doused it up with enough booze. But then I bit the bullet and it has definately become an annual ceremony. The actually making doesn’t take too long; the fruit is best boozed up a few days before, a bit of stirring and then hours in the oven when it just needs occasional checking but not onerously. And then the boozing up, my favourite ritual. Once a week, or more if I remember, the cake is unwrapped, prodded, sniffed and then liberally painted with booze. I write ‘booze’ because I don’t think it really matters what you use so use up those dregs at the back of the cocktail cabinet (what, you don’t have one darling) but I stipulate it must have flavour (so no vodka), not be cream based and be greater than 20% alcohol (so no syrupy things). Don’t ask me if you can make it without the alcohol; this recipe has mandatory alcohol. This cake is best made several weeks before it is due to be eaten; Delia suggests a minimum of 8 weeks, so perhaps it should really be an October Half Term activity but I usually don’t remember until mid to late November and it still tastes great.

    Christmas Cake
    (Delia Smith with some of my alterations)
     
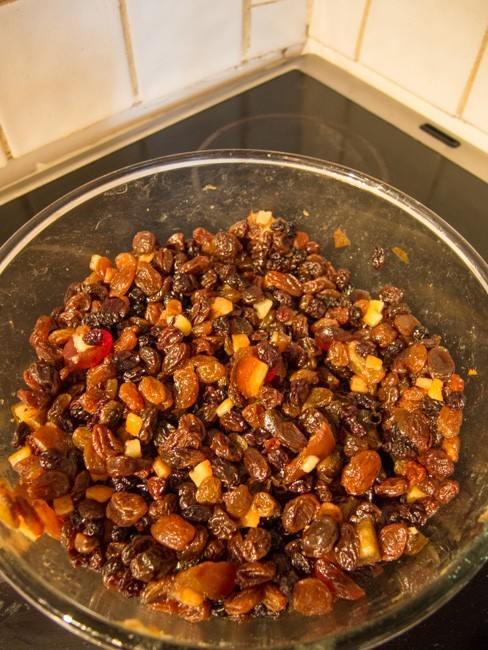
    1kg mixed dried fruits (raisins, sultanas, currants, mixed peel, glace cherries, dried cranberries, chopped dried apricots, dates, figs) I added a quarter of this weight in dates from our trip to Morocco
    50-100ml booze (sherry, brandy, rum, whisky…)
    250g unsalted butter
    250g light brown soft sugar
    200g plain flour
    50-100g nuts (whole or flaked almonds, chopped walnuts, pecans etc)
    4 large eggs or 5 medium eggs from my girls
    1/2 tsp salt
    2 tsp mixed spice
    1 tbsp black treacle
    grated rind of one lemon and one orange
     
    Several days before you plan do do the baking, put the fruit mixture into a glass bowl and add the booze. Cover with cling and shake daily until ready to use.
     
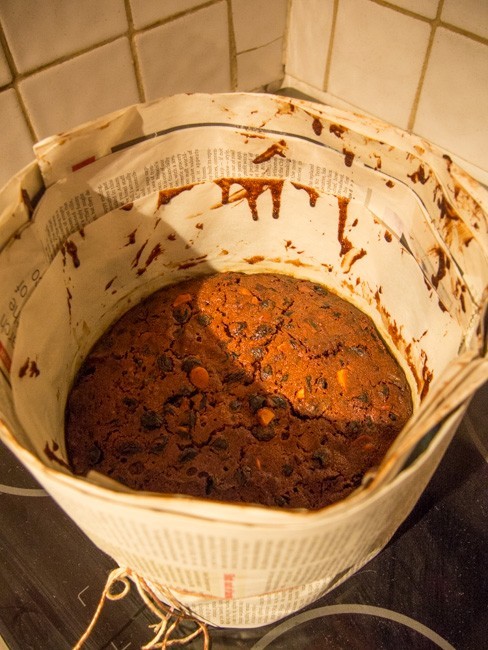
    Preheat the oven to 160 °C/140 °C fan with a shelf in the bottom third of the oven. Butter and double line a 20 cm round tin, with enough baking parchment to come several centimetres above the top of the tin. Wrap the outside of the tin with several sheets of newspaper secured with string. Sit the tin on top of more folded newspaper on a baking tray. Make a hat for the tin with double thickness of parchment cut to a circle that just fits inside and cut out a small circle in this in the centre (fold the squares of parchment up into quarters, the quarters again then round off the outer corners to give a circle and cut the point out of the circle – comprendé?).
     
    Cream the butter and sugar until very light. Whisk the eggs separately then add one at a time to this, mixing well between and adding some of the flour if it looks like it will curdle. Sift the flour, spices and salt over the top and then fold in. Fold in the fruit (and any booze left behind), the nuts, the treacle and rinds.
     
    Tip this mixture into the prepared tin and level off the surface. Place into the preheated oven and leave alone for 4 hours – walk the dog, do some study etc. The cake may take up to 4 and half hours but you still want a few crumbs sticking to the metal skewer when you test it; if you over cook it, it will be dry no matter how much booze you add. Leave to cool totally in the tin before unwrapping and then make some holes with a skewer all over the cake and brush or spoon over more booze. Wrap the cake in greaseproof paper and in a tin and repeat the feeding process ad infinitum.
     
    Decorate as you wish (no fondant for me please!).
    DSCN0586 DSCN0587


    DSCN0592


    DSCN0658


  7. Eggs and Lemons Part Deux – Lemon and Poppyseed Cake

    November 2, 2013 by sarah

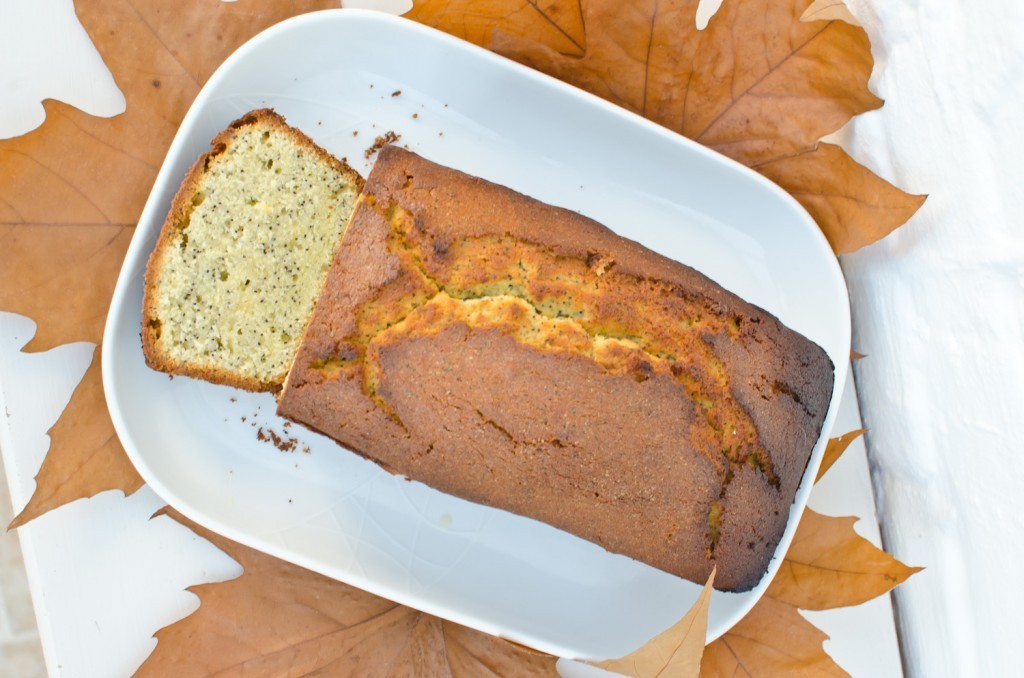
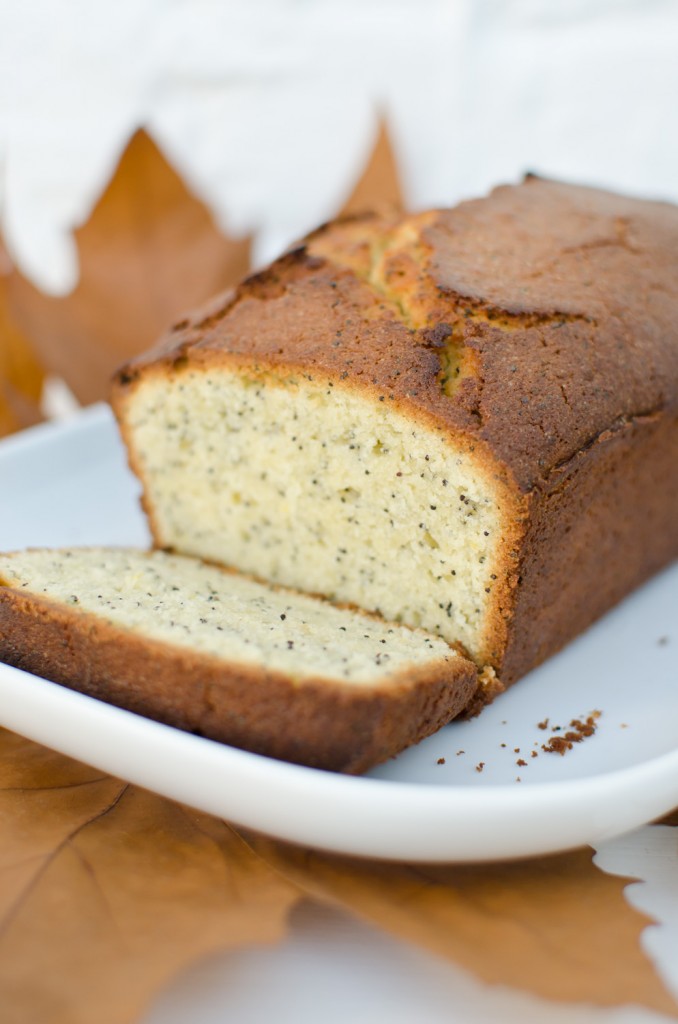
    With the excess eggs and lemons, I also made a lemon poppyseed cake. This came out a bit denser than I like for a sponge though I understand Maderia sponges are supposed to be like this. Next time I will try adding a little (maybe half a teaspoon) of baking powder and see if it lightens the mixture up a touch.

    Lemon and Poppyseed cake
    From ‘How To Be A Domestic Goddess’ by Nigella Lawson
     
    240 softened unsalted butter
    200g caster sugar
    grated zest and juice of 2 lemons
    2 tablespoon of poppyseeds
    3 large eggs (or 4 medium), beaten
    210g self-raising flour
    90g plain flour
     
    Line and butter a 23 x 13 x 7cm loaf tin.
     
    Cream the butter and sugar, then add the lemon zest. Add the eggs one at a time with a tablesppon of flour for each. Then fold in the rest of the flour and the poppyseeds and finally the lemon juice. Sprinkle with caster sugar.
    Bake at 170 (150 fan) for an hour or until a cake tester comes out clean. Let cool in the tin before turning out.
     
    Unfortunately I had to cook this at the same time as the pastry for the lemon meringue tart, which meant it was at too high temperature and it burnt slightly round the edges. Also my fan oven isn’t very even and I forgot to turn the cake. Will not do that again!
     
    _1SK3525 _1SK3526

  8. Traditional Dundee Cake

    September 29, 2013 by sarah

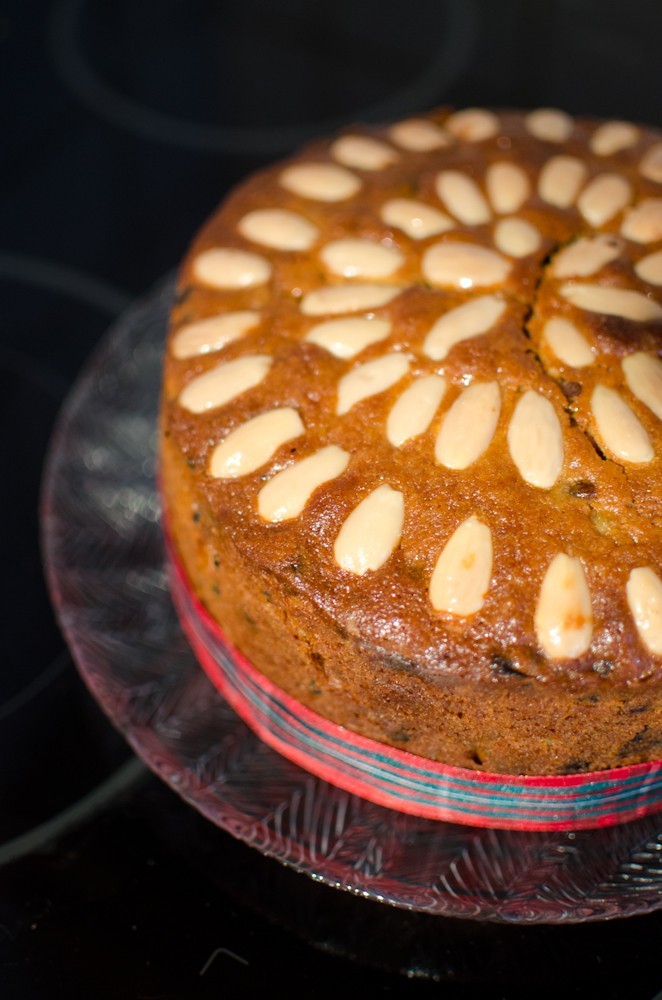
    This is a recipe for a traditional Dundee cake with a texture lighter and crumblier than the Christmas-type fruit cake and a lovely flavour.  It takes a while to bake during which it needs some attention but not constant.

    175g unsalted butter at room temperature/softened
    150g caster sugar or soft brown sugar, or mixture
    4 medium eggs (room temperature)
    250g plain flour
    1 tsp baking powder
    100g marmalade or apricot preserve (optional)
    350g of mixed dried fruit (currants and sultanas are traditional)
    50-100g glace cherries, rinsed, dried and cut in half
    50-100g mixed candied peel, finely chopped
    75g ground almonds
    finely grated rind of an orange
    1 tablespoon of whisky
    100g blanched almonds for the top.

    A day or two before you want to make this cake, weigh out the dried fruit and splash over some sherry, whisky or rum, cover with cling film and leave until ready to make the cake.

    Prepare the tin – this is very important as it will stop the cake from sticking and burning. Line a 20cm (7.5 to 8″) tin with a double layer of greaseproof paper, including the bottom, and grease well. Round the outside of the tin wrap folded over newspaper and tie with string to hold in place. Sit the prepared tin on more folded over newspaper on a baking tray. Preheat the oven to 170 degrees (150 if fan).

    Beat the butter and sugar in a bowl until very fluffy. Whisk in the eggs one at a time with a tablespoon of flour between each addition to prevent curdling (it will also help if the eggs are at room temperature). Now add the marmalade or apricot preserve if using and orange zest; make sure it is soft and bit on the runny side by whisking, possibly with the whisky, before adding to the mixture otherwise you will end up with lumps (see – this is what happened to me!).

    Now fold in the flour (reserving a couple of tablespoons – see next step), ground almonds and baking powder with a large spoon. The mixture at this stage should be stiffer than your average sponge batter, otherwise the fruit will sink.  That reserved flour, sprinkle it over the dried fruit and glace cherries (this stops them from sinking) then fold all the remaining fruity ingredients into the batter.

    Put the blanched almonds into a bowl and cover with boiling water while you spoon the mixture into the prepared cake tin, smooth the top and press a very slight concavity into the middle of the cake (so when it rises the top stays level). Drain the almonds and dry on kitchen paper. Next, arrange the almonds in concentric circles on the top of the cake, starting in the middle. Do not push them in when you do this otherwise they will sink into the cake while cooking.

    Make a foil hat that sits on top of the paper that surrounds the tin and put the tin in the oven, middle or bottom levels. It will need 2 to 2 and half hours, until a skewer comes out almost clean (err on the side of slight under doing as it will continue to cook for a bit as it cools and you don’t want a dry cake). Keep the hat on the cake until the last half an hour of cooking as this will stop burning and cracking.

    When you take the cake out of the oven, brush the top with a sugar syrup made from a tablespoon of water and a tablespoon of caster sugar and put back in the oven for 5 minutes to dry this then repeat the syrup but leave out of the oven. Leave the cake to cool completely in the tin. This cake keeps very well for a week or more in an airtight tin and the flavour improves after a few days. Enjoy!

    show (2 of 16)


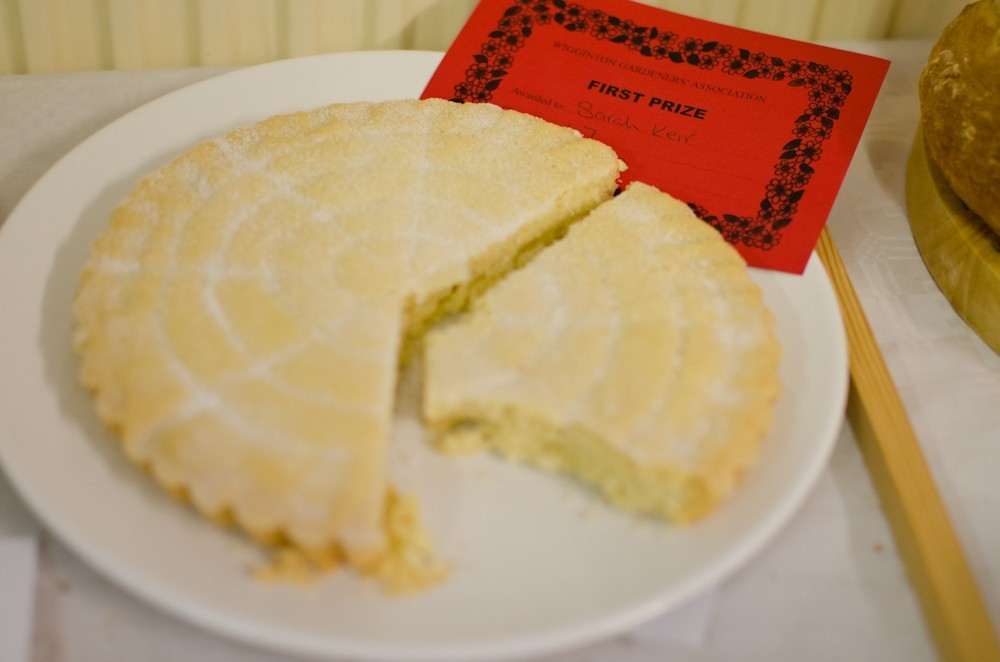
  9. Perfect Shortbread

    September 25, 2013 by sarah

    Perfect shortbread – so simple it is hard! Who would of believed it? But I have found some simple tips that seem to make difference to create that perfect shortbread. Recipes from ‘Mary Berry’s Ultimate Cake Book’ (BBC Books, 2003) and ‘How to make perfect shortbread’ on The Guardian Word of mouth blog (http://www.theguardian.com/lifeandstyle/wordofmouth/2010/sep/30/how-to-make-perfect-shortbread). To me shortbread should be crisp but short and crumbling as the sand on Mull so it melts in your mouth and tastes of nothing but butter and the subtle sweetness of sugar. No fancy flavourings in this one!

    Use the best quality butter your can get i.e. the top shelf butter in the supermarket. You will REALLY taste the butter in this recipe so it must be good and not fridgey either. Handle it very gently using implements not a food processor or your hands. Refridgerate before cooking as with any pastry and do not over cook. It must be crisp but pale – the butter and sugar will make it colour easily so watch it like a hawk and I would recommend checking every 5 minutes maximum towards the end of cooking.

    150g unsalted butter, cut onto small pieces and soft

    75g caster sugar

    150g plain flour, ‘OO’ if you can get it

    75 rice flour

    good pinch of salt

    Use a wooden spoon to cream the butter and sugar together. Then use a fork to mix in the flours and salt. Pour the crumbs into a well greased loose bottom fluted pan of about 8″/20cm diameter. Gently pat down until all the flutes are equally filled.

    Refridgerate for 15 minutes or so. Bring out and prick all over with a fork and score into 8 wedges – in a pretty pattern if for a show.

    Cook at 170 degrees or 150 if fan oven, for 30-35 minutes, watching carefully towards the end so it stays pale. Bring out and remark the scoring before sprinkling with more caster sugar. Cool in the pan before removing for serving. The shortbread will last for several days in an airtight container – if you can resist eating it all in one go!

    An alternative way of shaping is to gently kneed the crumbs until they stick together and form a smooth dough which you can then press into the tin or roll out to make a large round or individual biscuits (bake on parchment). But I found this shortbread was not as crumbly melting as the former method, though the top was smoother which might be important in showing.

    show (12 of 16)


  10. Cut-out Sugar Cookies – Baby Feet!

    June 30, 2013 by sarah

    I took a box of these baby feet cookies to the baby shower. This is my first attempt at cut-out cookies and royal icing and piped icing biscuits. Well, actually second attempt for the cookies because the first recipe, from my trusty Nigella’s ‘How To Be A Domestic Goddess’, were disappointing; not at all buttery or sweet like they should be and easily burnt. So 10pm on Thursday I made a second batch which were much more successful. This recipe is made up from various sources when I noticed I needed to add more butter and to leave out the baking powder. I have to admit to much preferring a nice slice of moist cake or a tasty cupcake to a biscuit or cookie but I may be tempted to make these from time to time, especially as they can be made in advance (supposedly keeping for up to a month).

    Butter/sugar cookies for cut out

    200g unsalted butter, soft/room temperature

    150g caster sugar

    2 tsp vanilla extract

    1 large egg

    300g plain flour, 1 tsp salt

    • Cream the butter and sugar until well mixed but not getting to light and airy stage (air will make the biscuits spread), whisk in the vanilla and then the egg.
    • Sift over the flour and salt and mix until comes together in one lump.
    • Divide the very soft and sticky dough into 2 patties, wrap in cling film and refrigerate for at least an hour.
    • Kneed just a couple of times so smooth and warm enough to work. Roll out using minimal flour (can do it between 2 sheets of parchment so no extra flour needed as the flour will change the texture of the cookies) until 1/2cm thick. Cut out desired shapes and place on greased or parchment lined baking trays, allowing a couple of centimeters between each cookie. Place trays in fridge for at least half an hour or the freezer for 10 minutes until firm.
    • Bake in preheated oven at 160 degrees fan for 12-14 minutes until just going golden around the edges, allow to cool completely on wire racks and leave at least 24h before icing.

    Royal Icing

    500g icing sugar

    3 tbsp dried egg white powder

    100-150ml warm water

    • Add 100ml warm water to the dried egg whites in a bowl and whisk until well blended. Add any liquid flavourings eg vanilla extract.
    • Sift over the icing sugar and beat until well mixed then continue beating for 10 minutes until thick. Colour at this stage.
    • Leave for 24h before uring. To pipe on to biscuits, the correct consistency is that a knife dragged through the mixture takes 10 seconds to fill in.
    • Pipe an outline then fill in. Size 2 to 5 nozzle is required, though I only had a size 10 and this worked too.

    baby (7 of 5)