RSS Feed

‘Recipe Index’ Category

  1. Meringue nests – Uses for eggs!

    June 15, 2014 by sarah

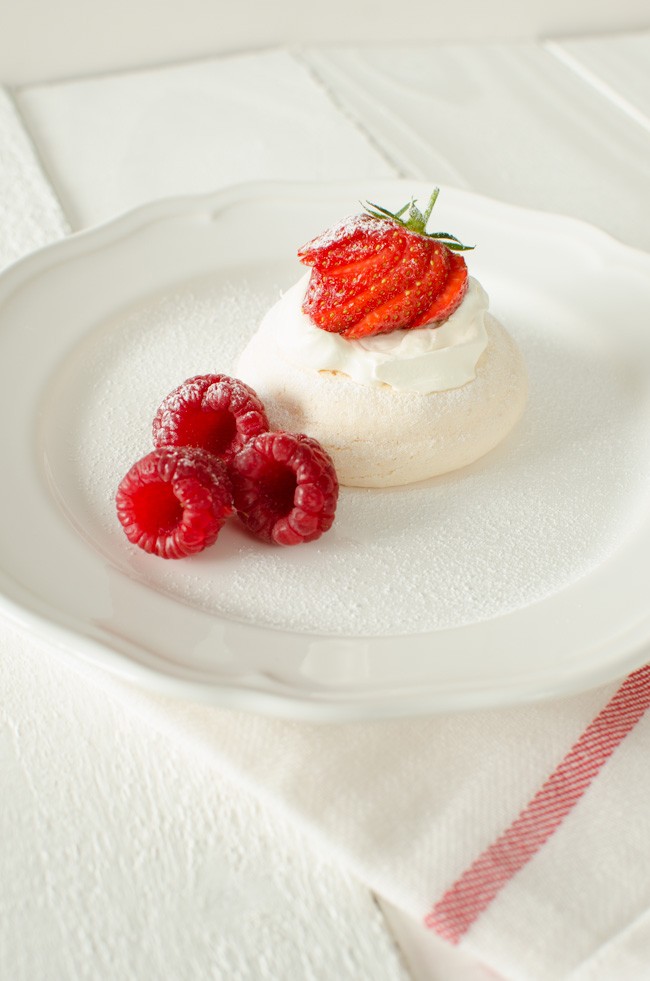
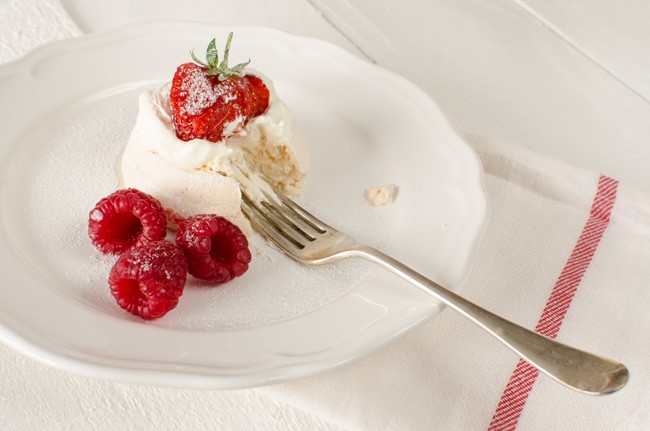
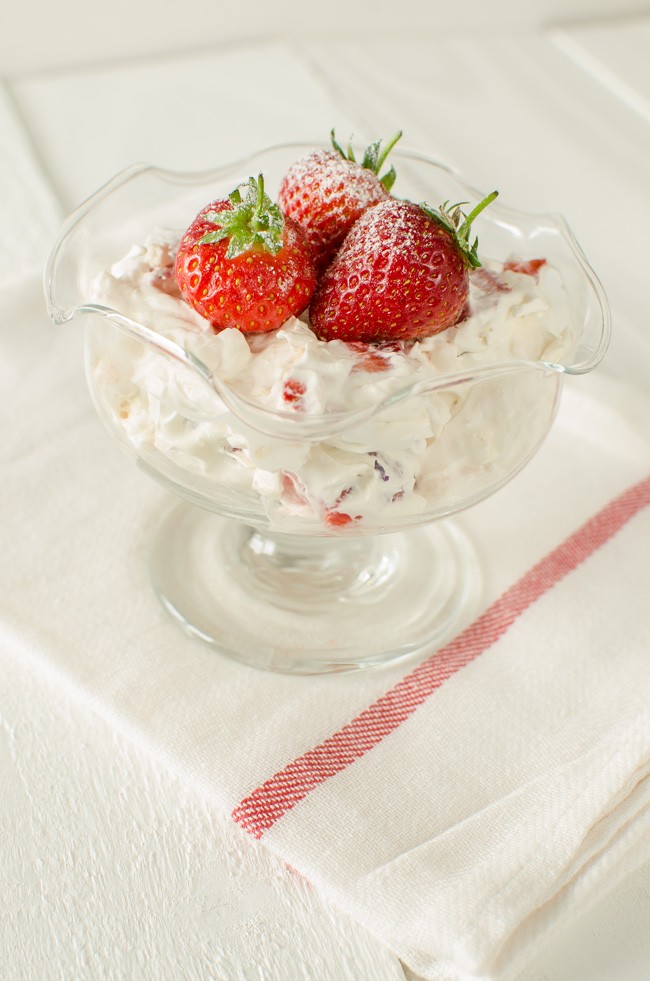
    Meringue. A word that can instill fear into the heart of even the most experienced cook. Sometimes it works and sometimes it doesn’t and usually you can never work out why. But understanding more about eggs and the chemical reaction that makes meringue can help demystify it and hopefully prevent so many failed egg dishes. Though I can knock out a batch of meringues without much thought, I still get some disasters though they always taste better than they look! A meringue is never a failure, you might just have to opt to serve Eton mess rather than neat nests. There is nothing better than sweet meringue, smooth and silky cream and tart berries.

    meringues (7 of 9)

    Eton mess

    meringues (8 of 9)

    Strawberry meringue nest

    Egg whites consist over 90% water and various proteins make up the rest. When you whisk egg whites, you are breaking down the protein structure so that the protein strands lengthen and air bubbles become entrapped within this lattice structure. When whisking egg whites it is very important to have scrupulously clean bowl and whisk. I prefer a metal or bowl as it is supposed to help the egg whites trap more air or if using a glass bowl, I clean it first with kitchen paper with a little vinegar and left to dry. It is also very important not to get a single speck of egg yolk in with the whites so it is a good idea to break the eggs individually into a small bowl before adding the whites to your larger bowl to avoid messing up the whole lot. A drop of lemon juice or a pinch of cream of tartar is often added to the egg whites at the start of beating as it is supposed to help stabilise the bubbles. This is unverified; I think I need to do more experimentation to see if it makes a noticeable difference. Very fresh eggs whisk the best as the white is firm and not runny. This is part of the reason why I got chickens of my own. Interestingly, fresh eggs make awful hard boiled eggs as they are impossible to peel! Remember that eggs you buy in the supermarket will probably be at least a week old by the time you buy them and the ‘best before date’ will be up to 5 weeks after they were laid!

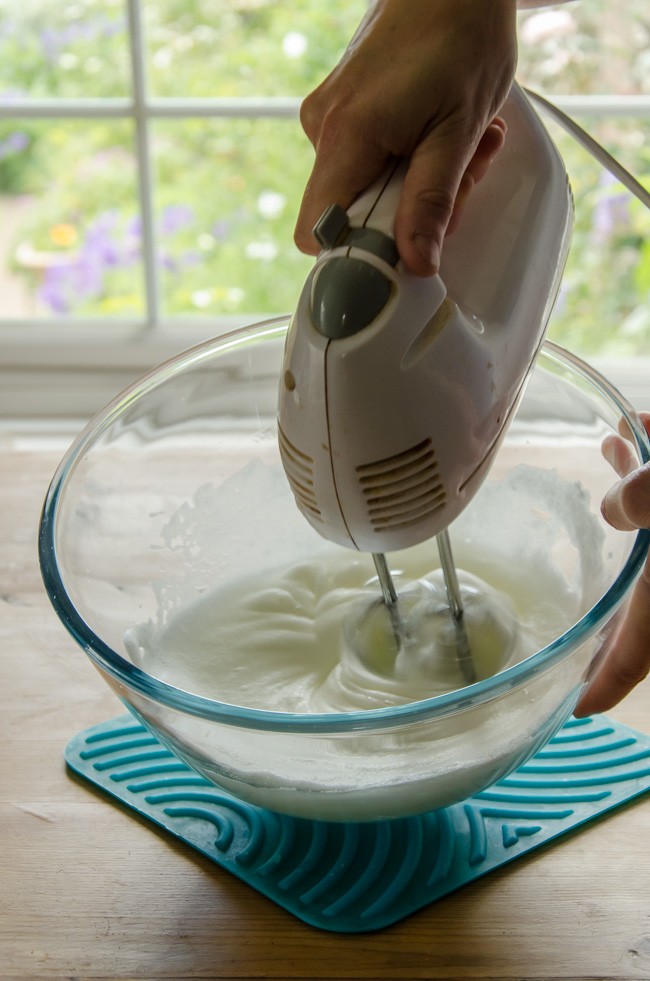
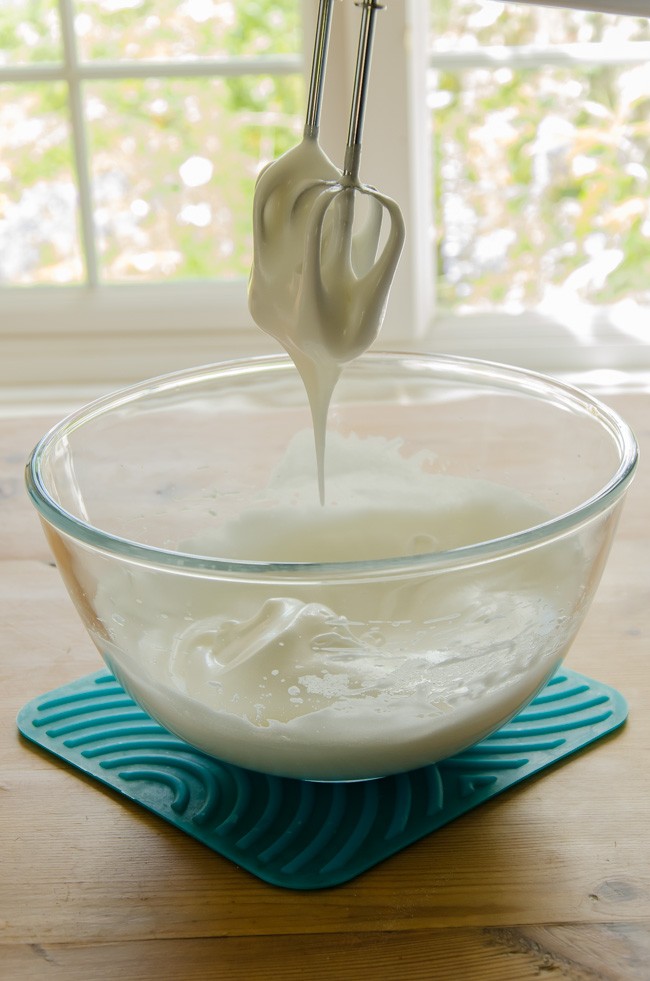
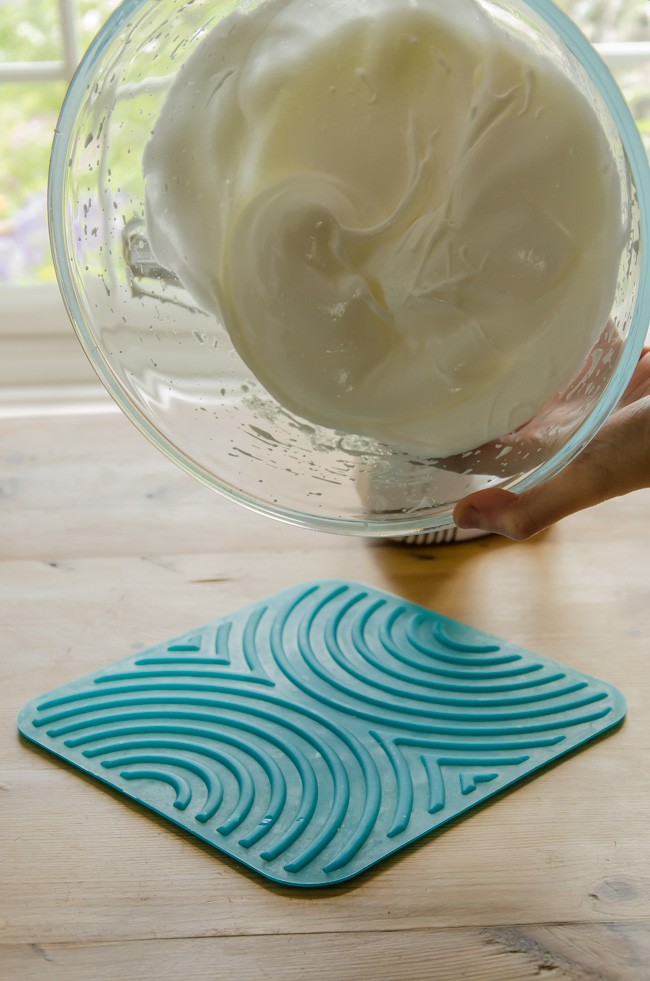
    When you start whisking eggs, start on a slow speed for a minute or so before increasing the speed. The soft peak stage, as used for souffles and mousses, occurs when you lift the whisk out of the egg whites and the peak slowly folds over into the mixture. The bottom of the bowl may feel slightly liquidy and slip around the bowl. The stiff peak stage happen fairly soon after so keep watching and testing. Egg whites beaten to this stage are used for meringues and you can tell when you have reached this stage as the peaks when you lift out the whisk are firm and do not sag. Also the whole bowl should be whisked to the same stage so at firm peak stage you should be able to turn the bowl over your head and not get a santa hat of egg whites! To prevent meringues from weeping when cooking, you must make sure the sugar is thoroughly dissolved in the egg whites and that you use very fine sugar.

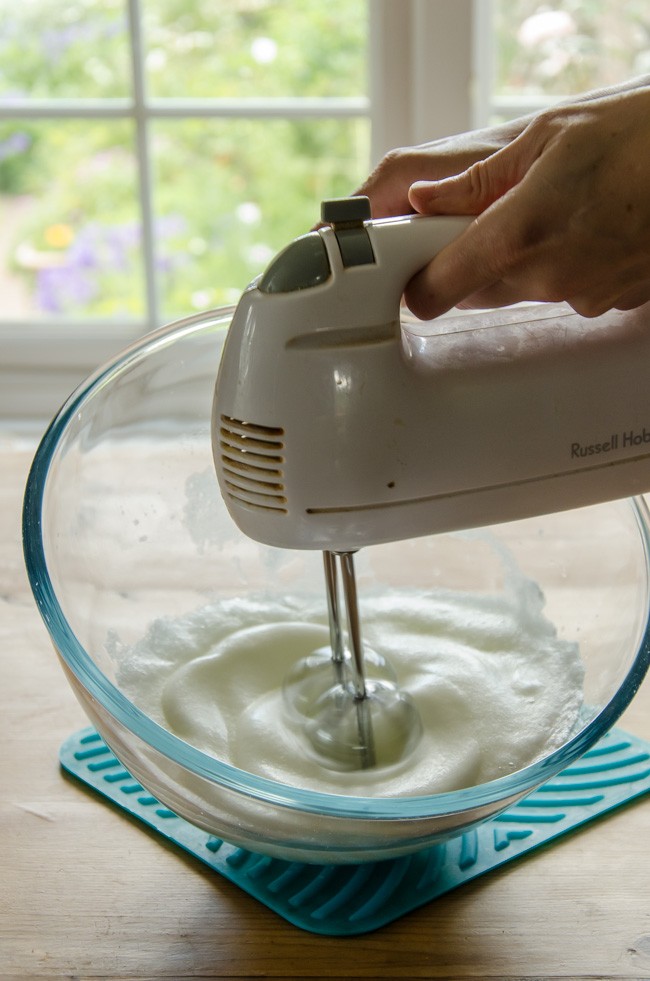
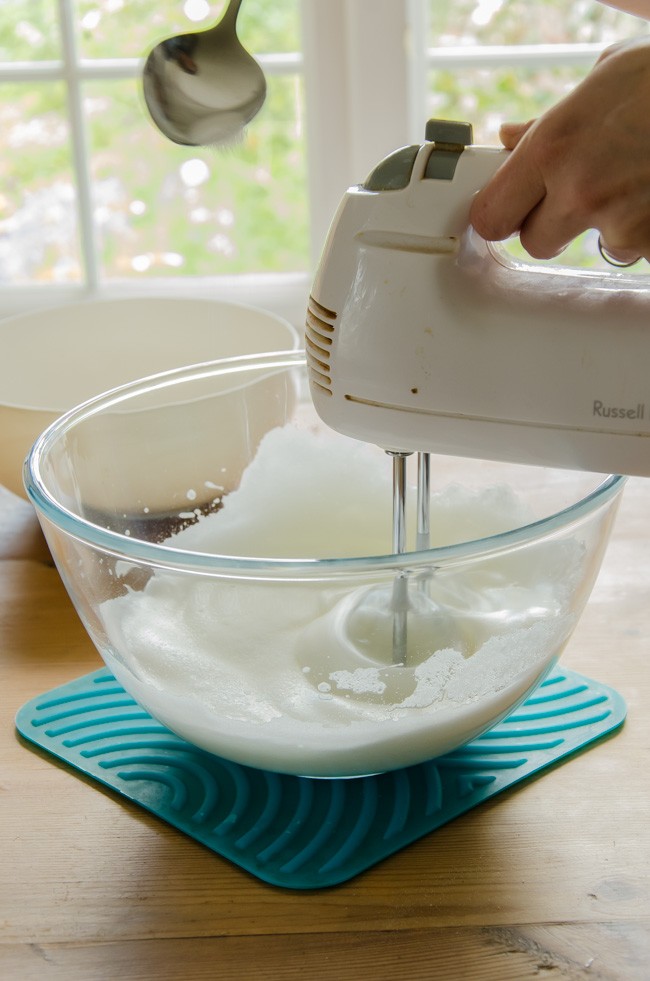
    I don’t know if equipment matters too much when whisking meringues; after all, it used to be done with a hand whisk. Think of those muscles! I use a handheld machine but would love a stand machine, especially if it came with whisk attachments rather than the all purpose ones I currently have. I am not sure it would make a huge difference to my meringues, but there is only one way to tell! I do put a silicone mat under the bowl as I whisk to prevent the bowl from spinning off the counter.

    There are three types of meringues and I will give the recipe for simple ones below. Swiss meringues are probably what we are all familiar with. The egg whites are beaten to soft peak stage, half the sugar is added and whisking continues until stiff peaks are achieved and the mixture is glossy; then the rest of the sugar is folded in. This mixture is suitable for simple piping like the nest I made for the afternoon tea or pavlova layers or toppings for pies, but it must be used quickly other it turns back to liquid. Italian meringue is made by adding hot sugar syrup to whisked egg whites and whisking until cool. This meringue is more stable and is the best choice for piping delicate items. Cooked meringue, also known as meringue cuite, is made by whisking the egg whites with the sugar in a bowl over boiling water and this is the most stable type of meringue.

    One final note on making meringues and that is you MUST use baking parchment, also known as silicone paper, to line the trays. Greaseproof paper has a wax coating that resists water so is used for wrapping and layering food and with sticky food like dough, but the coating melts in the oven so the food then sticks to it unless you pre-grease it like for a sponge cake. Baking parchment has been treated so that the non-stick properties do not disappear in the heat of the oven; essential for high sugar foods such as meringues, macaroons and even sponge cakes that you do not pre-grease the paper lining the tin such as genoese sponge.

    meringues (9 of 9)


    Simple Meringue Recipe

     
    4 large egg whites, cold from fridge – about 120-150g of egg white if mixed egg sizes
    pinch of cream of tartar
    225g caster sugar
     
    Preheat the oven to 110 ºC/ fan 100ºC and line a couple of baking trays with baking parchment/silicone paper.
    Tip the egg whites into a large bowl and whisk on slow speed until foamy and then add the cream of tartar. Continue to whisk on medium speed until soft peaks are reached and just turning to stiff ones.
    Turn the speed up and add the sugar a dessert spoonful at a time, beating for 3-4 seconds between each addition.
    Once half of the sugar has been added and the egg whites are glossy, add the rest of the sugar in one go and beat for a few seconds more until well mixed and not granular when touch between you fingers. But try to resist over beating. If you over beat, put in the fridge until cold again and try again. Theoretically you should fold in the last half of the sugar but I find it doesn’t mix in well so you get sugar bleeding in the finished meringue or to fold it in well enough the mixture becomes deflated and becomes sloppy.
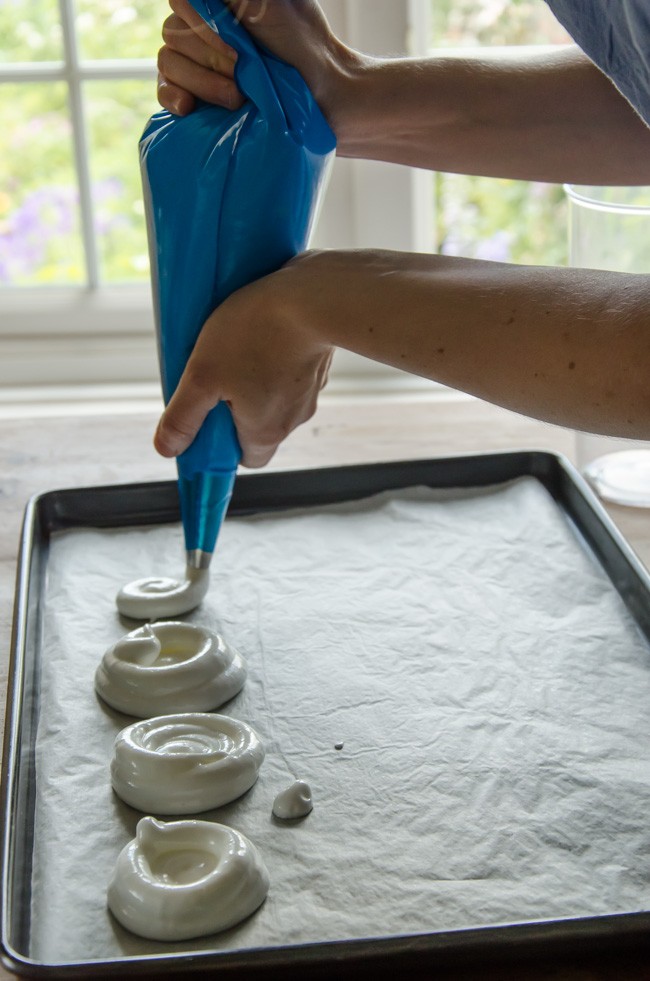
    Pipe or soon the mixture on the lined baking trays – you can only manage rough shapes with this type of meringue.
    Bake for about 1 and half hours. I cook for an hour then prop the oven door open and let them cool in the oven and this leaves the meringues with a soft, chewy centre. If you like them dry all the way through then cook for the full 1 and half hours at least.
    When cool, they can be stored in an airtight container for up to 2 weeks, or frozen indefinitely.
     
    meringues (1 of 9)

    Step 1 – whisk egg whites to soft peak stage.

    meringues (2 of 9)

    Step two – make sure you move the beaters around the bowl.

    meringues (3 of 9)

    Step three – add the sugar a spoonful at a time.

    meringues (4 of 9)

    Step four – keep beating until stiff and glossy.

    meringues (5 of 9)

    See – stiff peaks, shouldn’t slide out the bowl.

    meringues (6 of 9)

    Step five – pipe as required on to baking parchment.


  2. What to do with all those eggs? Recipe for Creme Caramel

    June 10, 2014 by sarah

    There once was three chickens
    Called Mrs Red, White and Blue,
    They laid so many eggs
    I didn’t know what to do,
    So I made some meringues,
    Ice cream and creme caramels,
    That used up lots of eggs
    And then all was well.
     
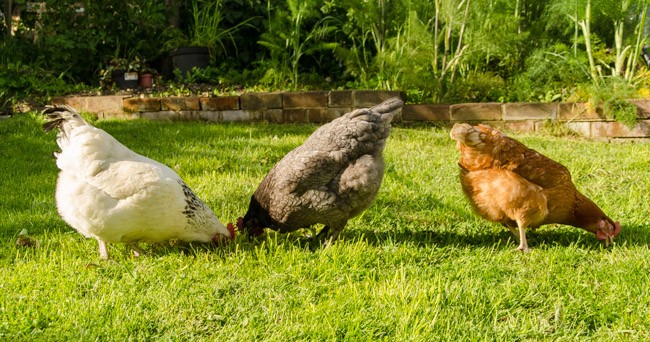
    _1SK6838

    Mrs Red, White and Blue enjoying the sun in the garden.

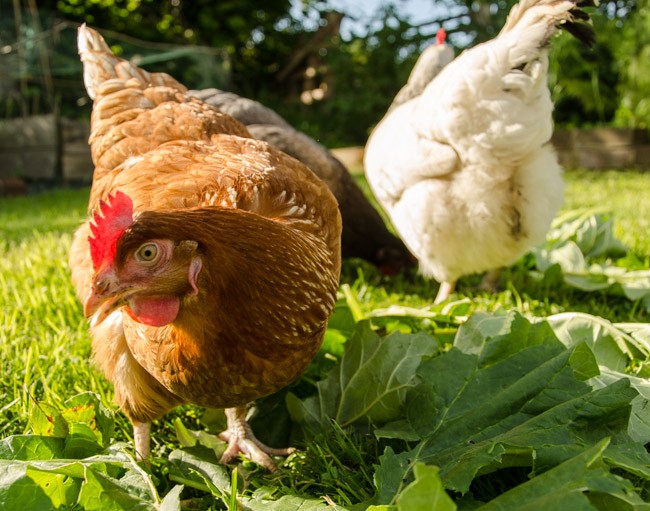
    _1SK6857

    Mrs Red enjoying rhubarb leaves.

    My girls are currently on full steam with the egg laying. Which means I get at least two eggs every day and three eggs most days so a potential of about 20 eggs a week. Even with selling a box or two at work, it still leaves a lot of eggs for eating! Many are eaten at breakfasts, lunches or light dinners as boiled, poached, scrambled or baked eggs with various accompaniments but this usually leaves a box or two of eggs and me wondering what to do with them. So here is my go to list for inspiration when there are eggs to use and cooking to be done. If I spy a recipe I want to use that uses yolks, I make sure I also have an egg white recipe in mind, and visa versa, though egg whites do freeze well if necessary.

    Savoury
    –          omelette
    –          Frittata/tortilla
    –          Quiche/tarts
    –          Soufflés
    –          Mayonnaise, hollandaise sauce
     
    Sweet – whole eggs
    –          Sponge cake especially Genoese sponge/swiss roll/roulade
    –          Clafoutis
    –          Choux pastry e.g. profiteroles
    –          Pancakes/crepes
    –          Cheesecake
    –          Lemon tart
    –          Bread and butter pudding
    –          Custard Tart
     
    Sweet – whites
    –          Meringue, pavlovas
    –          Angel food cake
    –          Macaroons, of various types
    –          Mousses and soufflés
     
    Sweet – yolks
    –          Lemon curd
    –          Gateau Breton
    –          Custard/creme anglais – therefore accompaniment to stewed fruit or a steamed pudding and of course, the base for making
    –          Ice cream
    –          Crème patisserie – filling for fruit tarts or a base for trifles


    _1SK6809

    Lovely bowl of fresh eggs.

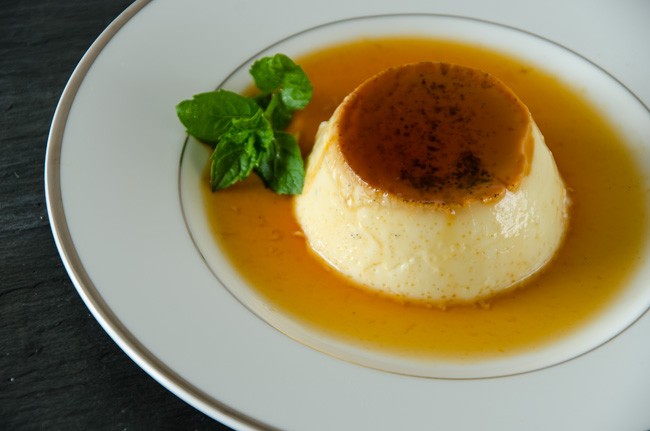
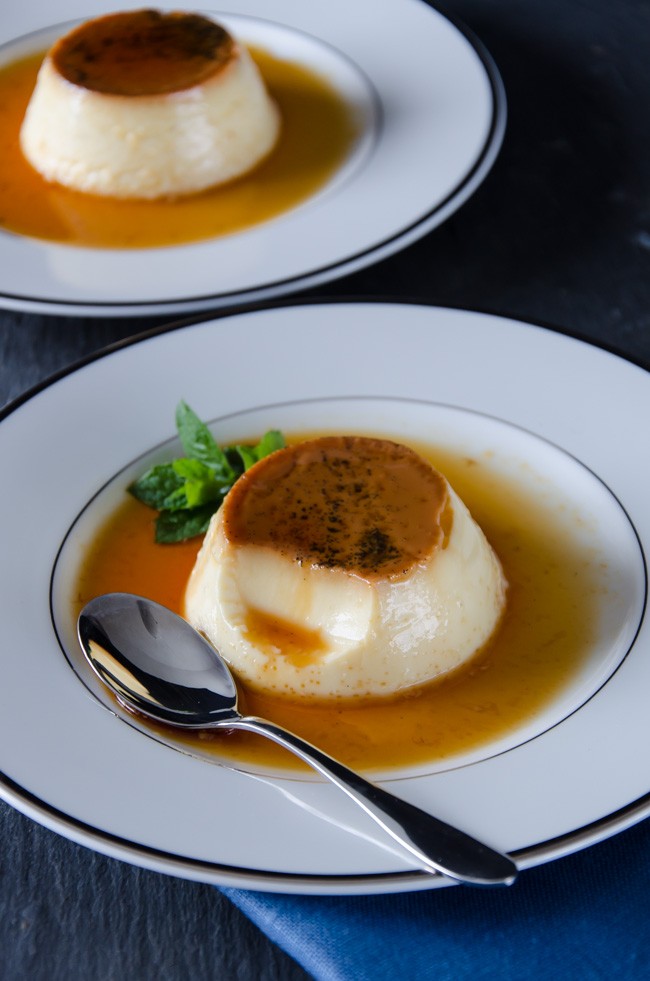
    And now for the recipe – a delectable smooth and creamy favourite – creme caramel. When homemade, it is a million miles away from the insipid stuff in pots in the supermarket or even the ubiquitous pudding option in any food establishment pertaining to be remotely French. It works because the creamy coolness of the just set custard is counter balanced by a caramel that is a bit acid or tart so you must get enough colour on the caramel to get that.

    _1SK6775 _1SK6779

    Creme Caramel

     
    500g milk (whole milk ideally or fat reduced milk with splash of cream, though I have used semi-skimmed and it turns out fine)
    1 vanilla pod
    4 medium eggs
    50g sugar
     
    Caramel – 50g sugar
     
    Put the milk into a non-stick heavy based pan, split the vanilla pod and add the seeds and empty pod to the milk and bring to the boil. Remove from the heat and leave to infuse until ready to use. Heat oven to 150 C/fan 120 C.
    Make the caramel by heating the sugar with 1 tablespoon of water in a heavy bottomed pan over a medium heat. If the sugar is crystallising around the edge of the pan, wipe around the edge with a silicon pastry brush dipped in water. Continue to bubble until a deep golden colour is reached and then pour the caramel directing into the bottom of 4-5 ramekins. Watch out as hot sugar is very hot and will burn. Allow to cool then grease the insides of the ramekins with a little butter.
    In a bowl whisk the eggs and remaining sugar until combined but do not continue to whisk (adding air bubbles at this stage will put air bubbles in your creme). Strain over the infused milk and whisk in. Strain this egg and milk mixture into a jug and use to fill the moulds evenly.
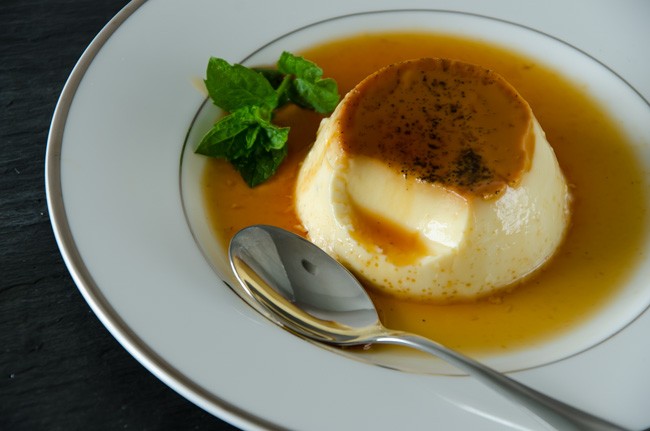
    Sit the moulds in a roasting tin and pour boiling water around the outside until comes half way up ( a bain marie – lovely name, means Mary’s bath) and cook in the preheated oven for 30-40 minutes until just set (should still wobble a little). Take out of the water and allow to cool entirely and then refridgerate before unmoulding. To unmould, run you finger around the top of the custard to prise it away from the ramekin, sit the base of the ramekin in hot water for 30 seconds then up end over a plate. Serve immediately as the caramel will lose its colour.
     
    _1SK6795

  3. Elderflower champagne and cordial

    May 31, 2014 by sarah

    Late May into mid-June, depending on the weather that year, is elderflower time. And that is a very important time for me because it means it is time to make my own home brewed alcoholic beverage that is elderflower champagne. To me it marks the start of summer as they only flower when there has been enough sunshine. I have just finished the last bottle of last years brew and the date on it was July as last spring was awful. It is a delight to see the hedges filled with frilly lace caps of the elderflower heads and I start planning how many litres of the stuff I will make and if I have enough sugar and the lemons… The best time to pick the flowers is late morning on a dry, sunny day. You need a few hours of sun on the flowers to bring out the aroma but not too much otherwise they turn musky, almost a cat-pee smell, and I can’t image that is nice to drink. The best flowers are the ones that are still creamy coloured and not all the individual flowers have opened on the head; avoid the bright white or slightly brown heads as these are past their best. It is best to collect the flowers with scissors into a basket so that any insects drop off the flowers on the way home with your precious load. Use the flowers as soon as you have picked them. Remember not to pick all of the flowers as you want to be able to return in the autumn for the fruits!

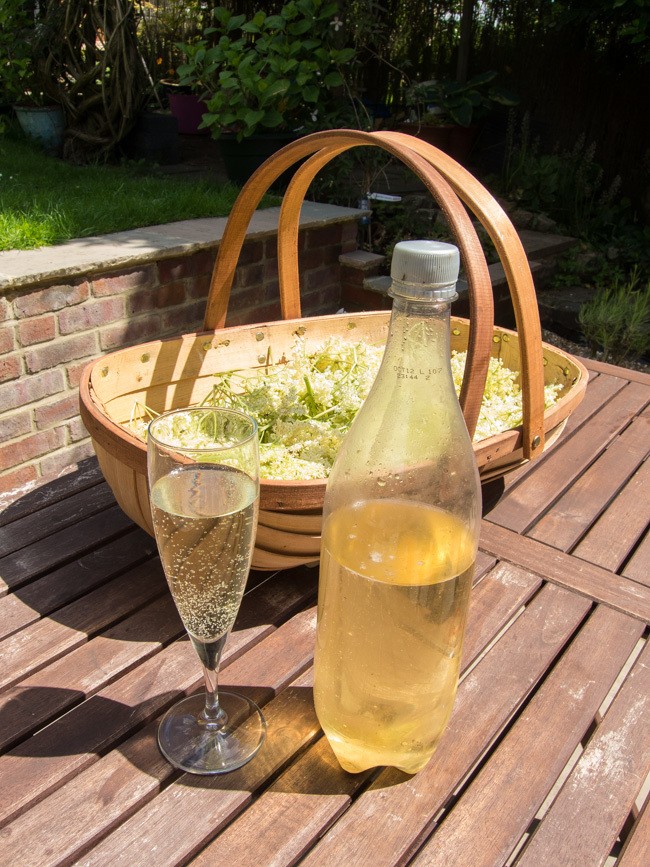
    DSCN1500

    Last of last years champagne with the flowers picked for this year’s brew!


    A few care warnings about this brew. I have no idea how alcoholic it is. In fact, it seems to vary from batch to batch as to its leg wobbliness effects. It is very much like cider in its effects; its doesn’t taste alcoholic and goes down easy and you don’t realise it has any effect until you stand up! Also, and this is VERY important, the brew is highly explosive, especially for the first few weeks as the pressure builds up. For this reason I reuse plastic pop bottle because if they do go bang you don’t get shards of glass everywhere and with a screw cap you can gently release the pressure as necessary. For the first couple of weeks I keep the bottles in the kitchen and feel the bottles daily for the tenseness of the plastic and I tend to release the pressure daily for a week then every second day for another couple of weeks until noticing that they are not completely taught when ready to be released. They perhaps get one more release before being stored somewhere cool and dark.

    I also make several litres of elderflower cordial which is a wonderfully fragrant ingredient for flavouring ice creams, panna cottas, other creamy desserts such as cheesecakes and the perfect pairing with gooseberries (which annoyingly come a few weeks later so the cordial is a great way to store the flavour until the gooseberries are ready for their turn). I also love the cordial diluted down with ice cold sparkling water; a refreshing summer spritzer. I have seen recipes for deep-fried elderflowers or fritters and I am dying to try them, if only I get long enough off work to pick some more flowers!

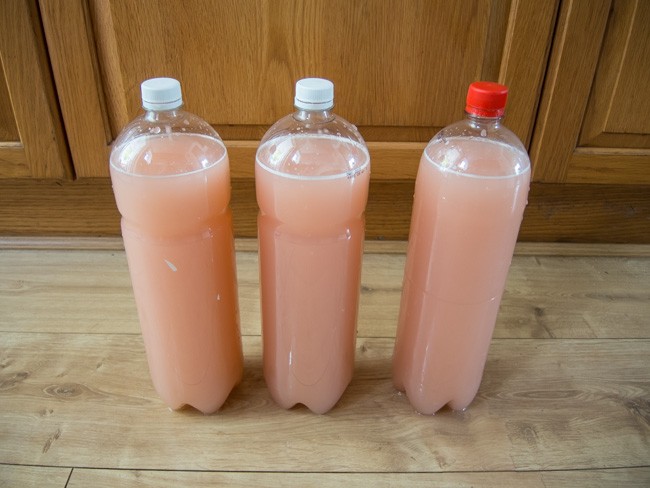
    This year I have also made a variation on the champagne theme as my parents brought me a huge bag of rhubarb from Scotland. So there are also 3 bottles of rhubarb champagne to try in a few weeks. It is a pretty pink colour. Anyone for a glass?


    Elderflower Champagne

    1 kg granulated sugar
    juice and zest of 4 lemons (organic, wax-less)
    2 tablespoons white wine vinegar
    about 30 elderflower heads – shake to dislodge insects before adding
    a teaspoon of wine yeast or a few pinches of baking yeast
     
    Boil 4 litres of water in a pan.
    In a large clean bucket, tip the sugar and then the hot/almost boiling water over the top. Use a clean spoon and stir until the sugar has dissolved. Add another 2 litres of water to the bucket.
    Allow this to cool to tepid/luke warm before adding the lemon juice, vinegar and elderflowers. Stir in the yeast.
    Cover with a lid or clean tea towel and stir daily.
    After 5-7 days when the brew is bubbling away well, strain the brew through a sieve lined with muslin and decant into sterilised bottles (I sterilise mine with Milton tablets and rinse out with a little boiled water so as not to taint the taste).
    Do the pressure releasing as described above and wait at least a few weeks before drinking; it is best served very cold and open the bottle very slowly so the yeast that collects in the bottom does not rise. It will keep in a cool, dry place for up to a year.
     
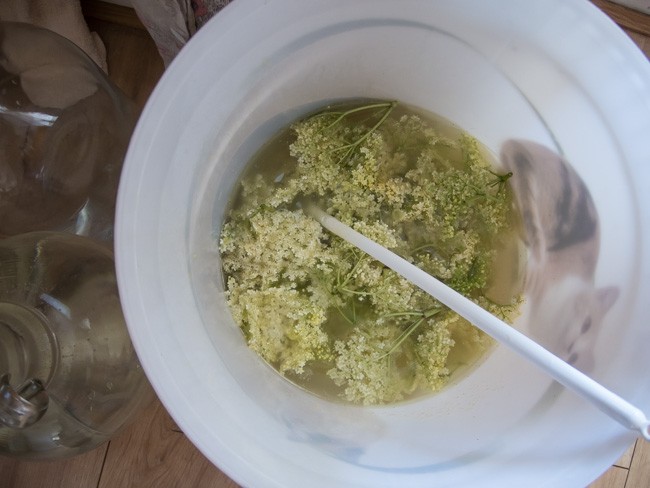
    DSCN1504

    The champagne bucket!

    Elderflower Cordial

     
    1 kg granulated sugar
     zest of 2 lemons which then sliced roughly
    25g citric acid (available in Wilkinsons)
    30 plus elderflower heads – more is easily acceptable
     
    Boil 1.5 litres of water. In a large clean bucket or bowl, tip the sugar and then pour the boiling water over; stir until the sugar has dissolved.
    Leave to cool and then add the other ingredients. Stir at least once daily for 5 days. Strain through a sieve lined with muslin and decant into sterilised bottles.
    This will keep in the fridge for a few weeks or in the freezer indefinitely. Remember if freezing, leave a little space at the top of the bottle for expansion.
     

    Rhubarb Champagne

     
    2kg rhubarb, roughly chopped
    2 lemons roughly chopped
    2 tablespoons of white wine vinegar
    1.5kg granulated sugar
    1 teaspoon wine yeast or few pinches of baking yeast
     
    Boil 4 litres of water.

    In a large clean bucket, tip the sugar and then the hot/almost boiling water over the top. Use a clean spoon and stir until the sugar has dissolved. Add another 2 litres of water to the bucket. Add the rhubarb now (unlike the elderflower champagne).
    Allow this to cool to tepid/luke warm before adding the lemons, vinegar and yeast.
    Cover with a lid or clean tea towel and stir daily.
    After 5-7 days when the brew is bubbling away well, scoop out the rhubarb with a slotted spoon and strain the brew through a sieve lined with muslin and decant into sterilised bottles (I sterilise mine with Milton tablets and rinse out with a little boiled water so as not to taint the taste).
    Do the pressure releasing as described above and wait at least a few weeks before drinking; it is best served very cold.
     
    DSCN1494

    Rhubarb champagne freshly bottled.


  4. Afternoon Tea – chocolate eclairs

    May 25, 2014 by sarah

    A lovely thing to do when friends get together is to make something that can be shared around and enjoyed by all. And last Friday I had the occasion as the practice where I work had a communal Birthday lunch so that we could all celebrate (or not) our Birthdays on one day. More like a ‘unbirthday party’, for you who remember Disney’s Alice in Wonderland. The weather wasn’t too bad so we had a BBQ outside in the garden and I made something sweet for after. I love a fresh pastry and rarely eat cream so these pastries were a real treat.

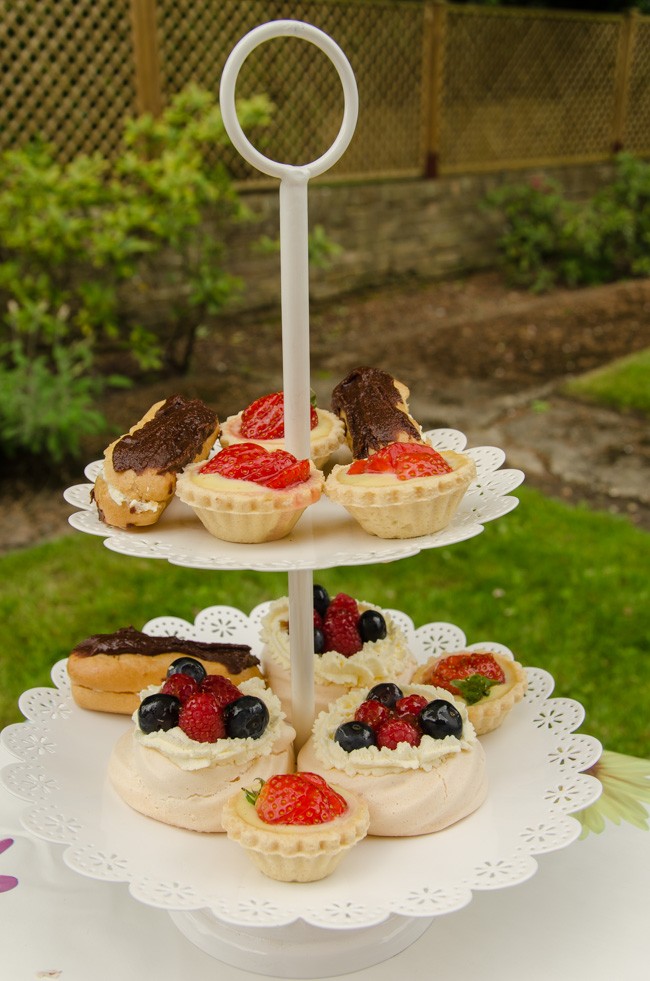
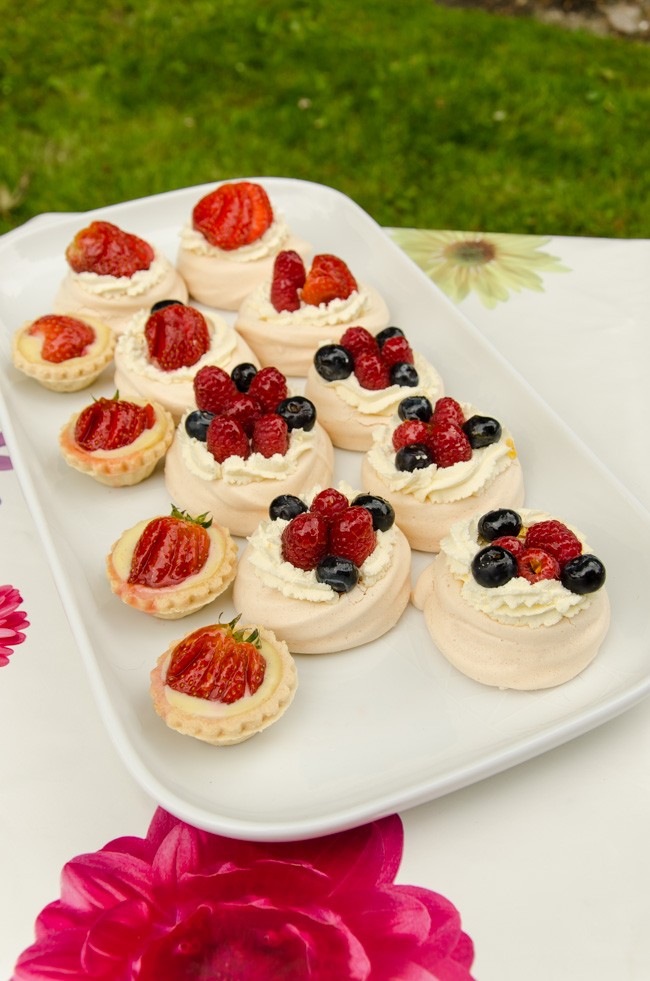
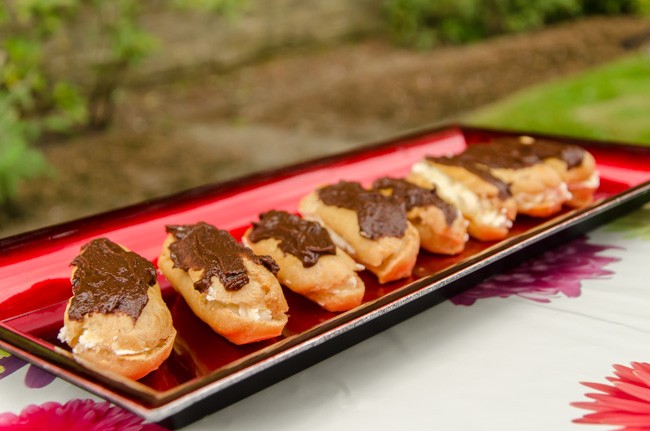
    I made chocolate eclairs, some meringue nests filled with cream and fruit and strawberry tarts. OK, I cheated a little; the pastry tartlet cases are bought not homemade but all the rest was made by my fair hand. This was only the second time I had made choux pastry and I have to say, it really isn’t too hard. In fact, I only just got over my phobia of making shortcrust pastry last year and I think that choux pastry is actually easier! Well, that’s done it. I am sure next time it will be a complete failure! I will share the recipes for meringue nests and crème patissière on a future post. If the weather is good this Bank Holiday weekend, why not treat your loved ones to some home made pastries as part of an afternoon tea. A lovely way to celebrate together.

    chocolate eclair (3 of 4)

    Cake stand of yummy homemade things!

    chocolate eclair (4 of 4)

    Platter of meringues and strawberry tarts

    Chocolate Eclairs

    Makes 18-20 mini eclairs or 12 full sized ones.

    For the choux pastry

    50g unsalted butter

    65ml water and 65ml milk

    Pinch of salt

    100g plain flour, sifted

    3-4 medium free-range eggs, beaten

    For the filling

    300ml whipping cream, whipped to firm peaks

    Or 450g crème patissière

    The icing

    50g plain chocolate

    2 tablespoons of water

    15g butter

    75g icing sugar, sifted


    chocolate eclair (1 of 4)

    Method

    1. Preheat the oven to 220°C/fan 180°C. Lightly greasy 2 baking trays or line with silicone paper.
    2. For the choux pastry, place the water, milk, butter and salt in a medium non-stick saucepan over a medium heat. Heat gently until the butter has melted then bring to the boil.
    3. Quickly take the pan off the heat, add all the flour at once and beat furiously with a wooden spoon until the mixture is completely smooth and comes together in a ball.
    4. Continue to beat on a low heat for a minute so the mixture comes together in a ball.
    5. Allow to cool slightly then beat in the eggs, one spoonful at a time into the dough. This is very hard work and you need to keep going until the pastry has a smooth shiny consistency and is paste like. You may not need all the eggs to reach the correct consistency as it must not be too soft as it needs to be piped.
    6. Transfer this pastry to a piping bag fitted with a 1cm (1/2 inch) plain nozzle and allow it to sit for 5 minutes to firm slightly. Now pipe the pastry in 3 inch (7.5cm) straight lengths (or full size eclairs are 6 “), leaving room between to spread. Apparently for a professional finish you can pipe into long lengths then freeze the pastry. Then cut the frozen lengths into uniform lengths and defrost before cooking.
    7. Bake the pastry at this temperature for 10 minutes then turn the temperature down to 190 °C/fan 170°C and cook for another 20 minutes.
    8. Remove the pastries from the oven and while still hot and pierce or cut to release the steam and if they feel damp on the inside, place back in the oven for 5 minutes.
    9. Allow to cool fully on a wire rack before filling. If not filling immediately, place in an air-tight container and use within a couple of days. If they are slightly soggy when you take them out, give them another 5 minutes in the oven.
    10. Pipe in the whipped cream or cream patisserie (use a star nozzle for the cream, plain nozzle for cream pat).
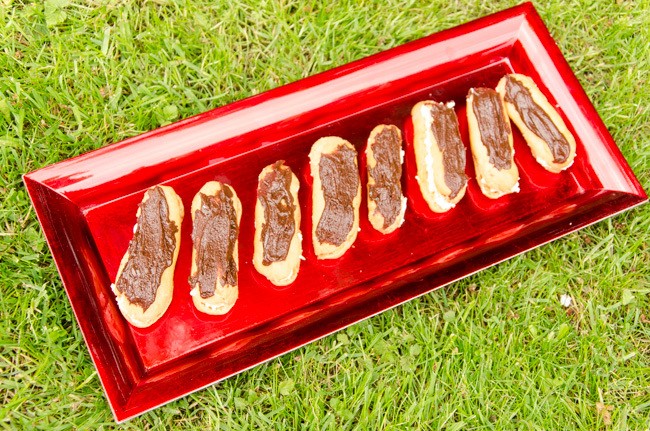
    11. For the icing, melt the chocolate slowly in a bain mairé with the water and butter. Remove from the heat and beat in the sugar until smooth. Pipe or spread over the top of each eclair.

    One last thing. The icing recipe didn’t work too great (I found it in Mary Berry’s book) but that may have been because it set firm before I was ready for it so I had to rewarm it and that is when it went grainy. Just to warn you if it looks like it is not going to work, perhaps just go with melted chocolate.chocolate eclair (2 of 4)


  5. All the greens of Spring

    May 14, 2014 by sarah

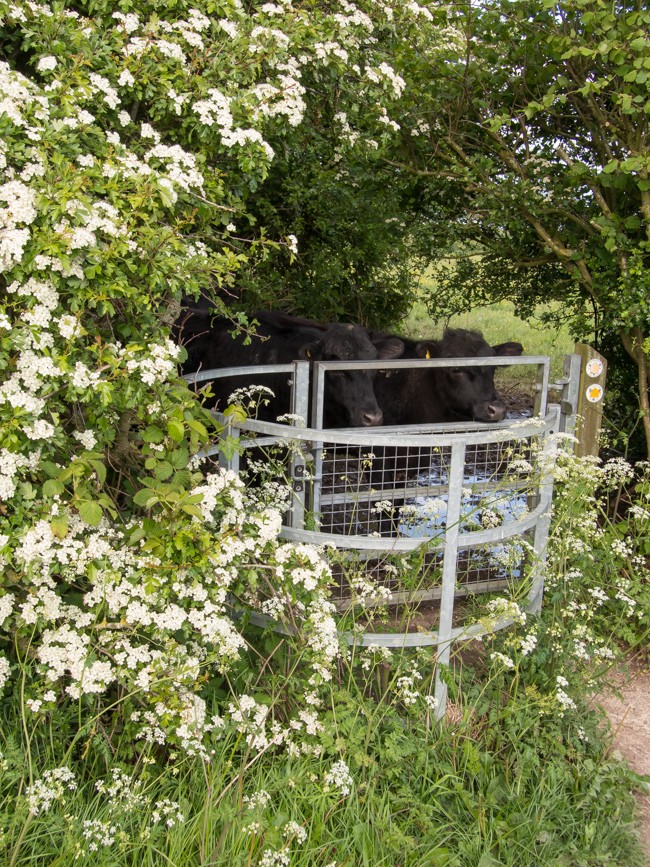
    Having just come back from foreign climes, where the environment is much more arid than home, means I am fully reveling in the luscious greenness that is May in England. No dusty or faded colours paint the landscape green here. It is as if everything has been slapped with the freshest glossiest paint of every green shade imaginable. The frothy lace of cow slips fills the gap between hedge and path and hawthorn blossoms drip from every branch above and delicately fragrances the air. It seems I am not the only one rejoicing in the fullness of Spring; every little bird is singing at the top of his little voice as he flits from bush to bush busying himself with household chores. And the cows are chasing us along the footpath, though as I turn to confront them the breaks are applied so suddenly as to make the ground thunder under their hooves. What joys!


    spring (7 of 7) spring (6 of 7)


    We are incredibly lucky to be living near one of the best bluebell woodlands in the country at Ashridge Estate. My heart was beating with anticipated excitement as we drove through the prettiest little village of Aldbury to get to Ashridge. And then it gave a little skip as we turned a corner on the path and there was the most amazing surreal blue sea spread out below the fresh young green of the tall beech trees. There was a fantastic display this year and yet every year it surprises me at how blue it all is. In another week or two it will be just a memory again.

    spring (2 of 7)

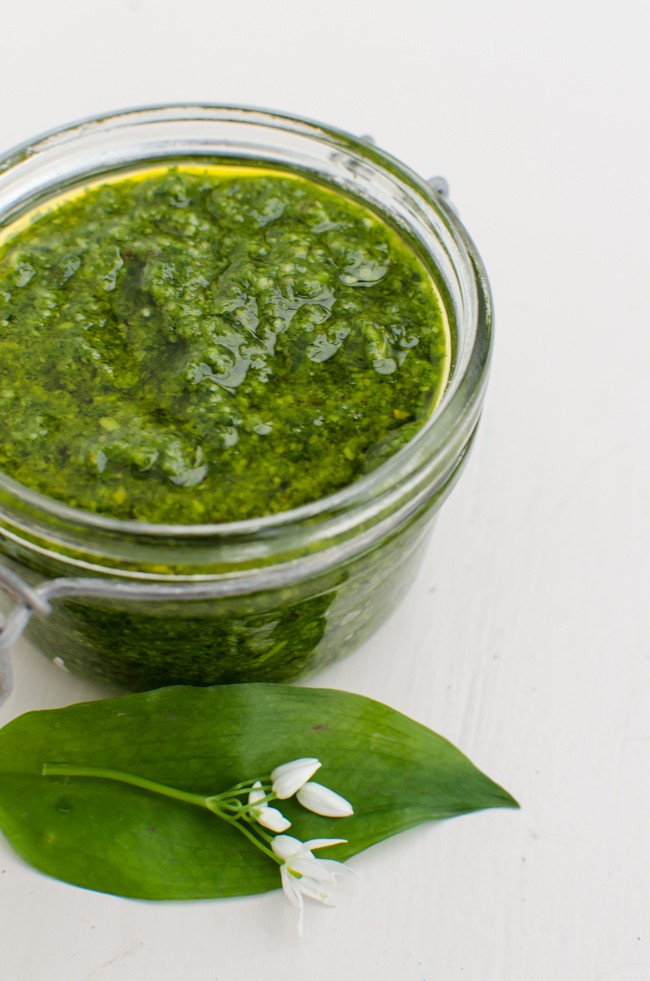
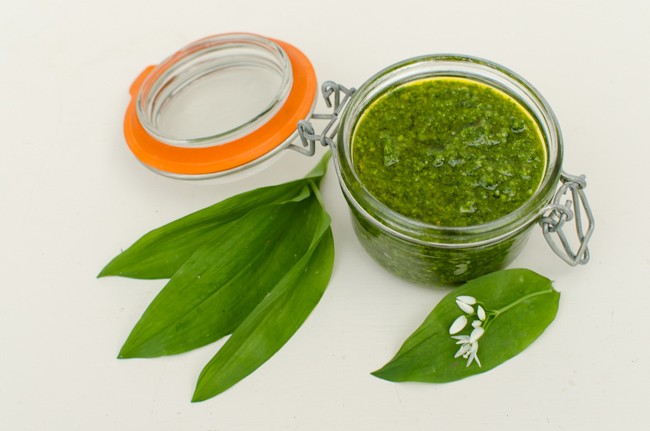
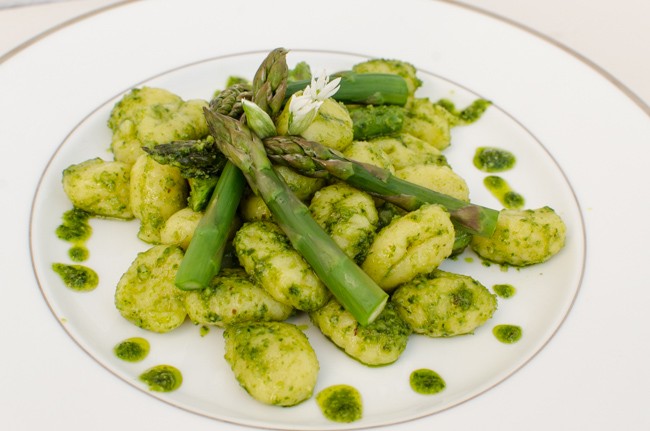
    While at Ashridge, we picked some wild garlic leaves as I always had in the back of mind that there must be something of use in them seeing as how they smell so strongly as you brush past on the footpath. And boy, I was not disappointed; raw the crisp leaves are crunchier than spinach with a green taste and pungent aroma of garlic; cooked, the softness is comparable to spinach and the garlic is tempered to a light scent. I ate handfuls straight from the carrier bag; I had leaves folded into a soft egg omelet. I was still left with half a carrier bag and yet wanting to preserve their uniqueness for longer than the leaves would last even in the fridge. And then I remembered a dish that John Wright from River Cottage cooked us when we went on the River Cottage hedgerow course a few years ago; wild garlic pesto. Of course, John made his with pig nuts which we spent many happy hours digging out of their water meadow but in real life only a sadist would want to waste time digging up a tiny pea sized bulb of a plant to make a dish. (Sadly, I have been known to go to such lengths) So I made mine with walnuts brought back from Iran, and I have to say I do not think the recipe suffered for the change. Indeed, if the feeling takes you then please make fresh gnocchi for the second recipe but also do not feel guilty using good quality ready made gnocchi; I don’t.

    spring (9 of 3) spring (8 of 3)

    Wild Garlic Pesto

    60g young wild garlic leaves (please look this up in a book to be sure what you are picking)
    1 small garlic clove (if you don’t think the leaves are garlicky enough!)
    50g nuts – pine nuts are traditional but walnuts, hazelnuts or almonds would work
    60g parmesan cheese finely grated
    zest of half a lemon
    150-200ml light olive oil or rapeseed oil (do not use virgin olive oil, you will not taste it)
     
    In a small food processor, blitz the garlic leaves and garlic clove with a good glug of the oil.When chopped down, add the nuts and blitz again until the nuts are fine. Add the cheese, lemon zest and a good pinch of sea salt and blitz again to mix. Add the remaining oil in small lots until the desired consistency is reached. Store in a sterilised jar with more oil over the top. Keep in the fridge and use within 2 weeks.
     
    spring (10 of 3)

    Gnocchi Primivera

    A 300g packet of fresh gnocchi (do not use the long-life vacuum packed packets in the pasta isle)
    2 tablespoons of fresh wild garlic pesto
    100g English asparagus
    a good shaving of fresh parmesan
     
    Cook the gnocchi according to the packet – using just dump them in boiling water and they are ready when they float. Steam the asparagus. Drain, reserving a little of the boiling water.
    Put the gnocchi back in the pan with the asparagus which you have chopped into short batons and stir through the pesto.
    Serve up and liberally sprinkle over large shavings of parmesan.
    Put the gnocchi

  6. Appletini Time

    May 9, 2014 by sarah

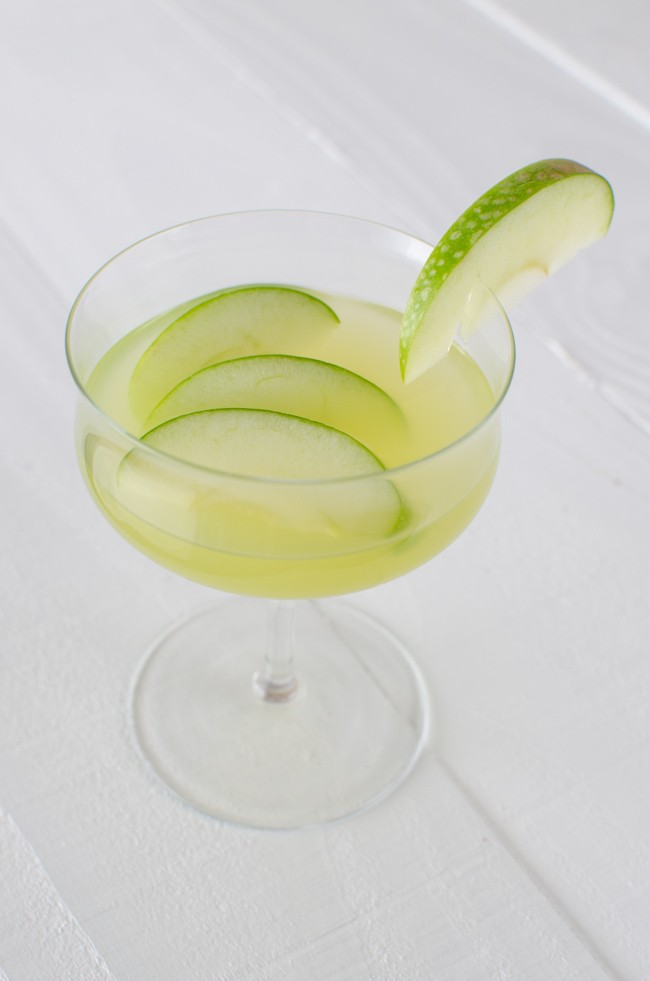
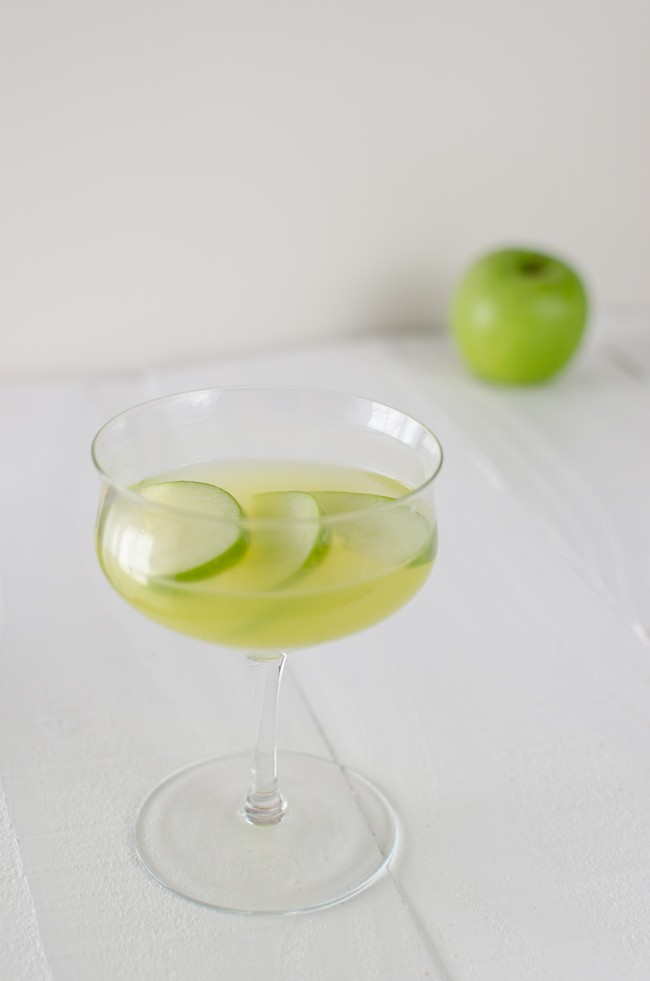
    It is Friday evening and that means cocktail time! Only kidding, but it is a good way to start the weekend. This recipe is deliciously fruity and a bit sour, my favourite combination in a cocktail.

    apple martini (4 of 5)

    Apple Martini

     
    Combine 2oz vodka and 1oz green apple snapps in a cocktail shaker and fill with ice. Shake until well chilled. Pour into a cocktail glass and top up with fresh apple juice. My personal preference is about 50% alcohol to 50% apple juice and some more ice. Garnish with green apple slices.
     
    apple martini (3 of 5)
     

  7. Salted Caramel Popcorn

    April 12, 2014 by sarah

    It is Saturday night and to me that means movie night. These days it is most often an ‘at home’ movie on DVD rather than a cinema experience. Apart from a special trip to The Rex, I don’t like going to the odious Odeon or the cynical Cineworld; over priced tickets for a standard chair, sticky carpets covered in popcorn, noisy customers, and no bar! Not nearly as pleasant as our own sofa, glass of wine in hand and a bowl of this delicious popcorn. I guess this is why our DVD collection would rival that of a well stocked rental shop!

    By the way, if you haven’t been to The Rex, you really MUST!

    popcorn (1 of 2)

    Salted Caramel Popcorn

    100g butter
    100g soft brown sugar
    2 tablespoons golden syrup
    1-2 teaspoons sea salt, depending on taste
     
    Make a batch of popcorn, either old fashioned in a pan or a bag of plain microwave popcorn.
    Oil a large baking tray and tip over the popcorn, discarding any unpopped kernels. Preheat the oven to fan 160 ºC.
    Melt the butter, sugar and syrup in a small pan, stir until melted and then boil for 4 minutes.
    Pour this sauce over the popcorn and toss with 2 spoons (it will be VERY hot and cause burns) until the popcorn is coated or the sauce goes stiff.
    Pu the tossed popcorn in the preheated oven for 5 minutes. Take out and toss again, sprinkle over the salt and cook for another 5 minutes. Repeat again if the popcorn isn’t evenly coated.
    Leave to cool for 10 minutes before attempting to eat – otherwise you WILL burn your mouth!
     
    popcorn (2 of 2)

  8. Chicken, Lemon and Olive Stew

    March 23, 2014 by sarah

    The lovely yellow colour and gentle spice warmth of this recipe brightens up the these cold Spring evenings. Just don’t dribble the juice down your favourite top as it will stain. You have been warned!

    juniper (3 of 6)


    I almost always have a jar of homemade preserved lemons in the cupboard. I make it from the lemon skins left over from pressing the juice from other recipes, such as elderflower champagne or lemon curd, so it is practically free rather than the very overpriced and over coloured jars in the supermarket. But feel free to use what ever preserved lemons you have to hand. Even a quick trip to Marrakesh to pick some up is quite alright by me. If you take me too.

    Chicken, Lemon and Olive Stew

    Serves 4
    1 kg or so of chicken thighs with skin on, or chicken pieces or a jointed chicken
    2 tablespoons of olive oil
    1 large onion cut into fine half moons
    2 garlic cloves crushed
    a large thumb sized knob of fresh ginger, finely grated
    1 teaspoon ground cumin
    1 teaspoon ground tumeric
    1/4 teaspoon ground cinnamon
    1 tablespoon honey
    1 pint/half a litre of chicken stock (from a stock pot is fine)
    half a jar of green olives (pitted or not as to your preference or what is on offer), rinsed
    1 preserved lemon
    fresh coriander, chopped finely
     
    Heat the oil in a large heavy bottomed casserole (my lovely new Creuset pan is perfect) and brown the chicken all over. Remove the chicken from the oil and rest on a plate. Reduce the heat to medium or less and soften the onion for a few minutes. Once the onions are softened, add the dry spices, garlic and ginger and stir until fragrant. 
    Pour over the chicken stock and with a wooden spoon, rub the bottom of the pan to release the crusted yumminess.
    Return the chicken to the pan and put on the lid; simmer for 30 minutes.
    Prepare the lemon by scraping out the sludgy insides and rinsing the rind under a cold tap. Cut the rind into small pieces and add to the pan with the rinsed green olives and the honey. Allow to simmer for 15-20 minutes with the lid off. Taste and adjust the seasoning if required (will probably not need salt due to the lemon and olives). Serve over couscous.
     
    juniper (5 of 6) juniper (4 of 6)

  9. Spice 4 – Juniper Berries – Venison Casserole

    March 19, 2014 by sarah

    Right, time for another spice and this time something that is probably known to you but perhaps lurking in the back of the cupboard unused? Well, mine was until I found this recipe. The recipe is actually a hand me down from my Mum, hand written into my recipe book from about 15 years ago!

    juniper (6 of 6)


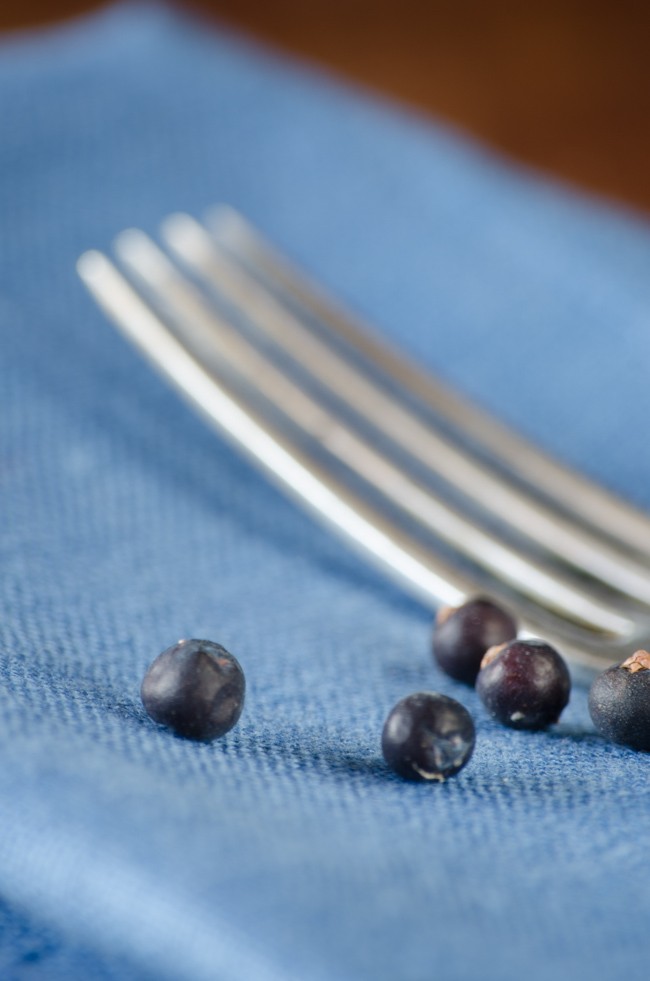
    Juniper is actually the female seed cone (i.e. not a berry or fruit) of Juniperus communis but the scales are fleshy and fused to give the berry like appearance. It is one of the few spices that is native to Europe, and even occurs in the UK though it is rare here. It is used a lot in Northern European, particularly Scandinavian, cuisine in particular to flavour game and cabbage dishes. And who can forget juniper is used to flavour gin. My favourite cocktail has got to be the plain, but oh so mouth watering, gin and tonic. Made with Hendricks of course!

    Venison Casserole with Juniper

    Serves 4

    1 pack of diced venison (about 400g)
    1/2 teaspoon of peppercorns
    1/2 teaspoon juniper berries, bruised in a mortar and pestle
    2 tablespoons olive oil
    3 bay leaves
    good sized sprig of thyme from the garden
    1/2 a bottle of red wine
    2 garlic cloves, finely sliced
    1 onion finely diced
    1 tablespoon plain flour
    rind of 1 orange and juiced
    2 tablespoons of red currant jelly (I used damson jelly because that is what I had – it worked well)
    sherry glass of port
    a dozen small shallots, pan fried
    one pack of vacuum packed chestnuts (or roast and peel and blanch and remove skin yourself – if you are a masochist)
     
    Marinade the venison in the wine, peppercorns, juniper,  1 tablespoon of olive oil, bay leaves, thyme, garlic and onion for 24-48 hours.
    Drain the venison, reserving the liquid.
    Brown the venison in the other tablespoon of olive oil, dust with 1 tablespoon of plain flour and rest on a plate and soften the onions from the marinade mixture. Add the venison, softened onions and the rest of marinade ingredients to a casserole dish. Add the juice and rind of the orange, the redcurrant jelly and the port and season. Add more water if necessary to make sure the venison is covered.
    Cook slowly for 2 hours on the hob or in a low oven.
    Add the shallots and chestnuts and cook for a further 30 minutes.
    Serve with mashed potatoes, celeriac mash or gratin or any other starch to your preference and it is obligatory to serve braised red cabbage with this stew.
     
          juniper (2 of 6) juniper (1 of 6)    


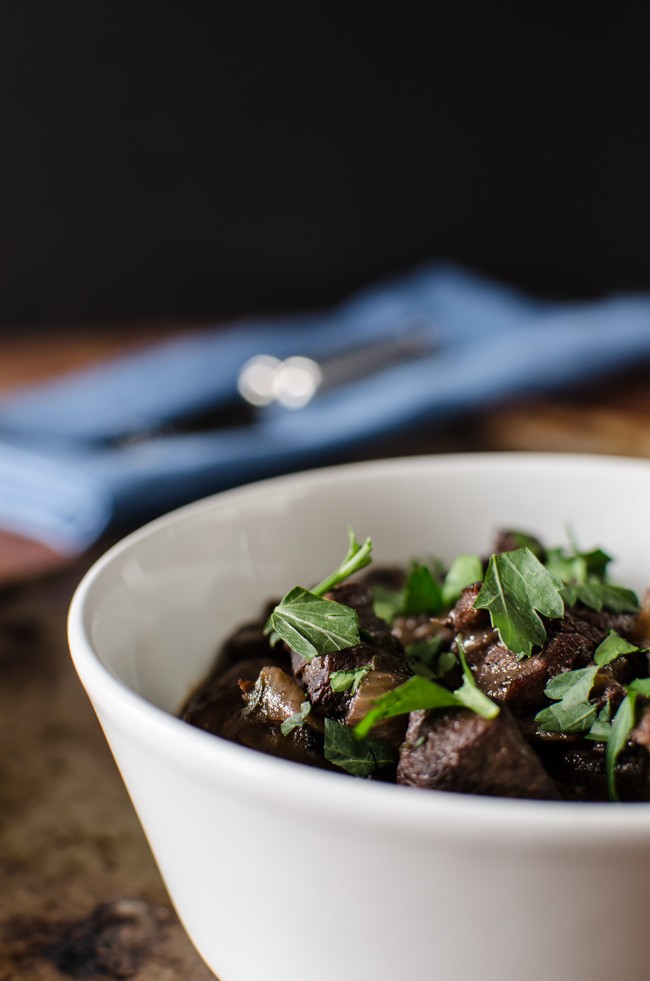
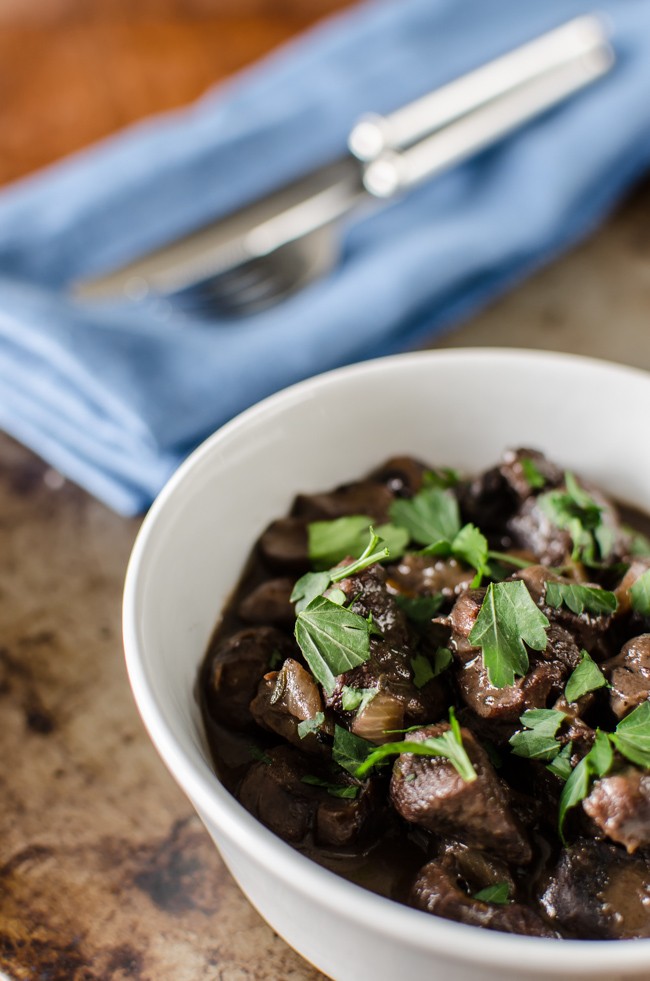
     I had quite a lot of problems photographing this dish. Though incredibly tasty, the stew is just BROWN and brown things don’t look that appetitsing. Hense the use use of the contrasting blue napkin and a fair sprinkling of parsley! Also, to get height in the bowl I used a a trick of placing half an upturned apple in the bottom of the dish to raise the chunky bits above the liquid of the stew and give more of a 3-D appearance.

  10. Jammy Bakewell Slice

    March 13, 2014 by sarah

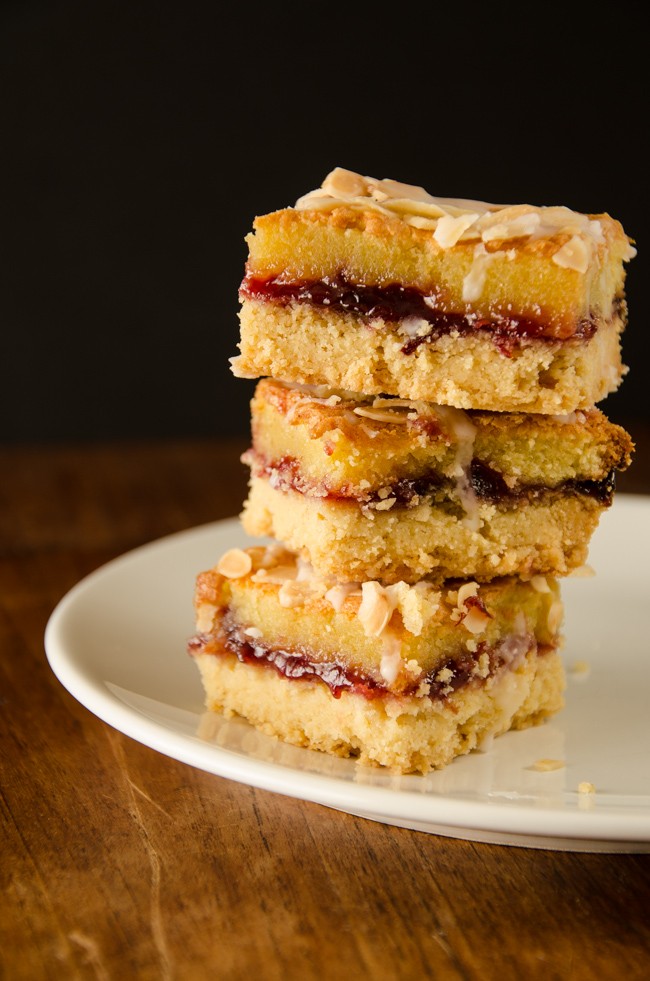
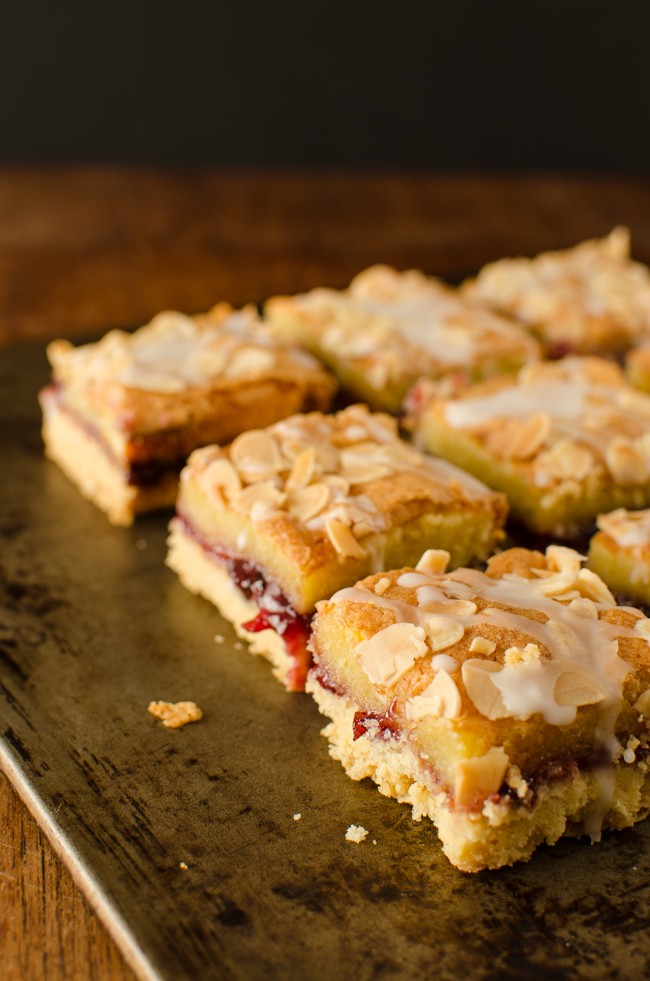
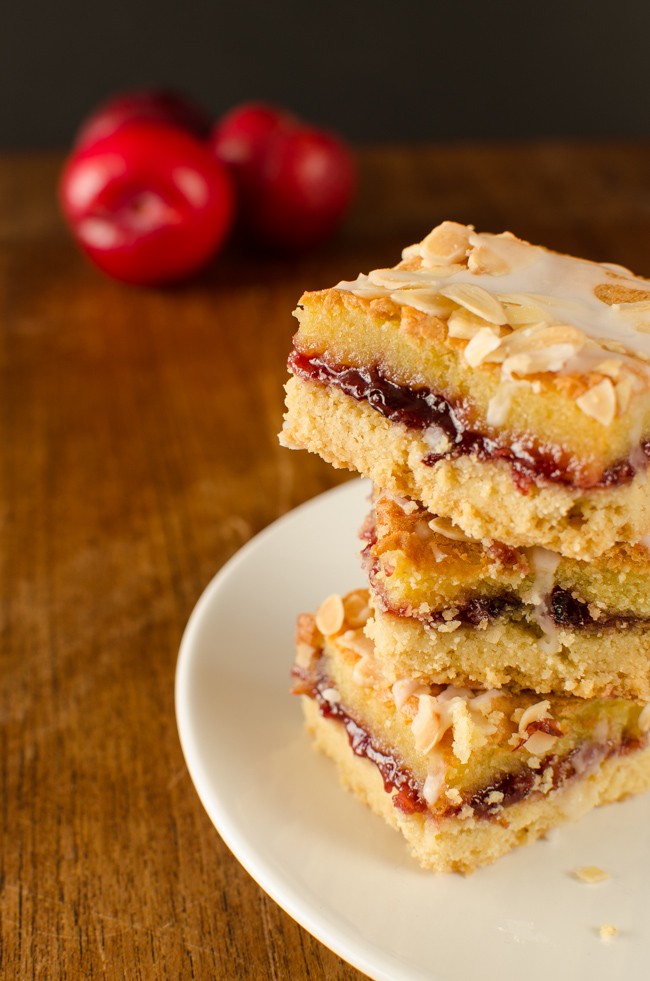
    This past weekend I woke to a sunny Spring day and a yearning for a cakey and biscuity homemade bake. I had been sorting out the jam from last year and found I had rather a lot of damson jam left over and some how a bakewell slice type of cake popped into my head. Perfect; uses up some jam, biscuity base and almost cake like top. I was right; it ticked all the boxes and I polished off 3 slices while taking the photographs. Never mind as a good long dog walk in the sun (probably) burnt off some of the calories and it made me happy to bake it, eat it and and give the leftovers to the guys at work. Top up your vitamin D levels!

    I have adapted a recipe I found online at www.bakingmad.com.

    _1SK5018


    Jammy Bakewell Slices

    300g plain white flour
    65g rice flour
    275g unsalted butter
    50g caster sugar
    1/4 teaspoon baking powder
    1/2 teaspoon salt
     
    good sized jar of good flavoured jam (cherry is traditional)
    4 medium eggs and one extra egg yolk
    150g caster sugar
    175g ground almonds (I only had 150g and added 25g fine semolina and this worked great)
    175g unsalted butter
    1/2 teaspoon vanilla extract
    1/2 teaspoon almond essence/extract
     
    25g flaked almonds
    1 tablespoon icing sugar
     
    Preheat the oven to 180 C or fan 160 C.
    Make the base by rubbing the butter into the flour, rice flour, baking powder and salt until it resembles fine bread crumbs. This made my hands ache like anything so I suggest you use a food processor if you have one.
    Bring the crumbs together into a ball and lightly knead for a few squeezes to make sure it all sticks together. This part is important otherwise your shortbread base will be too crumbly, but in a nice way. Tip in to a large square or rectangular baking tin (about 8″ by 12″, or 20cm by 30cm) and press down so equally covered. Bake for 20 minutes then allow to cool.
    While the base is cooling, make the top layer by whisking the eggs together in a large bowl then adding the other ingredients except the second lot of butter, which you melt first then whisk in.
    Spread the jam in a generous layer over the cooled base then pour over the topping.
    Cook for 20 minutes then sprinkle over the flaked almonds (this stops them getting too brown) and cook for a further 15-20 minutes. It is done when the top is golden and spongey.
    Leave to cool for half an hour and then drizzle over a simple sugar glaze made by mixing the icing sugar with just enough water to allow it to drizzle successfully. Now cut into slices and cool completely on a cooling rack. Makes about 20 pieces.
    _1SK5003 _1SK5028