RSS Feed

‘Home’ Category

  1. Vanilla Part 2 – Caribbean sweet potatoes and banana ketchup

    August 21, 2014 by sarah

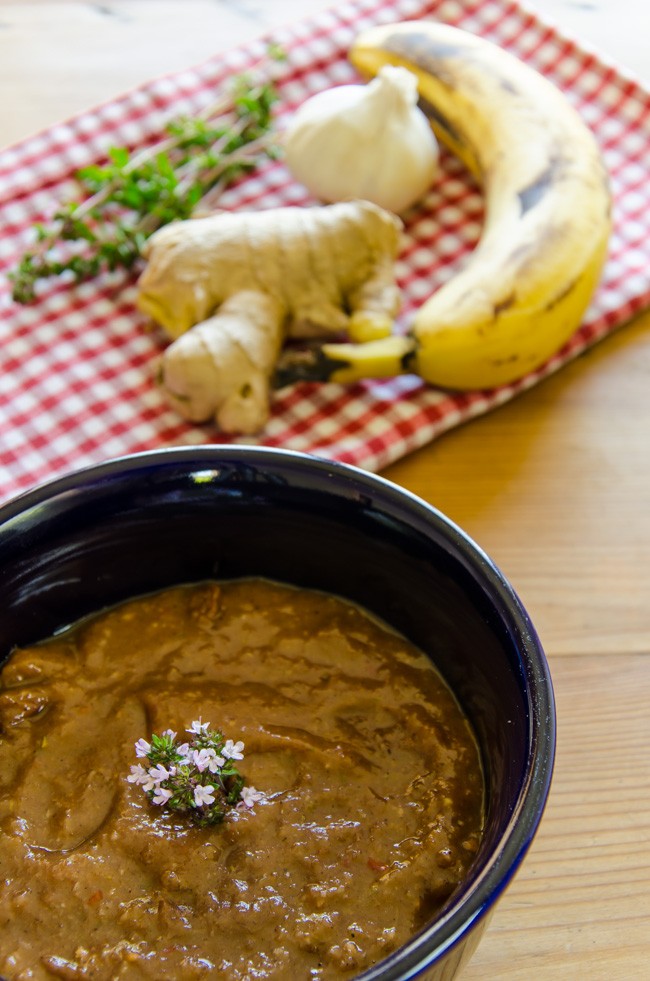
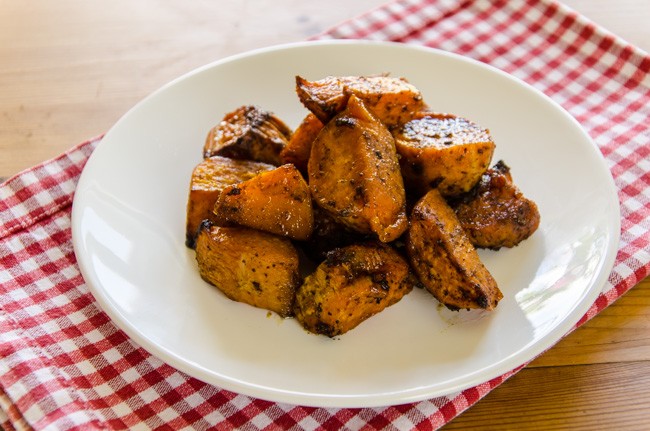
    In my experimentation to find a delicious savoury recipe using vanilla, I happened to add a vanilla bean to my usual recipe for Caribbean Sweet Potatoes and it worked! So here it is to share with you. I have also included a recipe for banana ketchup (from Levi Roots ‘Caribbean Food Made Easy’) because nothing goes better with sweet sticky potatoes and jerk chicken or pork. I know it sounds weird but it really works.  Bring some soul to your food!

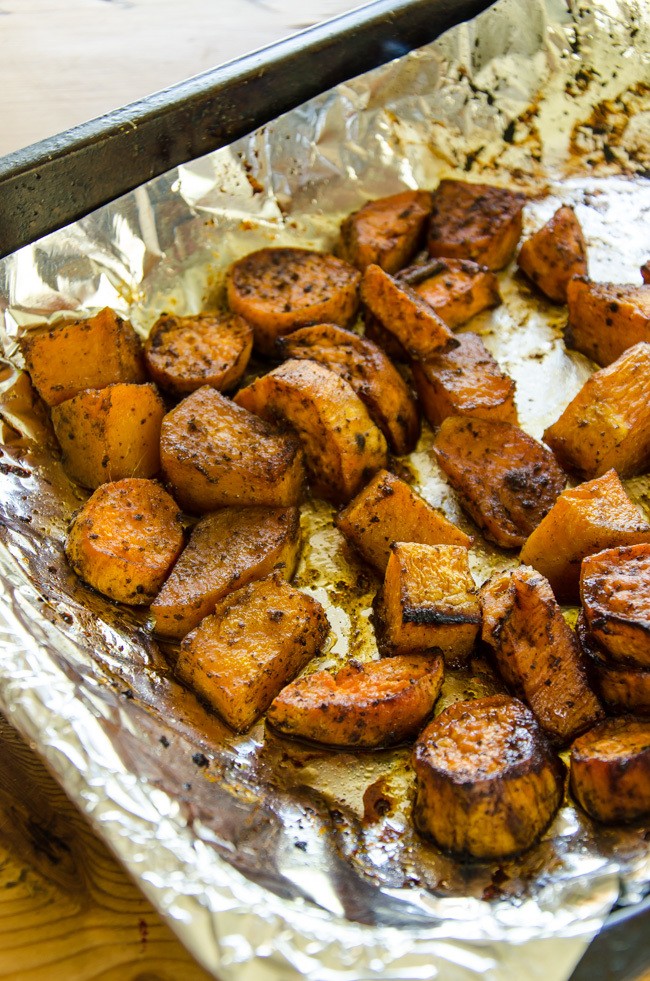
    sweet potatoes-6906

    Caribbean Sweet Potatoes with Vanilla

    1kg sweet potatoes
    2 tbsp vegetable oil
    2 tbsp honey or maple syrup
    juice of 1 lime
    4 cloves of garlic, peeled and finely chopped
    2 vanilla beans, blitzed in spice grinder grinder until fine powder
    1/2 tsp cinnamon
    1/2 tsp ground ginger
    1/4 tsp chili powder
    1/8 tsp nutmeg
    1/8 tsp allspice
     
    Preheat oven to 180 C. Line a large roasting pan with tin foil – this recipe really sticks!
    In a large bowl, whisk together all the ingredients then add the peeled and chunked potatoes.
    Toss so all is coated and then pour onto onto the roasting pan so it is one layer thick.
    Cook for 45-60 minutes, turning every now and then.
     
    sweet potatoes-6898


    Banana Ketchup

    most of a 400g can of chopped tomatoes in juice
    3 very ripe bananas, peeled
    3cm knob of root ginger, peeled and sliced
    1 garlic clove, peeled
    2 spring onions, remove roots
    some chili – however hot you like it man
    good grating of nutmeg (about a quarter of a nut)
    1 tsp ground allspice
    1 tsp ground cinnamon
    2 and 1/2 tbsp soft brown sugar
    good pinch (3 fingers) of salt
    juice of 1 lime
     
    Put everything in a blender (or use a stick blender in a tall narrow container) and blitz until smooth. Taste to check the seasoning, adjusting the sweet, sour and salt as required.
    Pour into a saucepan and simmer for 5 minutes. Leave to cool entirely before serving.
    This also freezes well but I would recommend using within a few months.
     
    sweet potatoes-6893

  2. Yorkshire Curd Tart

    August 5, 2014 by sarah

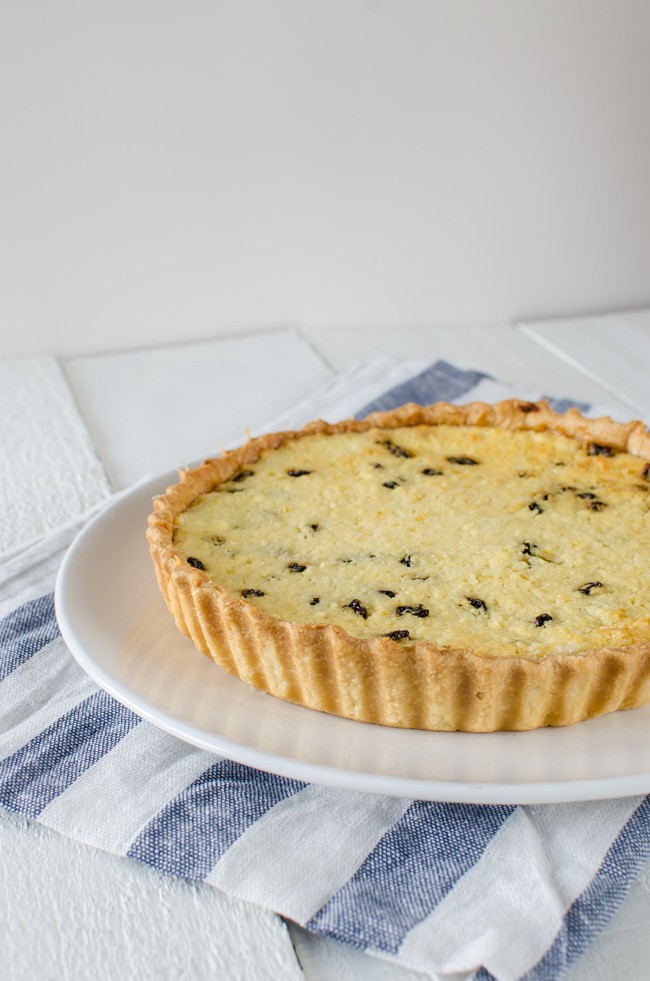
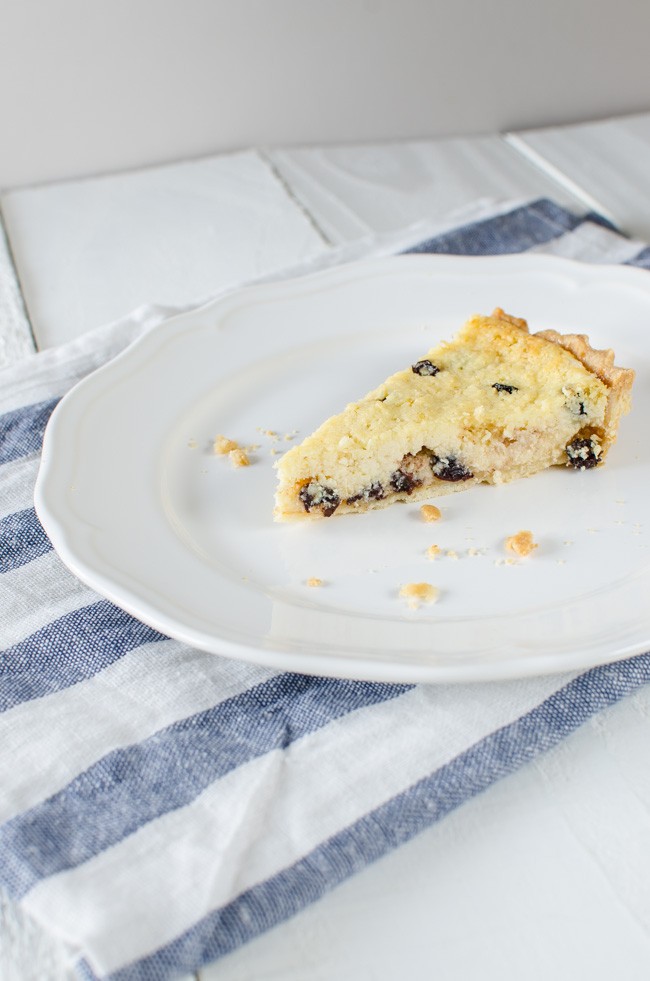
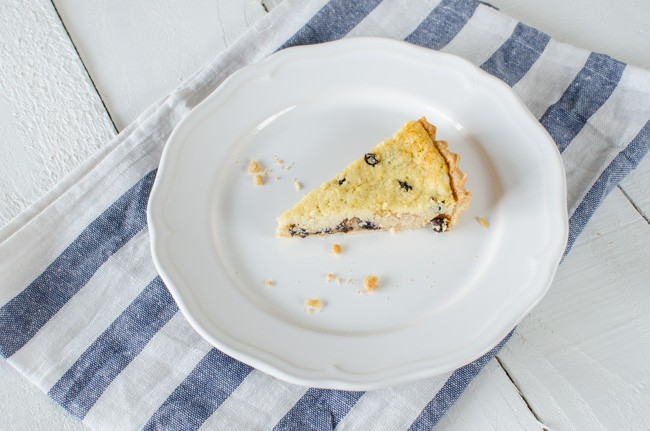
    When we were in the Yorkshire Dales a few weeks ago, we sampled the local foodie delights including something called a curd tart. Nothing to do with lemon curd but it was still a delight; soft buttery pastry with creamy but slightly tart filling with currants and spice. So once we were home I decided to make my own version to remind us of the trip. We had lots of lovely food that weekend, from the punnet of fresh sun ripened strawberries to the Wensleydale cheeses (they do more then just Wensleydale, try the Kit Calvert), the best sausage roll I have ever tasted to pie and pint in the pub!

    _1SK6991 _1SK6998

    Yorkshire Curd Tart


    (recipe from The Hairy Bikers here )

    For the Filling:
    1.2 litres/2 pints of milk (semi-skimmed or full fat)
    4 tbsp lemon juice
    1/2 lemon, zest only
    65g unsalted butter, softened
    65g caster sugar
    1 free-range egg, beaten
    1/4 tsp grated nutmeg
    60g currants
    20-22cm diameter deep loose-bottomed flan tin or pie tin – lined with blind baked pastry (bought or home made with 175g flour/100g butter/2 tsp caster sugar/1 egg)
     
    To make the curds for the filling, firstly zest the lemon and store the zest in an airtight container in the fridge – you will need it tomorrow to make the filling – and then juice the lemon. Heat the milk in a large non-stick saucepan over a low heat and bring to a very gentle simmer. Remove from the heat and pour in the lemon juice, stir a few times and then leave to curdle for a couple of hours.
    Line a sieve with muslin and place over a large bowl. Pour in the curdled milk and allow to drain in the fridge for a minimum of six hours, ideally overnight.
    Preheat the oven to 180 ºC/fan 160 ºC.
    Cream the butter and sugar together until light and fluffy. Gradually beat in the egg then stir in the curd cheese, lemon zest, nutmeg and currents.
    Spoon the curd into the pastry case and spread to evenly cover and bake for 30-35 minutes until the filling is set and lightly coloured. Leave to cool in the tin for at least 30 minutes before removing and eating. Serve at room temperature.
     
    _1SK6997

  3. Spice 6 – Vanilla – Madagascan spicy vanilla chicken

    July 22, 2014 by sarah

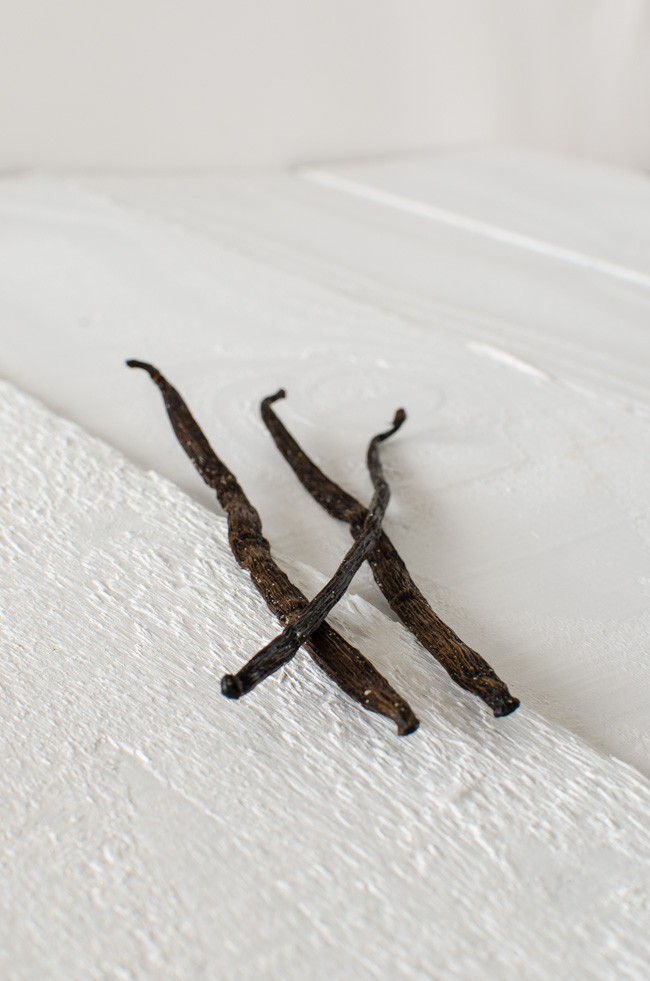
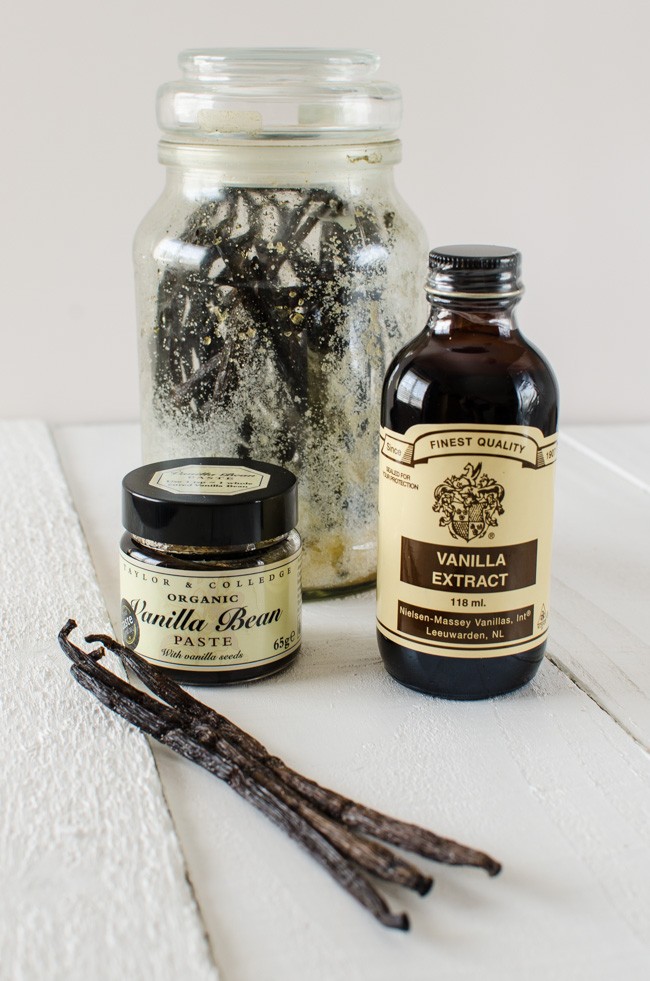
    Vanilla is one of the most expensive spices after saffron. It is a ubiquitous flavour in many sweet dishes – ice cream, custard – and yet under valued in savoury ones. So this post is hopefully going part of the way to address that and demystify the savoury uses of this delectable and exotic spice. It has a soft, sweet aroma and flavour which pairs so well with desserts and cakes. Vanilla also holds a  very special place in my heart as the vast majority of it comes from Madagascar where I spent a year as a child and on a return trip 20 years later, I met my future husband. From that trip I brought back half a kilo of the valuable beans, smuggled inside a smelly sleeping bag as the export limit was so tiny. I only have half a dozen of those beans left sadly; a good excuse to go back. But these days real vanilla is easily available. Please never use the ‘essence’, but a good quality extract is essential in baking.

    Vanilla beans are actually the pods of a climbing orchid native to Central America, though 75% of the world production is now in Madagascar. Vanilla growing is a labour intensive and slow process; the flowers must be pollinated by hand, the green pods must be harvested by hand and cured in the sun over several days, raised to high temperatures and ‘sweated’ in cloth to achieve the complex balance of sugars and aromatics, then dried and straightened out for several weeks.

    vanilla-7026

    Look for fragrant, very dark brown, almost black pods that are slightly wrinkled, but still supple, with a slightly oily, shiny surface. Length is an indication of quality – 15-20 centimetres is best. If there are white fibre like crystals on the surface of the pods, this is a sign of extra quality. Store vanilla pods in an airtight container in a cool dark cupboard and it will still be good after a few years. Prepare the pods by splitting down the length, opening out the inside of the pod where the seeds are and using the back of the knife to scrape down the length. Add the seeds and pod for flavouring. You can reuse the pods by rinsing well after infusing the milk or cream base and leave to dry for a few days; add the dried pod to a jar of sugar for homemade vanilla sugar. I store my pods in a jar with a little sugar in the bottom; whenever I open the jar, I have to stick my nose right in and take a deep breath.

    vanilla-7011

    We ate versions of this dish nearly every day on our trip around Northern Madagascar. I have upped the spice a little and although it is the main vanilla growing region in the world, I don’t think any versions we had in Madagascar actually had vanilla in it. Missing a trick. Vanilla also goes well with seafood and a typical dish would be lobster or prawns with a vanilla sauce.

    Madagascan Spicy Vanilla Chicken

     
    8 chicken thighs, boned and skinned (or a jointed jungle fowl)
    1 medium sized onion, chopped finely
    1 tablespoon vegetable oil
    2 cloves of garlic, chopped finely
    1 medium heat chili or a teaspoon of cheats chili from a jar
    thumb sized amount of fresh ginger, grated
    1 vanilla pod
    400ml tin of coconut milk
    4 tablespoon grated coconut (if you have it, could try dessicated coconut)
    handful of fresh tomatoes chopped or half a tin of chopped tomatoes
    chili powder
    lime
     
    Heat the oil in a heavy bottomed pan and when hot fry the chicken until brown on all sides. When done remove from the pan and rest on a plate. Fry the onion, garlic, ginger and chopped chili with a teaspoon of salt until translucent and soft. Add some chili powder to taste (depends how hot you like it and how hot your chili powder is) and stir for a minute.
    Put the chicken back into the pan with the onion mixture and add the coconut milk, grated coconut and tomatoes. Split the vanilla bean length ways and scrape out the seeds, adding the seeds and remains of the bean to the pan. Give everything a good stir; top up with water if necessary so that the chicken is just covered.
    Put a lid on the pan, bring to a simmer and cook for 30 minutes.
    Remove the lid and taste; adjust seasoning as required. Cook for another 10 minutes with the lid off.
    Serve over white rice with a wedge of lime.
     
    vanilla-1643
     

  4. On quiches and tarts

    July 17, 2014 by sarah

    I make a quiche – or the posh word for one, a tart – about twice a month. If you buy the pastry it can be surprisingly quick to make. I make my own pastry every now and then to keep my hand in but there is nothing wrong with bought pastry for an everyday quiche. Making quiches is how I overcame my fear of making pastry. They also freeze well so I tend to make a medium sized one that lasts the two of us two nights of dinners (any longer and I get fed up) and the spare pastry makes another 2 to 4 mini quiches which I freeze for lunches. Makes a perfect light dinner with a green salad and possibly some new potatoes if we are extra hungry.

    There is a huge variety of fillings and combinations that can go into your quiche, just try to use something that doesn’t give out too much moisture as it cooks otherwise you will end up with a very soggy quiche – yuck! There is nothing worse than wet quiche and soggy pastry. So that means avoiding spinach and other greens in the filling and if you use vegetables like mushrooms or courgettes then pre-cook them to drive off some of the moisture. Here are some alternative filling suggestions:

    • smoked salmon and asparagus or purple sprouting broccoli – also nice if you replace the cream with creme fraiche
    • pancetta or smoked bacon and strong cheese such as cheddar or Gruyere – classic quiche Lorraine
    • oven roasted cherry tomatoes (or the sunblush semi-dried ones), basil and Parmesan
    • red onion and three cheese – caramelise some red onions in a frying pan
    • leek and cheese – soften leeks in butter, choose a strong cheese like Gruyere
    • poached salmon and new potatoes – again creme fraiche would be good in the filling and perhaps some herbs
    • fig and blue cheese – halved or quartered fresh figs, good amount of a good blue cheese

    What is your favourite filling?

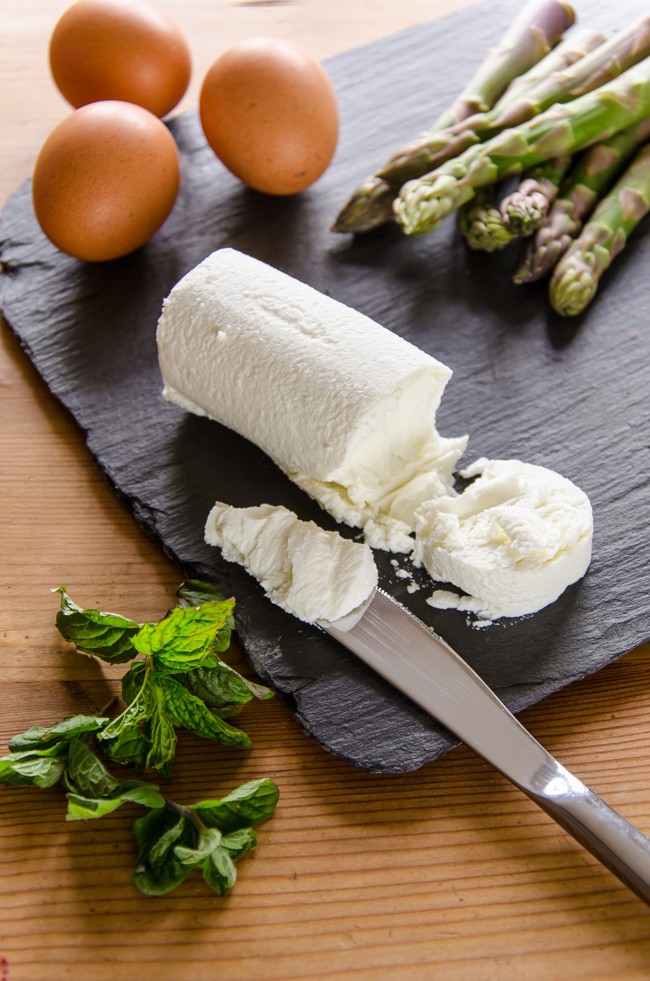
    quiche-6880

    Goats Cheese and Aspargus Tart

     
    320g pack shortcrust pastry – leave out of the fridge for 10 minutes so easier to use.
    150ml single cream (double cream or creme fraiche can be substituted, in which case I would reduce the amount and increase the milk to compensate for the extra richness)
    150ml milk
    4 whole eggs
    100g asparagus tips – blanched or steamed until just cooked, allow to cool.
    100-150g pack of soft/fresh goats cheese, usually in a mini log
    Makes a 20cm diameter and 2 mini quiches – you need loose bottomed flan tins with deep sides (the cheap ones tend to be too shallow)
     
    Use the pastry to line the flan tins. Try not to stretch the pastry as you bring it up the sides of the tin otherwise it can get very thin and holey. Press the pastry into the corners and fluting of the tins – a ball of left over pastry is perfect for this. Trim the edges by rolling a rolling pin over the top of the tin so the pastry is cut on the edge of the tin. Then go around the edge of the tin and with your fingers gently push the pastry up the side of the tin so it sits a few millimetres higher than it. Prick the base all over with a fork (this stops the pastry bubbling). Put the pastry lined tins in the fridge for at least half an hour. If you can’t spare the time then pop them in the freezer for 10 minutes.
     
    Preheat the oven to 200º C/fan 180ºC.
     
    Bake the pastry cases blind for 20-25 minutes. To do this, cut out a square of baking parchment a few inches larger than the tin, scrunch up the paper, flatten out and scrunch again. Flatten out the paper and lay over the pastry, fill with ceramic baking beans, dried pulses or even copper coins. Doing this cooks the base so you don’t get a soggy bottom and the baking beans stop the sides from collapsing. 
    Remove the paper and baking beans and return to the oven for another 5 minutes. Take out of the oven and with a pastry brush, brush the pastry with one of the eggs (beaten) and return to the oven for 1-2 minutes. This egg layer means your pastry bottom really will not go soggy. Thank you Raymond Blanc for this tip!
     
    Turn the oven down to 160 ºC/fan 140 ºc.
     
    quiche-1522
    In a jug, beat together the eggs (and any remaining from the one used to coat the pastry), milk and cream with a generous amount of seasoning and some fresh herbs if available.
     
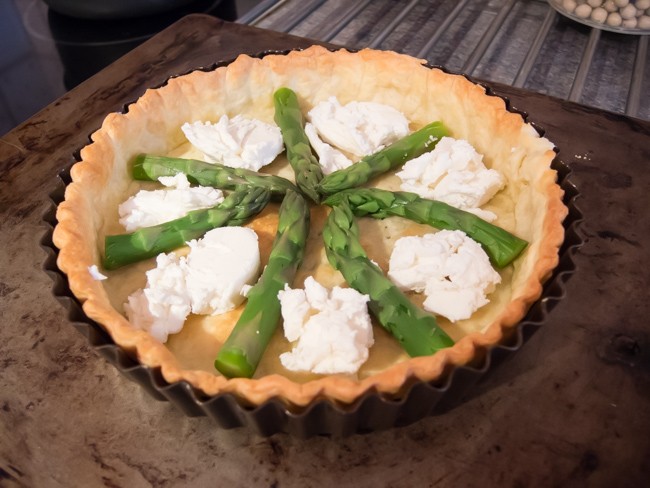
    In the pre-cooked pastry case, evenly spread the asparagus tips and slices of the cheese. Pour over the egg/milk mixture and carefully put in the oven on a middle shelf. Do not spill any egg mixture over the edge of the pastry case otherwise it will be impossible to get out.
     
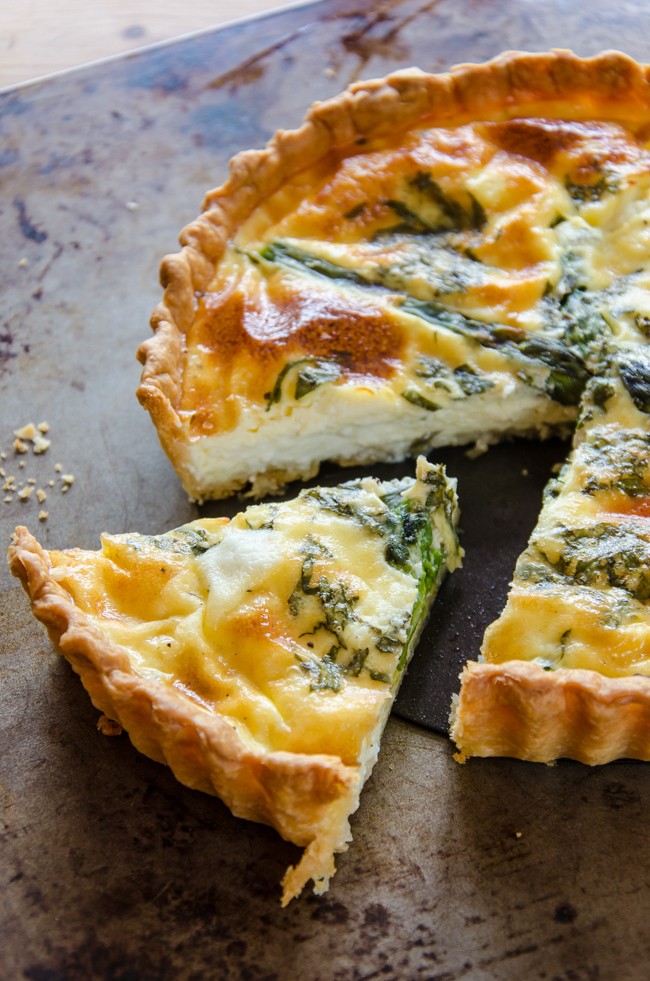
    Cook at this lower temperature for 20-25 minutes for the individual tarts and 25-30 minutes for the larger tart. The centre of the tart should be just set but still have a little wobble. Cool the quiche in the tin for at least 15 minutes before removing and eating.
     
    quiche-6884


  5. Rhubarb semifreddo

    July 3, 2014 by sarah

    Here is another recipe that uses up eggs. Can you tell that we have an egg glut at the moment? I also didn’t realise that chickens love rhubarb leaves. I wonder if it makes the eggs taste of rhubarb? Anyone noticed? Rhubarb leaves are supposedly toxic due the high levels of oxalates they contain, but either birds excrete oxalates in a different way to mammals or the chickens are slowly poisoning themselves. I have had to resort to netting the plants to prevent the chickens getting to them; for their sake and the poor rhubarb plants!

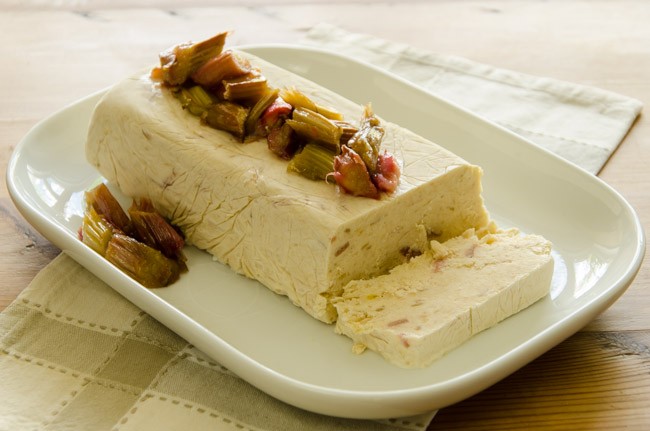
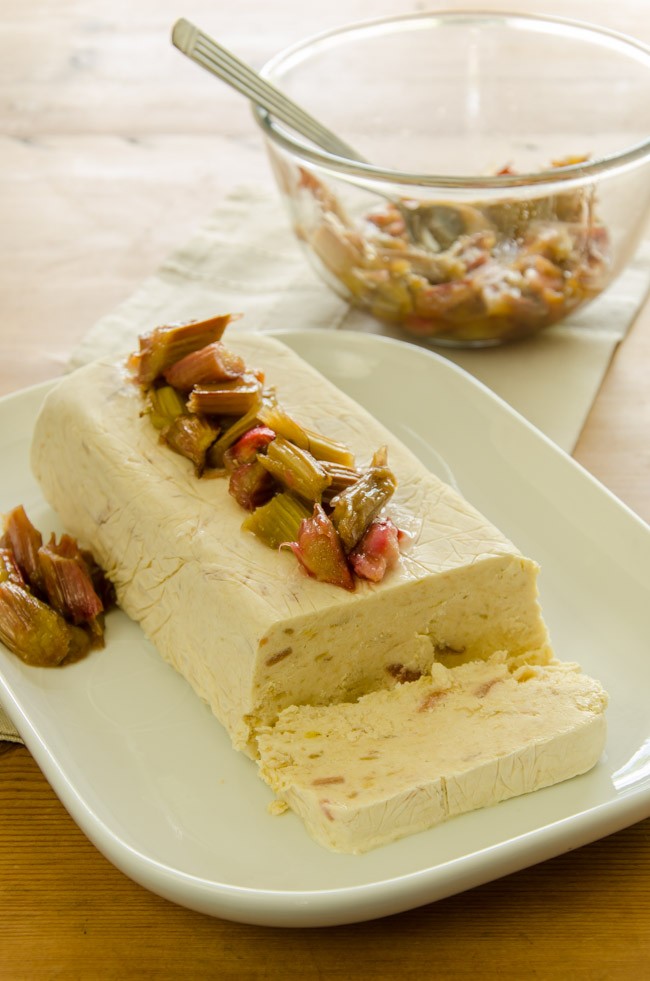
    This recipe is delectable, especially enjoyed on a lovely sunny evening like today. It tastes like rhubarb and custard in the most unctuous, dreamy state imaginable. Once served, it is cold but not icy like ice cream can be; all the better for taking large bites of. I like to serve this dessert with roasted rhubarb. Roasting the rhubarb means it keeps it shape and dries it slightly so it is not soupy like stewed rhubarb can be. Cut the rhubarb into 2cm lengths, lay single depth on a roasting tray or dish, sprinkle with caster sugar and roast in a medium oven for about 20-30 minutes. Enjoy!

    semifreddo-6911

    500g rhubarb
    120g caster sugar
    2 egg yolks
    2 tablespoons elderflower cordial
    250ml double or whipping cream
     
    Chop half the rhubarb finely and add to a pan with 100g of caster sugar plus the elderflower cordial. Bring to simmer and with lid off cook until very soft. Puree with potato masher or hand blender or pushing through a sieve. The other half of the rhubarb cut into 2cm lengths and arrange in singe layer on a baking dish, sprinkle with couple tablespoons sugar, cook in oven until soft (about 180 C for 3o-40 minutes). Leave to cool and then store in a ceramic or glass dish in the fridge until ready to serve the semifreddo.
    Make the sabayon base: in bowl over a pan of gently bubbling water, whisk the egg yolks and 20g caster sugar until light and fluffy and pale. They should triple in volume. Take off heat and allow to cool.
    In another bowl whisk the cream to soft peaks then fold in the pureed rhubarb and sabayon.
    Line a 2 lb loaf tin with two layers of cling film. Pour in the creamy mixture. If you have left over meringues or almond biscuits, crumble over the top. Fold over the cling to seal the surface of the semifreddo and place the tin into a carrier bag. Put in the freezer for at least 4 hours, ideally over night. When you want to serve, put the tin in the fridge for half an hour, turn out onto a plate and serve with the roasted rhubarb.
    semifreddo-6913

  6. Biscotti vs Cantucci/cantuccini

    June 20, 2014 by sarah

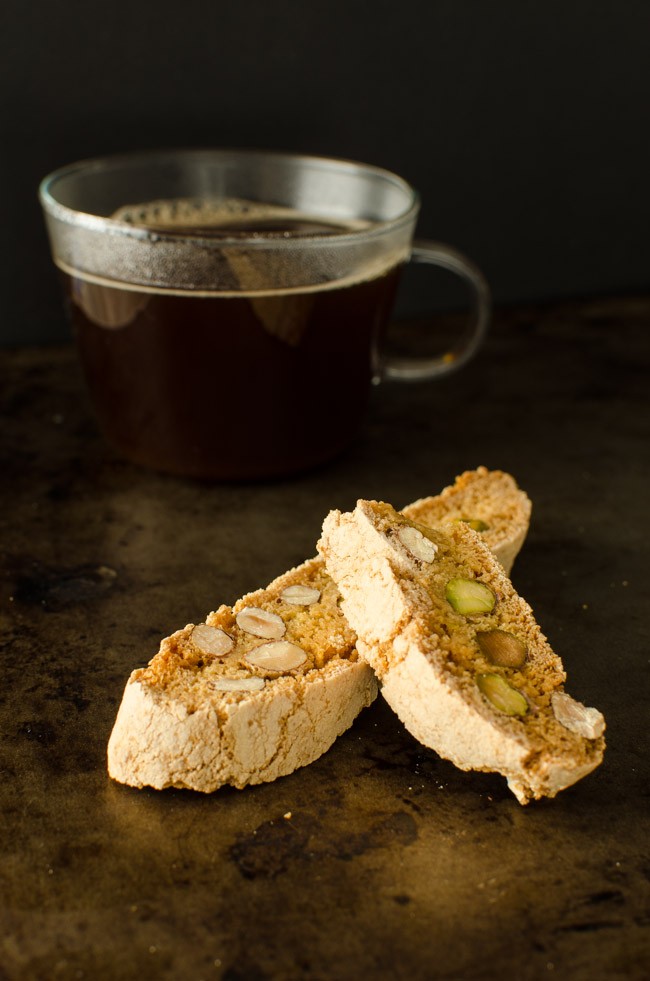
    Biscotti really just means ‘twice baked biscuit’ in Italian, and are otherwise known as cantuccini, or ‘coffee bread’. Biscotti is now taken to loosely mean just any biscuit in Italian so really these should be called cantuccini (if small in size) or cantucci (if larger) though I am sure everyone knows them as biscotti. Originally from Prato in Italy, there are versions from other regions of Italy and even from Spain where they are called carquinyoli. Since they are very dry, they are usually served with a drink; vin santo in Italy and coffee elsewhere in the world. But don’t let that stop you enjoying them at other times. I am very partial to them dipped in ice cream or a creamy dessert like rhubarb fool.

    biscotti-6944


    I cannot believe that in some chain coffee shops they charge £1 or more for some small slice of at most 3 mouthfuls. I can make a tin full for same amount. I supose that must be by thrifty Scottish side coming through. They are also rediculously easy to make and last for ever (well, as long as you can resist eating them) as they are completely dried out.

    Recipe from Nigella Lawson ‘Feast’. Easily doubled and they last for ages so you can never have too much.

    biscotti-1533

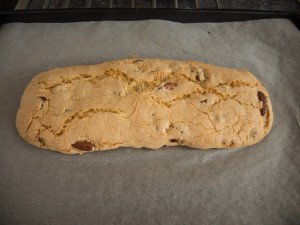
    Shape the loaf shape (this is after the first bake)

    biscotti-1534

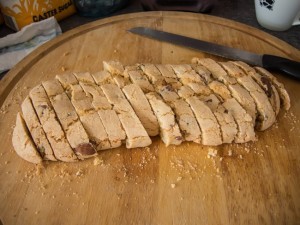
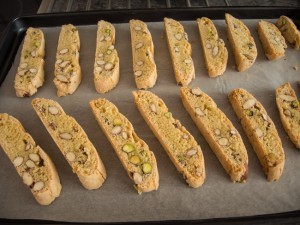
    Slice into 1cm slices

    biscotti-1535

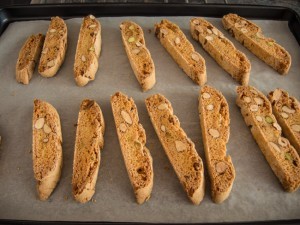
    Spread out slice and bake

    biscotti-1536

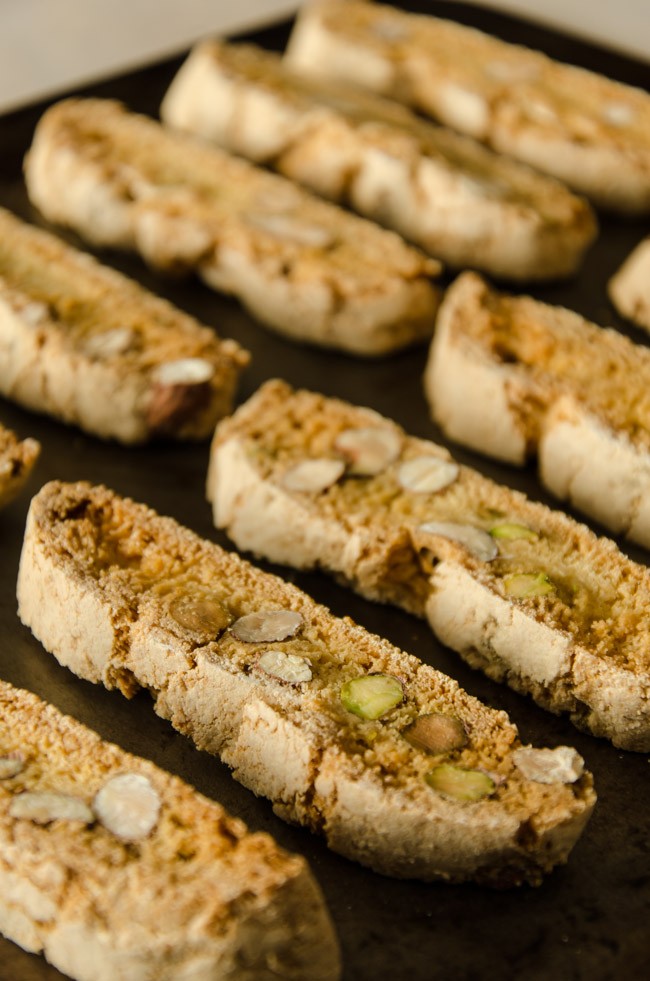
    This is the slices after their first bake.

    Cantuccini

    1 large egg
    100g caster sugar
    1/2 teaspoon real vanilla extract
    few drops of almond essence (optional)
    125g plain flour
    1/2 teaspoon baking powder
    pinch salt
    75-100g nuts – natural almonds in skins, pistachios, hazelnuts, even chocolate chips
     
    Preheat oven to 180 °C/fan 160 °C. Line a tray with baking parchment.
    Whisk the egg and sugar until pale and moussily thick so leaves ribbon trails from the whisk. Beat in the vanilla and almond flavourings. Fold in the flour, salt and baking powder and when all combined mix in the nuts/chocolate. The dough will be a soft, slightly wet but soft mixture.
    Using floured hands, bring the dough to a ball and then shape into a rough loaf like shape on the lined baking tray, so roughly 25 x 5cm.
    Cook in the preheated oven for 25 minutes, remove and allow to cool for 10 minutes or so. Using a serrated bread knife, cut the log into diagonal slanting slices of about 1cm thickness to give the characteristic finger-like pieces.
    Lay the slices on the tray and cook again for another 10 minutes, turn them over and cook for another few minutes. Let them cool entirely on a rack before storing in an airtight container.
     
    biscotti-6956

  7. Meringue nests – Uses for eggs!

    June 15, 2014 by sarah

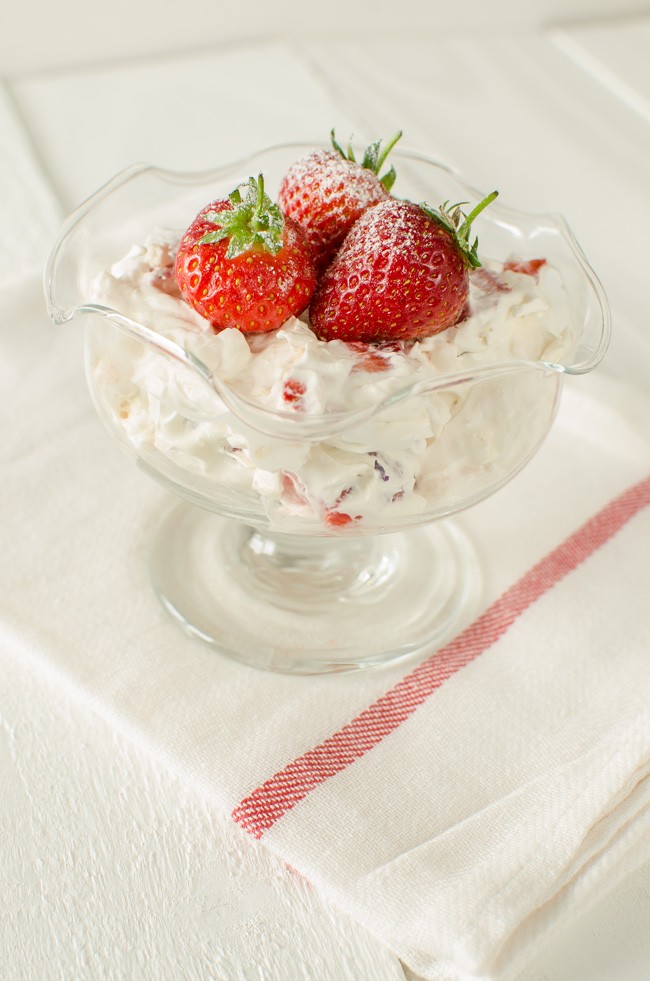
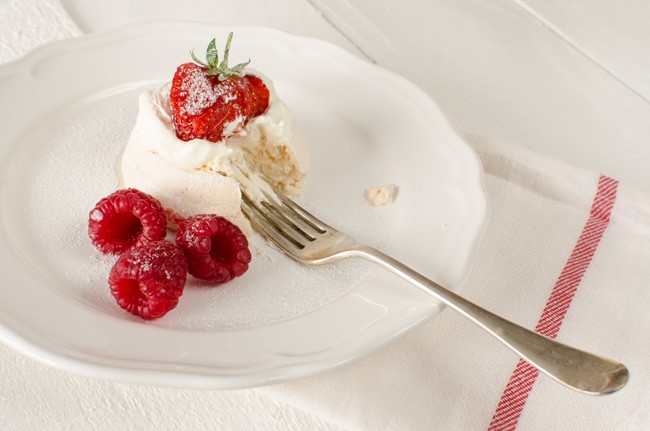
    Meringue. A word that can instill fear into the heart of even the most experienced cook. Sometimes it works and sometimes it doesn’t and usually you can never work out why. But understanding more about eggs and the chemical reaction that makes meringue can help demystify it and hopefully prevent so many failed egg dishes. Though I can knock out a batch of meringues without much thought, I still get some disasters though they always taste better than they look! A meringue is never a failure, you might just have to opt to serve Eton mess rather than neat nests. There is nothing better than sweet meringue, smooth and silky cream and tart berries.
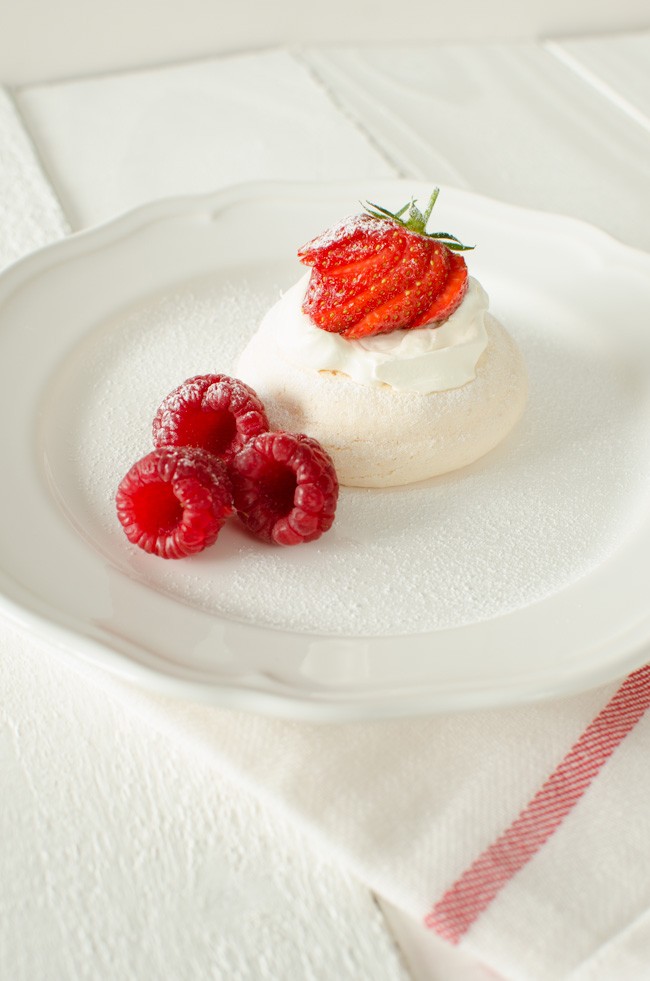
    meringues (7 of 9)

    Eton mess

    meringues (8 of 9)

    Strawberry meringue nest

    Egg whites consist over 90% water and various proteins make up the rest. When you whisk egg whites, you are breaking down the protein structure so that the protein strands lengthen and air bubbles become entrapped within this lattice structure. When whisking egg whites it is very important to have scrupulously clean bowl and whisk. I prefer a metal or bowl as it is supposed to help the egg whites trap more air or if using a glass bowl, I clean it first with kitchen paper with a little vinegar and left to dry. It is also very important not to get a single speck of egg yolk in with the whites so it is a good idea to break the eggs individually into a small bowl before adding the whites to your larger bowl to avoid messing up the whole lot. A drop of lemon juice or a pinch of cream of tartar is often added to the egg whites at the start of beating as it is supposed to help stabilise the bubbles. This is unverified; I think I need to do more experimentation to see if it makes a noticeable difference. Very fresh eggs whisk the best as the white is firm and not runny. This is part of the reason why I got chickens of my own. Interestingly, fresh eggs make awful hard boiled eggs as they are impossible to peel! Remember that eggs you buy in the supermarket will probably be at least a week old by the time you buy them and the ‘best before date’ will be up to 5 weeks after they were laid!

    When you start whisking eggs, start on a slow speed for a minute or so before increasing the speed. The soft peak stage, as used for souffles and mousses, occurs when you lift the whisk out of the egg whites and the peak slowly folds over into the mixture. The bottom of the bowl may feel slightly liquidy and slip around the bowl. The stiff peak stage happen fairly soon after so keep watching and testing. Egg whites beaten to this stage are used for meringues and you can tell when you have reached this stage as the peaks when you lift out the whisk are firm and do not sag. Also the whole bowl should be whisked to the same stage so at firm peak stage you should be able to turn the bowl over your head and not get a santa hat of egg whites! To prevent meringues from weeping when cooking, you must make sure the sugar is thoroughly dissolved in the egg whites and that you use very fine sugar.

    I don’t know if equipment matters too much when whisking meringues; after all, it used to be done with a hand whisk. Think of those muscles! I use a handheld machine but would love a stand machine, especially if it came with whisk attachments rather than the all purpose ones I currently have. I am not sure it would make a huge difference to my meringues, but there is only one way to tell! I do put a silicone mat under the bowl as I whisk to prevent the bowl from spinning off the counter.

    There are three types of meringues and I will give the recipe for simple ones below. Swiss meringues are probably what we are all familiar with. The egg whites are beaten to soft peak stage, half the sugar is added and whisking continues until stiff peaks are achieved and the mixture is glossy; then the rest of the sugar is folded in. This mixture is suitable for simple piping like the nest I made for the afternoon tea or pavlova layers or toppings for pies, but it must be used quickly other it turns back to liquid. Italian meringue is made by adding hot sugar syrup to whisked egg whites and whisking until cool. This meringue is more stable and is the best choice for piping delicate items. Cooked meringue, also known as meringue cuite, is made by whisking the egg whites with the sugar in a bowl over boiling water and this is the most stable type of meringue.

    One final note on making meringues and that is you MUST use baking parchment, also known as silicone paper, to line the trays. Greaseproof paper has a wax coating that resists water so is used for wrapping and layering food and with sticky food like dough, but the coating melts in the oven so the food then sticks to it unless you pre-grease it like for a sponge cake. Baking parchment has been treated so that the non-stick properties do not disappear in the heat of the oven; essential for high sugar foods such as meringues, macaroons and even sponge cakes that you do not pre-grease the paper lining the tin such as genoese sponge.
    meringues (9 of 9)


    Simple Meringue Recipe

     
    4 large egg whites, cold from fridge – about 120-150g of egg white if mixed egg sizes
    pinch of cream of tartar
    225g caster sugar
     
    Preheat the oven to 110 ºC/ fan 100ºC and line a couple of baking trays with baking parchment/silicone paper.
    Tip the egg whites into a large bowl and whisk on slow speed until foamy and then add the cream of tartar. Continue to whisk on medium speed until soft peaks are reached and just turning to stiff ones.
    Turn the speed up and add the sugar a dessert spoonful at a time, beating for 3-4 seconds between each addition.
    Once half of the sugar has been added and the egg whites are glossy, add the rest of the sugar in one go and beat for a few seconds more until well mixed and not granular when touch between you fingers. But try to resist over beating. If you over beat, put in the fridge until cold again and try again. Theoretically you should fold in the last half of the sugar but I find it doesn’t mix in well so you get sugar bleeding in the finished meringue or to fold it in well enough the mixture becomes deflated and becomes sloppy.
    Pipe or soon the mixture on the lined baking trays – you can only manage rough shapes with this type of meringue.
    Bake for about 1 and half hours. I cook for an hour then prop the oven door open and let them cool in the oven and this leaves the meringues with a soft, chewy centre. If you like them dry all the way through then cook for the full 1 and half hours at least.
    When cool, they can be stored in an airtight container for up to 2 weeks, or frozen indefinitely.
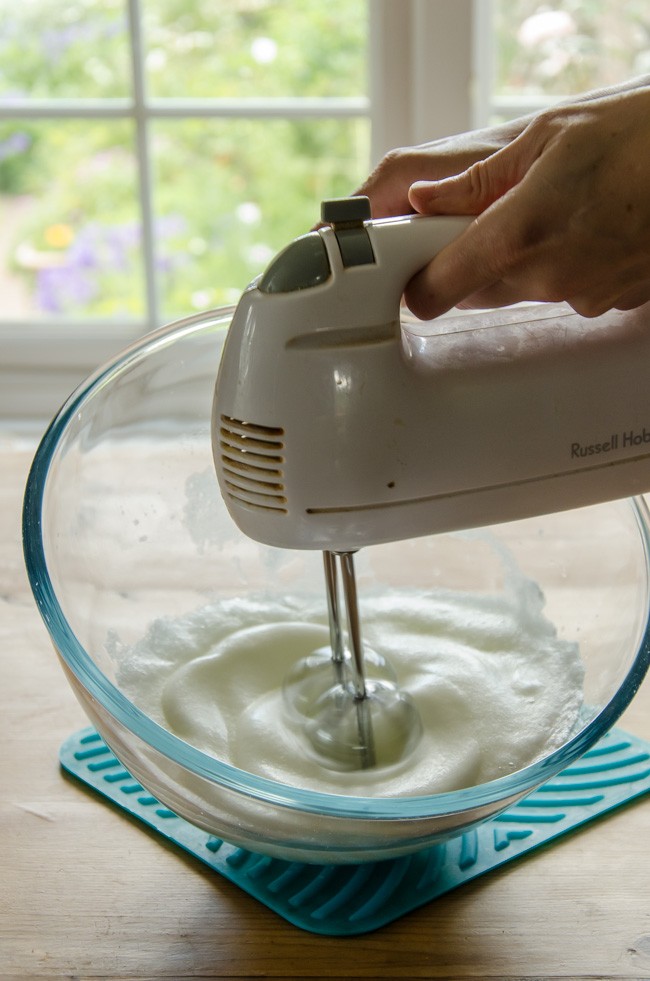
     
    meringues (1 of 9)

    Step 1 – whisk egg whites to soft peak stage.
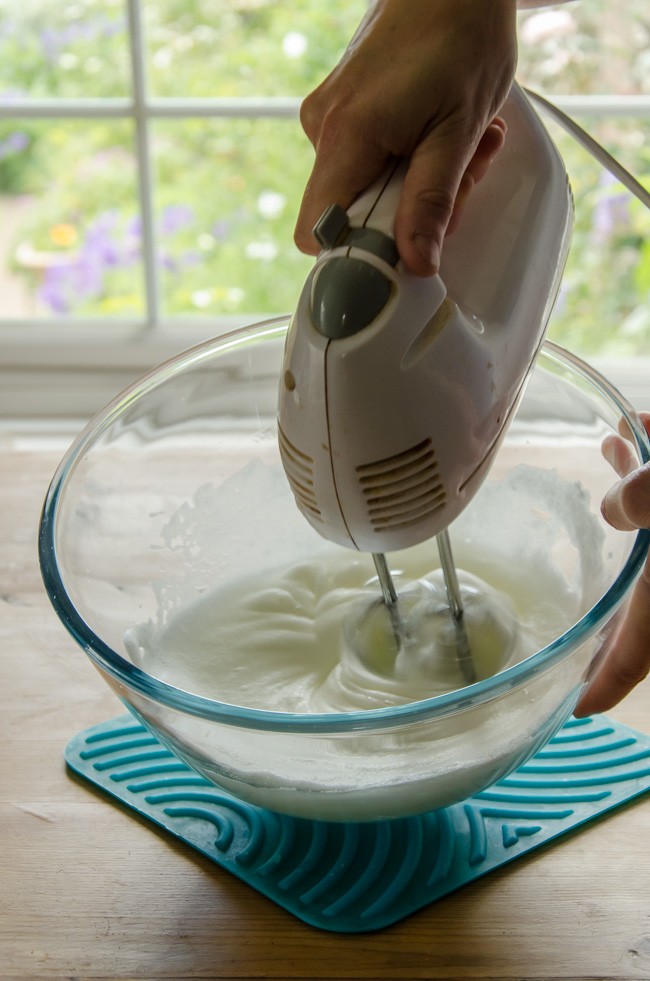
    meringues (2 of 9)

    Step two – make sure you move the beaters around the bowl.
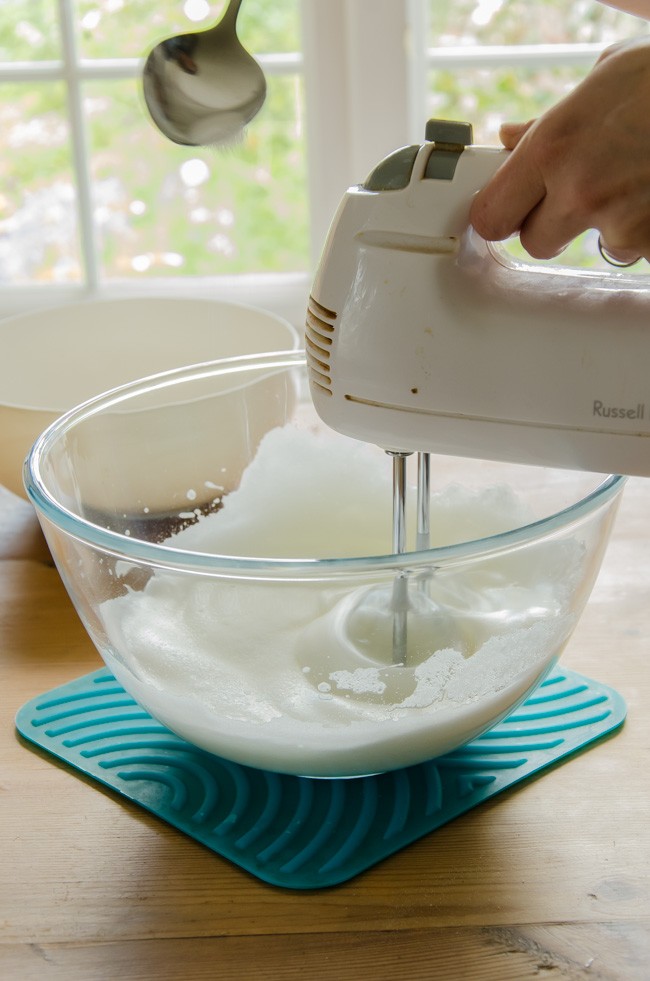
    meringues (3 of 9)

    Step three – add the sugar a spoonful at a time.
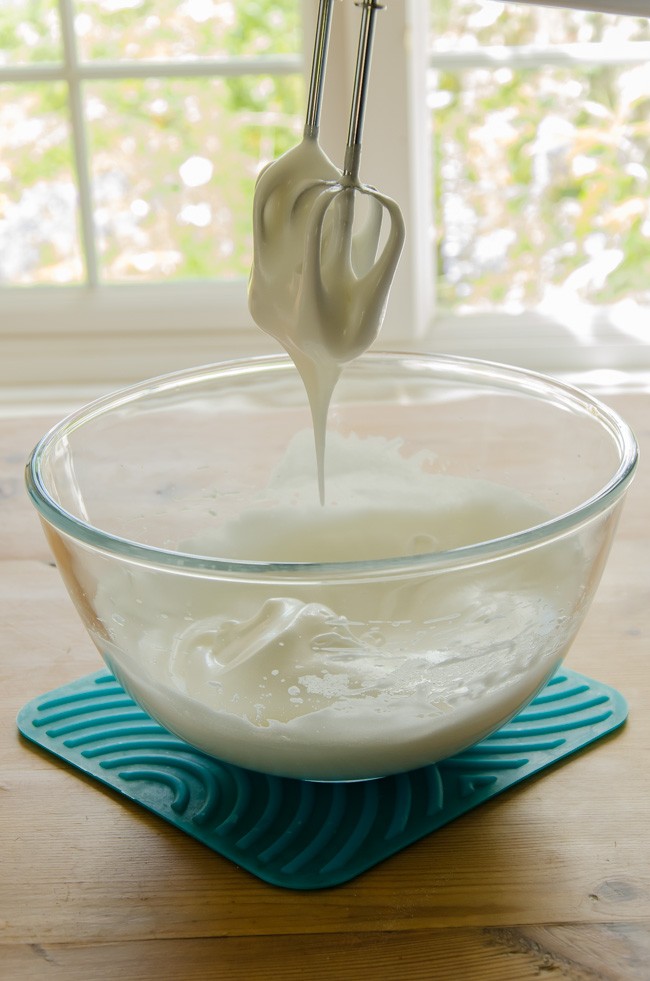
    meringues (4 of 9)

    Step four – keep beating until stiff and glossy.
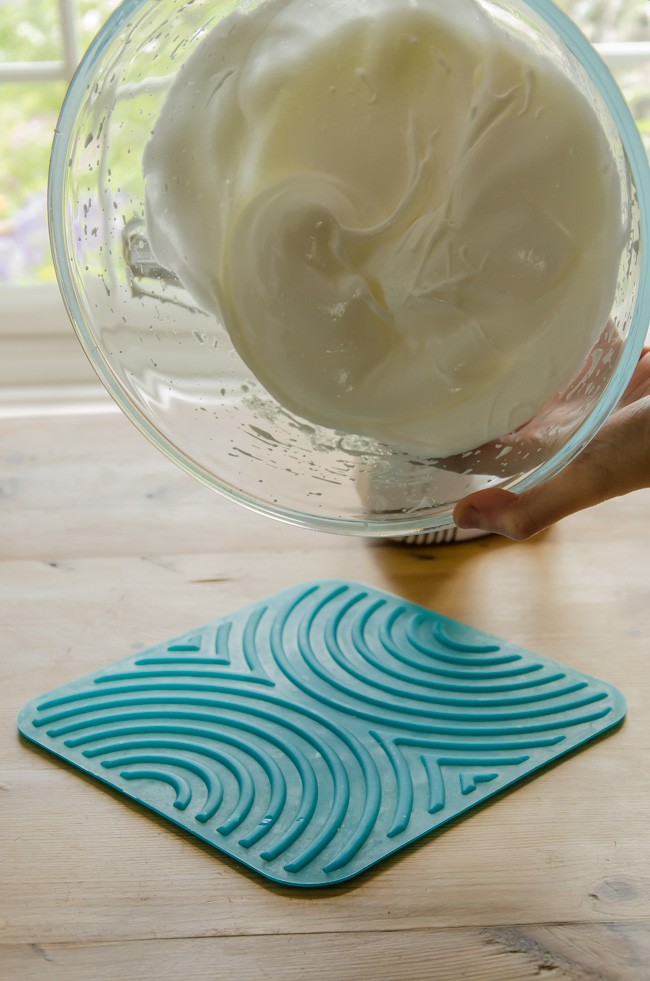
    meringues (5 of 9)

    See – stiff peaks, shouldn’t slide out the bowl.
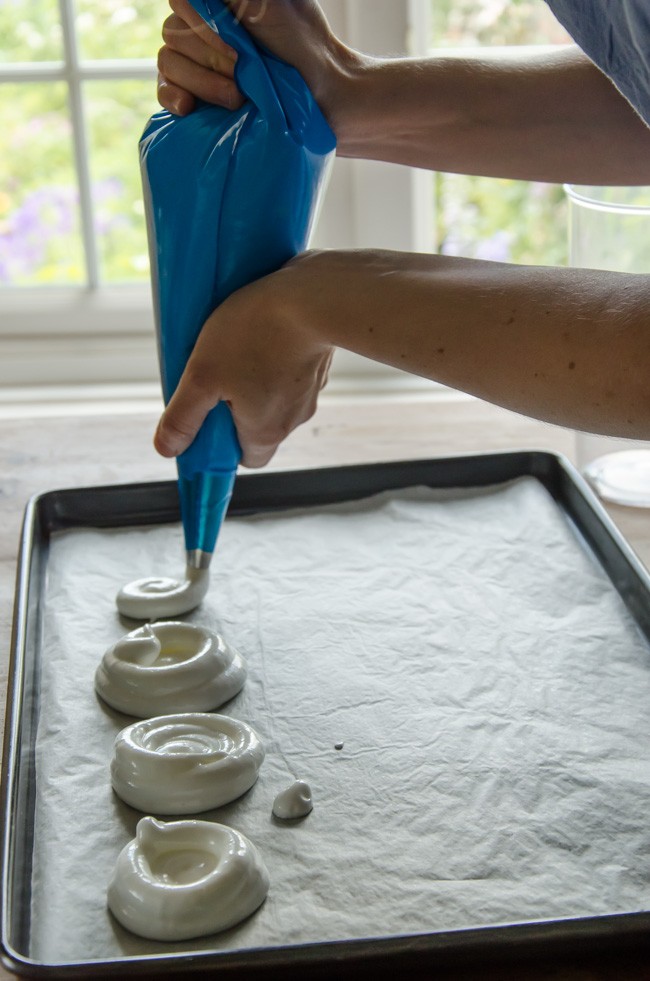
    meringues (6 of 9)

    Step five – pipe as required on to baking parchment.
     

  8. What to do with all those eggs? Recipe for Creme Caramel

    June 10, 2014 by sarah

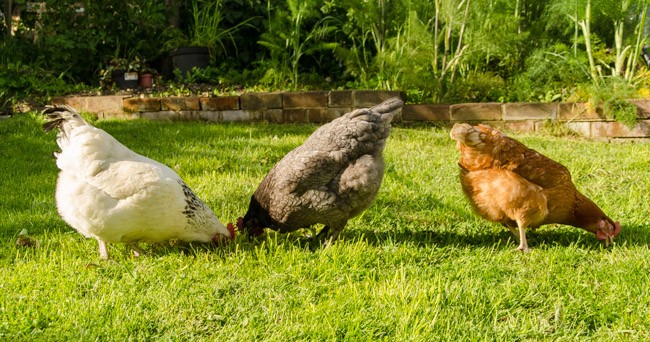
    There once was three chickens
    Called Mrs Red, White and Blue,
    They laid so many eggs
    I didn’t know what to do,
    So I made some meringues,
    Ice cream and creme caramels,
    That used up lots of eggs
    And then all was well.
     
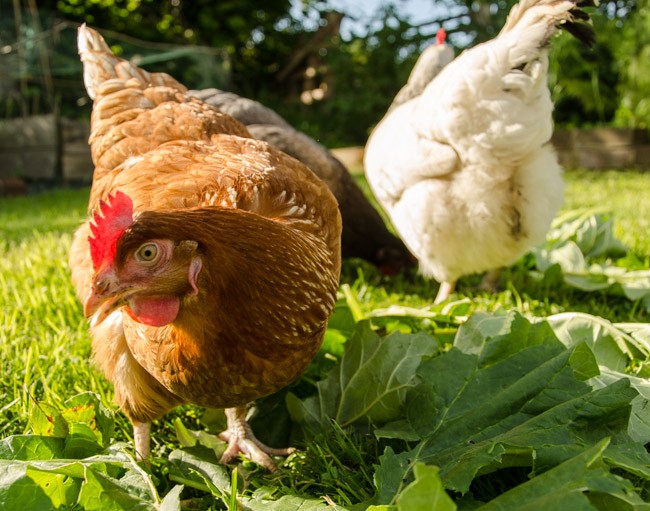
    _1SK6838

    Mrs Red, White and Blue enjoying the sun in the garden.

    _1SK6857

    Mrs Red enjoying rhubarb leaves.

    My girls are currently on full steam with the egg laying. Which means I get at least two eggs every day and three eggs most days so a potential of about 20 eggs a week. Even with selling a box or two at work, it still leaves a lot of eggs for eating! Many are eaten at breakfasts, lunches or light dinners as boiled, poached, scrambled or baked eggs with various accompaniments but this usually leaves a box or two of eggs and me wondering what to do with them. So here is my go to list for inspiration when there are eggs to use and cooking to be done. If I spy a recipe I want to use that uses yolks, I make sure I also have an egg white recipe in mind, and visa versa, though egg whites do freeze well if necessary.

    Savoury
    –          omelette
    –          Frittata/tortilla
    –          Quiche/tarts
    –          Soufflés
    –          Mayonnaise, hollandaise sauce
     
    Sweet – whole eggs
    –          Sponge cake especially Genoese sponge/swiss roll/roulade
    –          Clafoutis
    –          Choux pastry e.g. profiteroles
    –          Pancakes/crepes
    –          Cheesecake
    –          Lemon tart
    –          Bread and butter pudding
    –          Custard Tart
     
    Sweet – whites
    –          Meringue, pavlovas
    –          Angel food cake
    –          Macaroons, of various types
    –          Mousses and soufflés
     
    Sweet – yolks
    –          Lemon curd
    –          Gateau Breton
    –          Custard/creme anglais – therefore accompaniment to stewed fruit or a steamed pudding and of course, the base for making
    –          Ice cream
    –          Crème patisserie – filling for fruit tarts or a base for trifles


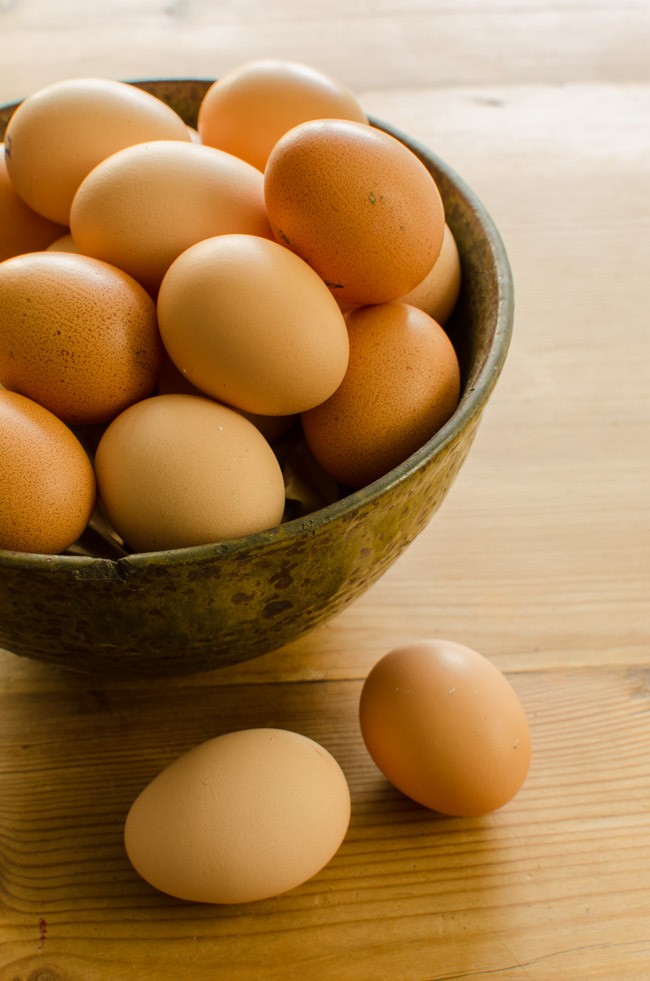
    _1SK6809

    Lovely bowl of fresh eggs.

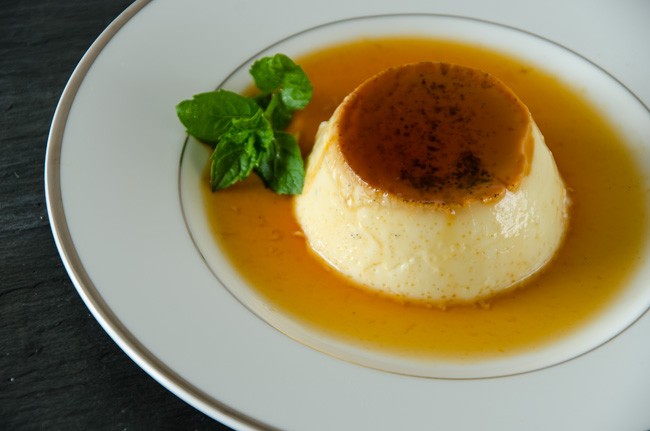
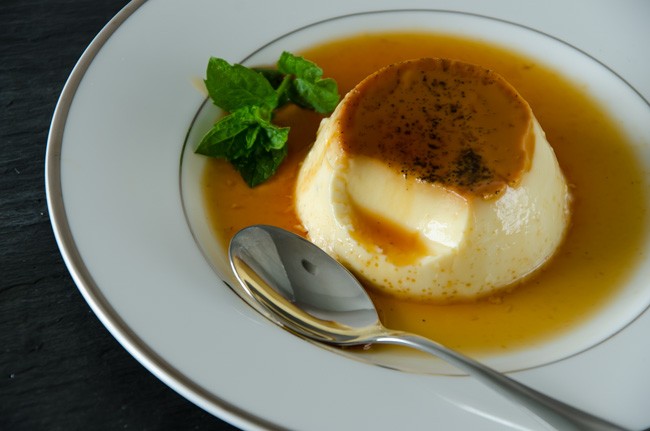
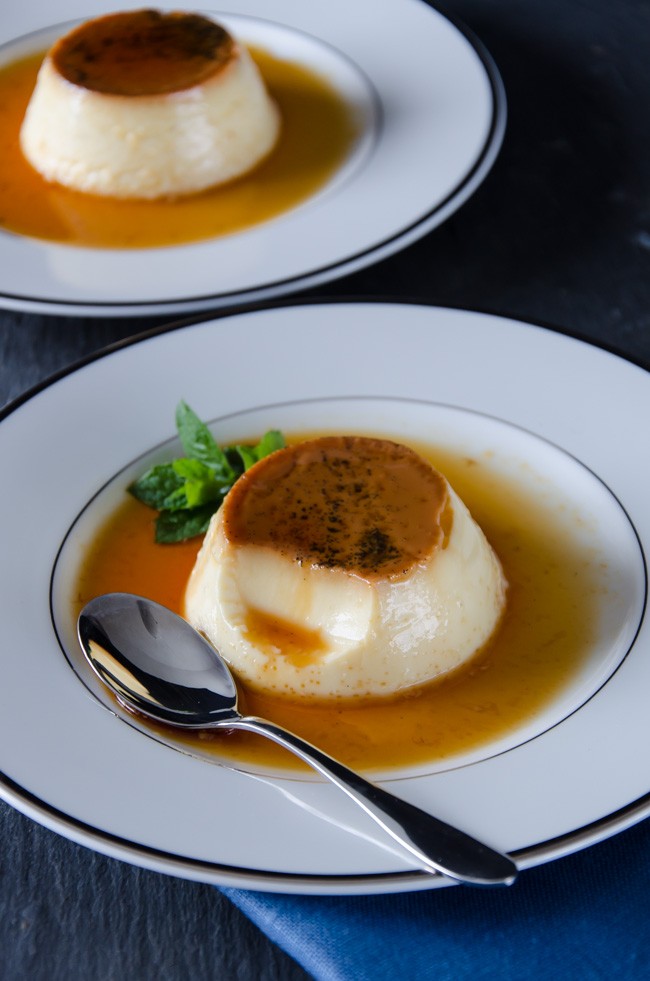
    And now for the recipe – a delectable smooth and creamy favourite – creme caramel. When homemade, it is a million miles away from the insipid stuff in pots in the supermarket or even the ubiquitous pudding option in any food establishment pertaining to be remotely French. It works because the creamy coolness of the just set custard is counter balanced by a caramel that is a bit acid or tart so you must get enough colour on the caramel to get that.

    _1SK6775 _1SK6779

    Creme Caramel

     
    500g milk (whole milk ideally or fat reduced milk with splash of cream, though I have used semi-skimmed and it turns out fine)
    1 vanilla pod
    4 medium eggs
    50g sugar
     
    Caramel – 50g sugar
     
    Put the milk into a non-stick heavy based pan, split the vanilla pod and add the seeds and empty pod to the milk and bring to the boil. Remove from the heat and leave to infuse until ready to use. Heat oven to 150 C/fan 120 C.
    Make the caramel by heating the sugar with 1 tablespoon of water in a heavy bottomed pan over a medium heat. If the sugar is crystallising around the edge of the pan, wipe around the edge with a silicon pastry brush dipped in water. Continue to bubble until a deep golden colour is reached and then pour the caramel directing into the bottom of 4-5 ramekins. Watch out as hot sugar is very hot and will burn. Allow to cool then grease the insides of the ramekins with a little butter.
    In a bowl whisk the eggs and remaining sugar until combined but do not continue to whisk (adding air bubbles at this stage will put air bubbles in your creme). Strain over the infused milk and whisk in. Strain this egg and milk mixture into a jug and use to fill the moulds evenly.
    Sit the moulds in a roasting tin and pour boiling water around the outside until comes half way up ( a bain marie – lovely name, means Mary’s bath) and cook in the preheated oven for 30-40 minutes until just set (should still wobble a little). Take out of the water and allow to cool entirely and then refridgerate before unmoulding. To unmould, run you finger around the top of the custard to prise it away from the ramekin, sit the base of the ramekin in hot water for 30 seconds then up end over a plate. Serve immediately as the caramel will lose its colour.
     
    _1SK6795

  9. Elderflower champagne and cordial

    May 31, 2014 by sarah

    Late May into mid-June, depending on the weather that year, is elderflower time. And that is a very important time for me because it means it is time to make my own home brewed alcoholic beverage that is elderflower champagne. To me it marks the start of summer as they only flower when there has been enough sunshine. I have just finished the last bottle of last years brew and the date on it was July as last spring was awful. It is a delight to see the hedges filled with frilly lace caps of the elderflower heads and I start planning how many litres of the stuff I will make and if I have enough sugar and the lemons… The best time to pick the flowers is late morning on a dry, sunny day. You need a few hours of sun on the flowers to bring out the aroma but not too much otherwise they turn musky, almost a cat-pee smell, and I can’t image that is nice to drink. The best flowers are the ones that are still creamy coloured and not all the individual flowers have opened on the head; avoid the bright white or slightly brown heads as these are past their best. It is best to collect the flowers with scissors into a basket so that any insects drop off the flowers on the way home with your precious load. Use the flowers as soon as you have picked them. Remember not to pick all of the flowers as you want to be able to return in the autumn for the fruits!

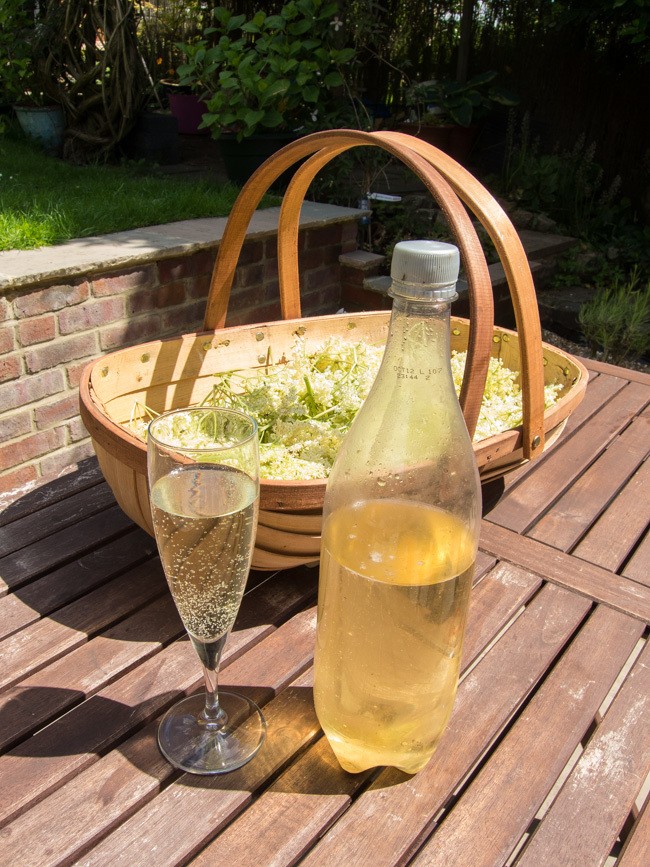
    DSCN1500

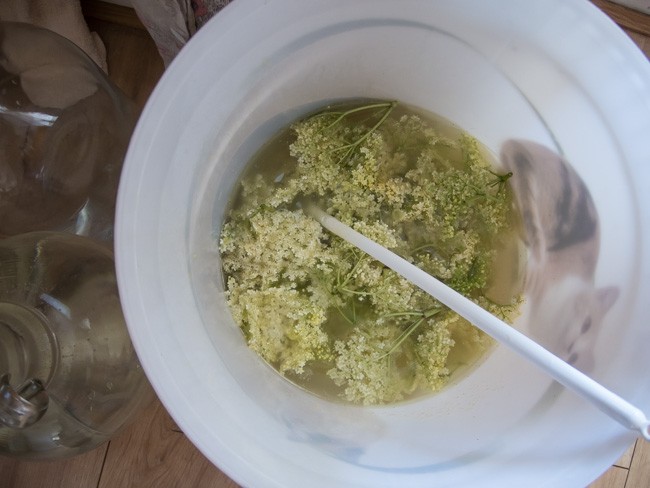
    Last of last years champagne with the flowers picked for this year’s brew!


    A few care warnings about this brew. I have no idea how alcoholic it is. In fact, it seems to vary from batch to batch as to its leg wobbliness effects. It is very much like cider in its effects; its doesn’t taste alcoholic and goes down easy and you don’t realise it has any effect until you stand up! Also, and this is VERY important, the brew is highly explosive, especially for the first few weeks as the pressure builds up. For this reason I reuse plastic pop bottle because if they do go bang you don’t get shards of glass everywhere and with a screw cap you can gently release the pressure as necessary. For the first couple of weeks I keep the bottles in the kitchen and feel the bottles daily for the tenseness of the plastic and I tend to release the pressure daily for a week then every second day for another couple of weeks until noticing that they are not completely taught when ready to be released. They perhaps get one more release before being stored somewhere cool and dark.

    I also make several litres of elderflower cordial which is a wonderfully fragrant ingredient for flavouring ice creams, panna cottas, other creamy desserts such as cheesecakes and the perfect pairing with gooseberries (which annoyingly come a few weeks later so the cordial is a great way to store the flavour until the gooseberries are ready for their turn). I also love the cordial diluted down with ice cold sparkling water; a refreshing summer spritzer. I have seen recipes for deep-fried elderflowers or fritters and I am dying to try them, if only I get long enough off work to pick some more flowers!

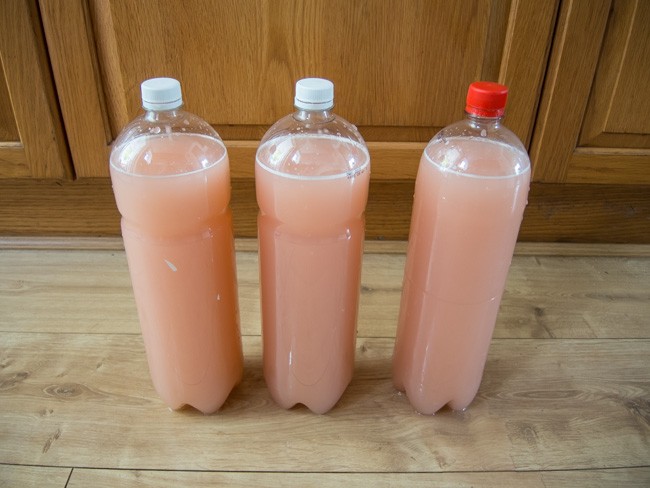
    This year I have also made a variation on the champagne theme as my parents brought me a huge bag of rhubarb from Scotland. So there are also 3 bottles of rhubarb champagne to try in a few weeks. It is a pretty pink colour. Anyone for a glass?


    Elderflower Champagne

    1 kg granulated sugar
    juice and zest of 4 lemons (organic, wax-less)
    2 tablespoons white wine vinegar
    about 30 elderflower heads – shake to dislodge insects before adding
    a teaspoon of wine yeast or a few pinches of baking yeast
     
    Boil 4 litres of water in a pan.
    In a large clean bucket, tip the sugar and then the hot/almost boiling water over the top. Use a clean spoon and stir until the sugar has dissolved. Add another 2 litres of water to the bucket.
    Allow this to cool to tepid/luke warm before adding the lemon juice, vinegar and elderflowers. Stir in the yeast.
    Cover with a lid or clean tea towel and stir daily.
    After 5-7 days when the brew is bubbling away well, strain the brew through a sieve lined with muslin and decant into sterilised bottles (I sterilise mine with Milton tablets and rinse out with a little boiled water so as not to taint the taste).
    Do the pressure releasing as described above and wait at least a few weeks before drinking; it is best served very cold and open the bottle very slowly so the yeast that collects in the bottom does not rise. It will keep in a cool, dry place for up to a year.
     
    DSCN1504

    The champagne bucket!

    Elderflower Cordial

     
    1 kg granulated sugar
     zest of 2 lemons which then sliced roughly
    25g citric acid (available in Wilkinsons)
    30 plus elderflower heads – more is easily acceptable
     
    Boil 1.5 litres of water. In a large clean bucket or bowl, tip the sugar and then pour the boiling water over; stir until the sugar has dissolved.
    Leave to cool and then add the other ingredients. Stir at least once daily for 5 days. Strain through a sieve lined with muslin and decant into sterilised bottles.
    This will keep in the fridge for a few weeks or in the freezer indefinitely. Remember if freezing, leave a little space at the top of the bottle for expansion.
     

    Rhubarb Champagne

     
    2kg rhubarb, roughly chopped
    2 lemons roughly chopped
    2 tablespoons of white wine vinegar
    1.5kg granulated sugar
    1 teaspoon wine yeast or few pinches of baking yeast
     
    Boil 4 litres of water.

    In a large clean bucket, tip the sugar and then the hot/almost boiling water over the top. Use a clean spoon and stir until the sugar has dissolved. Add another 2 litres of water to the bucket. Add the rhubarb now (unlike the elderflower champagne).
    Allow this to cool to tepid/luke warm before adding the lemons, vinegar and yeast.
    Cover with a lid or clean tea towel and stir daily.
    After 5-7 days when the brew is bubbling away well, scoop out the rhubarb with a slotted spoon and strain the brew through a sieve lined with muslin and decant into sterilised bottles (I sterilise mine with Milton tablets and rinse out with a little boiled water so as not to taint the taste).
    Do the pressure releasing as described above and wait at least a few weeks before drinking; it is best served very cold.
     
    DSCN1494

    Rhubarb champagne freshly bottled.


  10. Quilt number one is finished!

    May 27, 2014 by sarah

    quilt (2 of 3)

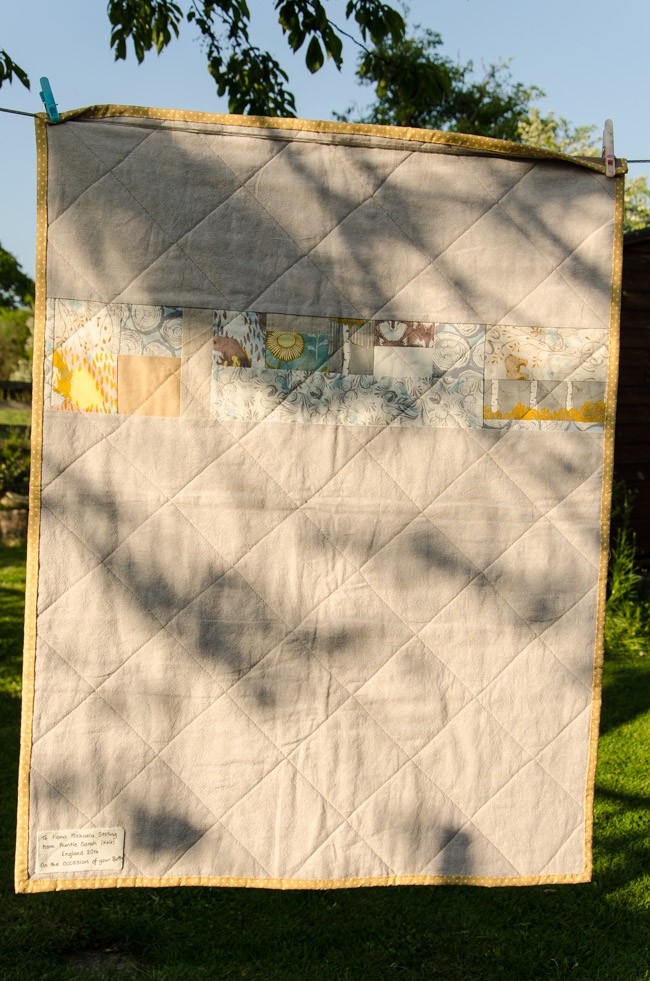
    The back – I love the patchwork strip I added.

    quilt (1 of 3)

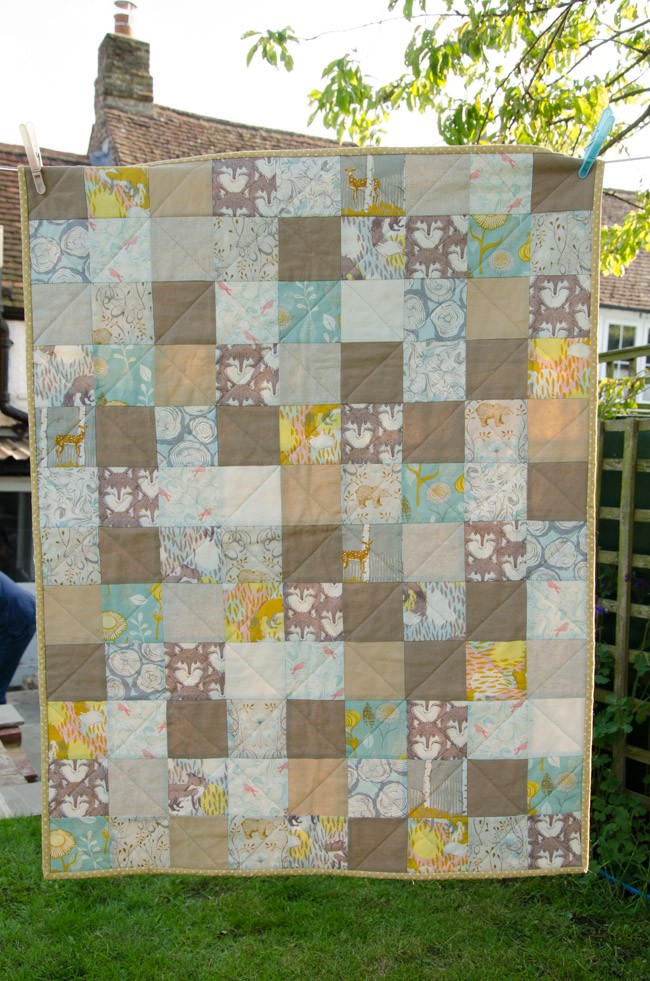
    The front.
    quilt (3 of 3)

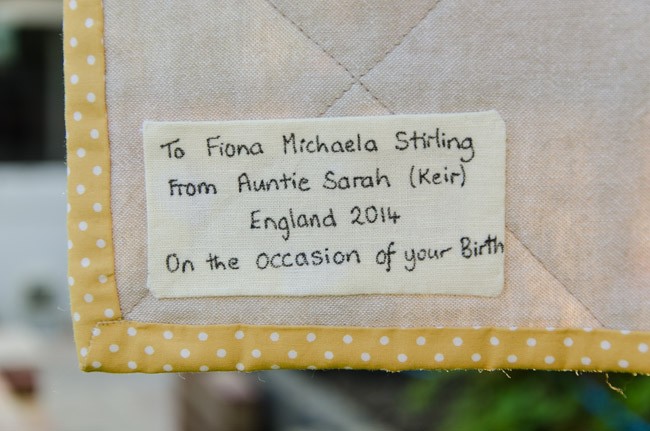
    The label

    Last week was a whirl wind of activity in order to get the baby quilt finished in time for its flight to the USA with my parents to get to my new neice. I didn’t get any of it done during the week before because a rotten cold and no energy (hopefully linked). So I watched a few YouTube videos on how to do binding plus some very useful websites and blogs (here and here). I got started at Plain Stitch’s Wendover Sewing Bee on the Tuesday evening, though I think I spent more time chatting and natting than actually sewing, and then finished it on the Friday I had off work. The ladies at the Sewing Bee were adamant I add a label so that was an extra job I hadn’t accounted for but luckily I have some fabric pens so it didn’t take too long to do. And I have to say the label finished it off nicely and I am very proud of my first proper quilt!